Epson Stylus Pro 7600 - UltraChrome Ink Product Support Bulletin(s) - Page 36
DRIVER REMOVAL, Print Center
 |
View all Epson Stylus Pro 7600 - UltraChrome Ink manuals
Add to My Manuals
Save this manual to your list of manuals |
Page 36 highlights
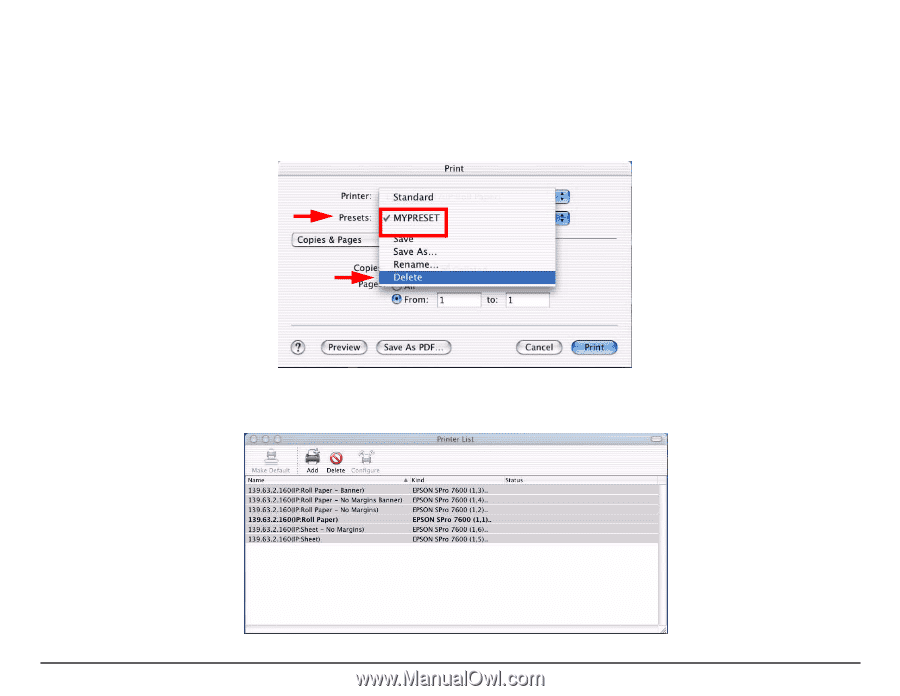
DRIVER REMOVAL Before installing a New Driver you must first properly remove the existing Driver and all of its components. 1. Open the Epson Driver from any application and select print. Remove all user created "Presets" that were created for the printer you are removing. From the Presets drop down menu select the Preset (example: MYPRESET) then select Delete.. 2. Next open the Print Center and remove all the printers queue entries for the printer you wish to un-install. Highlight the Queues and press the Delete button. EPSON Professional Graphics Group Page 10.
-
 1
1 -
2
-
3
-
4
-
5
-
6
-
7
-
8
-
9
-
10
-
11
-
12
-
13
-
14
-
15
-
16
-
17
-
18
-
19
-
20
-
21
-
22
-
23
-
24
-
25
-
26
-
27
-
28
-
29
-
30
-
 31
31 -
 32
32 -
 33
33 -
 34
34 -
 35
35 -
 36
36 -
 37
37 -
 38
38 -
 39
39 -
 40
40 -
 41
41 -
42
-
43
-
44
-
45
-
46
-
47
-
48
-
49
-
50
-
51
-
52
-
53
-
54
-
55
-
56
-
57
-
58
-
59
-
60
-
61
-
62
-
63
-
64
-
65
-
66
-
67
-
68
-
69
-
70
-
71
-
72
-
73
-
74
-
75
-
76
-
77
-
78
-
79
-
80
-
81
-
82
-
83
-
84
-
85
-
86
-
87
-
88
-
89
-
90
-
91
-
92
-
93
-
94
-
95
-
96
-
97
-
98
-
99
-
100
-
101
-
102
-
103
-
104
 |
 |
EPSON Professional Graphics Group
Page 10
.
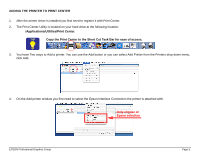
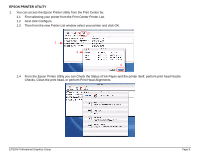
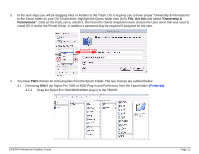
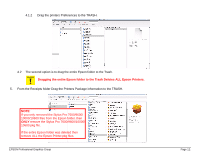
DRIVER REMOVAL
Before installing a New Driver you must first properly remove the existing Driver and all of its components.
1.
Open the Epson Driver from any application and select print. Remove all user created “Presets” that were created for the printer
you are removing. From the Presets drop down menu select the Preset (example: MYPRESET) then select Delete..
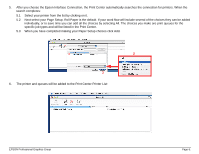
2.
Next open the
Print Center
and remove all the printers queue entries for the printer you wish to un-install. Highlight the Queues
and press the
Delete
button.