Epson Stylus Scan 2500 User Manual - Page 53
Select a color management system the availability depends, Choose a Print Quality resolution setting.
 |
View all Epson Stylus Scan 2500 manuals
Add to My Manuals
Save this manual to your list of manuals |
Page 53 highlights
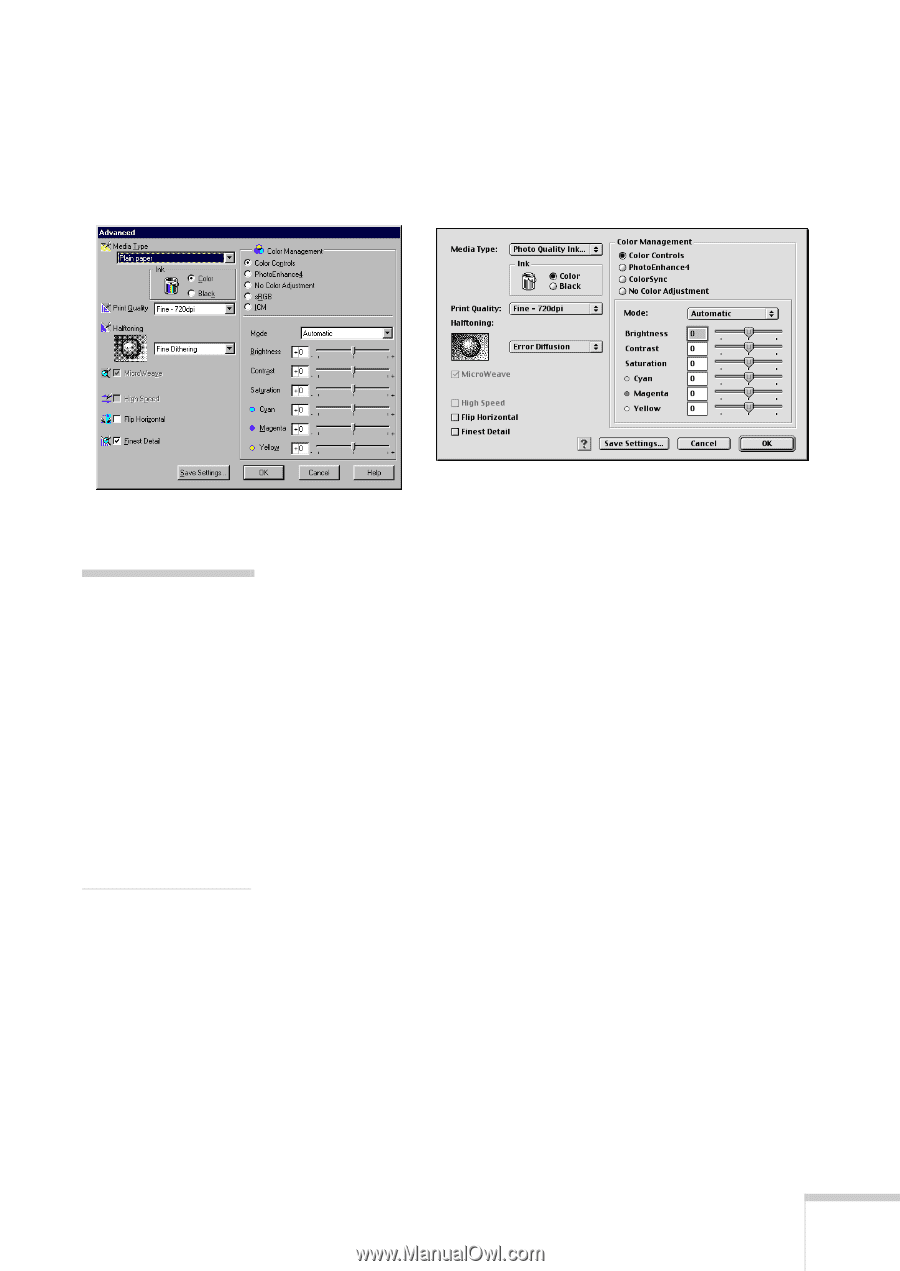
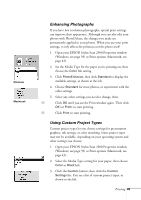
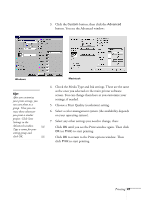
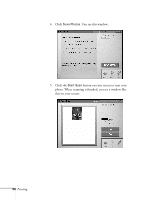
3. Click the Custom button, then click the Advanced button. You see the Advanced window: Windows Macintosh tip: After you customize your print settings, you can save them as a group. Then you can reuse them whenever you print a similar project. Click Save Settings in the Advanced window. W Type a name for your setting group and click OK. M 4. Check the Media Type and Ink settings. These are the same as the ones you selected on the main printer software screen. You can change them here as you customize your settings, if needed. 5. Choose a Print Quality (resolution) setting. 6. Select a color management system (the availability depends on your operating system). 7. Select any other settings you need to change, then: Click OK until you see the Print window again. Then click OK (or Print) to start printing. Click OK to return to the Print options window. Then click Print to start printing. Printing 47
-
 1
1 -
2
-
3
-
4
-
5
-
6
-
7
-
8
-
9
-
10
-
11
-
12
-
13
-
14
-
15
-
16
-
17
-
18
-
19
-
20
-
21
-
22
-
23
-
24
-
25
-
26
-
27
-
28
-
29
-
30
-
31
-
32
-
33
-
34
-
35
-
36
-
37
-
38
-
39
-
40
-
41
-
42
-
43
-
44
-
45
-
46
-
47
-
 48
48 -
 49
49 -
 50
50 -
 51
51 -
 52
52 -
 53
53 -
 54
54 -
 55
55 -
 56
56 -
 57
57 -
 58
58 -
59
-
60
-
61
-
62
-
63
-
64
-
65
-
66
-
67
-
68
-
69
-
70
-
71
-
72
-
73
-
74
-
75
-
76
-
77
-
78
-
79
-
80
-
81
-
82
-
83
-
84
-
85
-
86
-
87
-
88
-
89
-
90
-
91
-
92
-
93
-
94
-
95
-
96
-
97
-
98
-
99
-
100
-
101
-
102
-
103
-
104
-
105
-
106
-
107
-
108
-
109
-
110
-
111
-
112
-
113
-
114
-
115
-
116
-
117
-
118
-
119
-
120
-
121
-
122
-
123
-
124
-
125
-
126
-
127
-
128
-
129
-
130
-
131
-
132
-
133
-
134
-
135
-
136
-
137
-
138
-
139
-
140
-
141
-
142
-
143
-
144
-
145
-
146
-
147
-
148
-
149
-
150
-
151
-
152
-
153
-
154
-
155
-
156
-
157
-
158
-
159
-
160
-
161
-
162
-
163
-
164
-
165
-
166
-
167
-
168
-
169
-
170
-
171
-
172
-
173
-
174
-
175
-
176
-
177
-
178
-
179
-
180
 |
 |