Epson Stylus Scan 2500 User Manual - Page 93
to scan more images, click inside the, If you click
 |
View all Epson Stylus Scan 2500 manuals
Add to My Manuals
Save this manual to your list of manuals |
Page 93 highlights
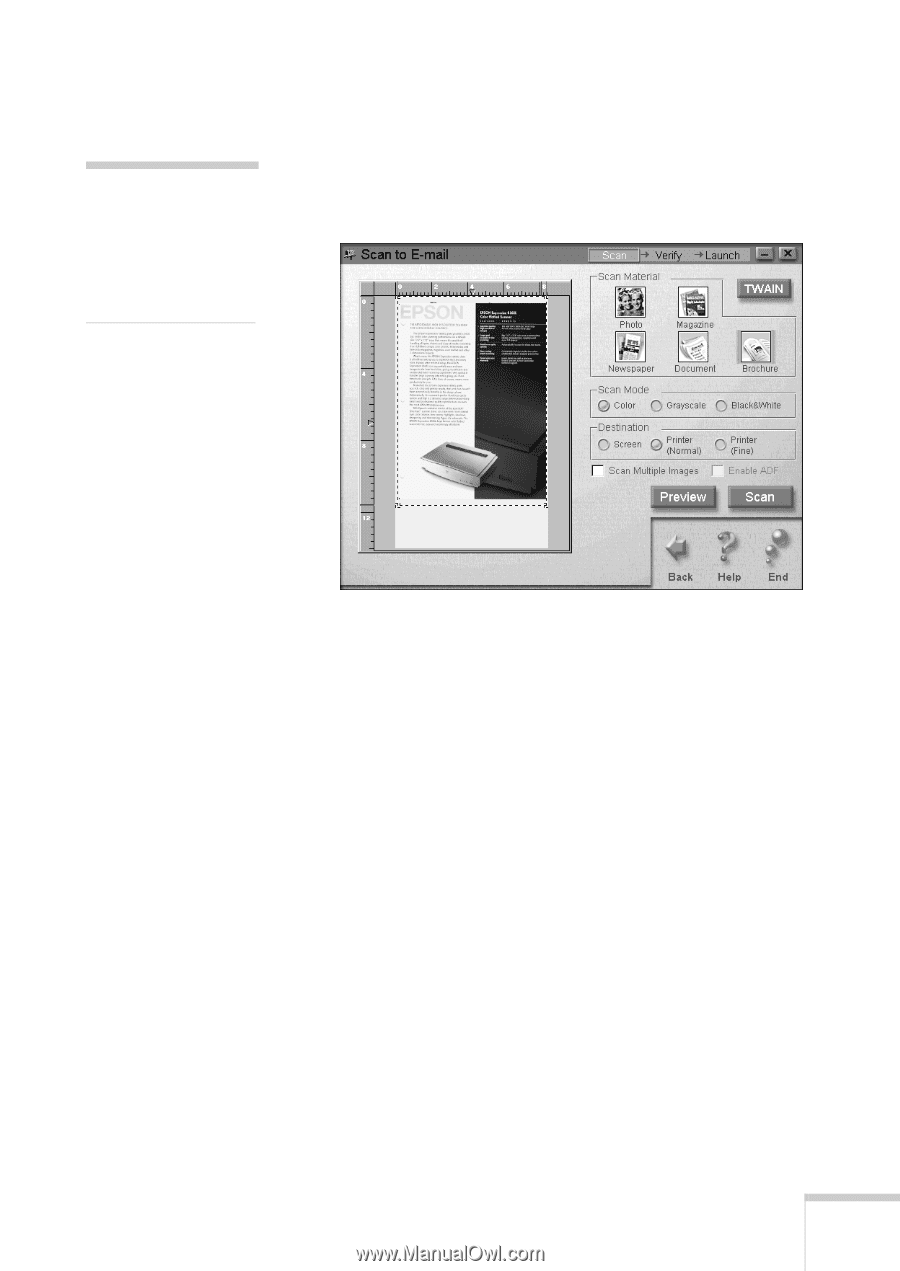
note: You can't use the Preview button if you're using the optional automatic document feeder. 10. Click the Preview button. The EPSON Stylus Scan scans your document and displays a preview in the scan window on your screen: 11. Click and drag the dotted-line border on the preview to define the area you want to scan. You can also adjust any of your other settings at this point. 12. Click the Scan button. Your original document is scanned. If you selected Scan Multiple Images, a message appears asking if you want to continue scanning. 13. If you click Yes to scan more images, click inside the dotted line border on the preview image and move it to the next image. Size the border as necessary, then repeat steps 12 and 13. If you click No, go to step 14. Scanning 87
-
 1
1 -
2
-
3
-
4
-
5
-
6
-
7
-
8
-
9
-
10
-
11
-
12
-
13
-
14
-
15
-
16
-
17
-
18
-
19
-
20
-
21
-
22
-
23
-
24
-
25
-
26
-
27
-
28
-
29
-
30
-
31
-
32
-
33
-
34
-
35
-
36
-
37
-
38
-
39
-
40
-
41
-
42
-
43
-
44
-
45
-
46
-
47
-
48
-
49
-
50
-
51
-
52
-
53
-
54
-
55
-
56
-
57
-
58
-
59
-
60
-
61
-
62
-
63
-
64
-
65
-
66
-
67
-
68
-
69
-
70
-
71
-
72
-
73
-
74
-
75
-
76
-
77
-
78
-
79
-
80
-
81
-
82
-
83
-
84
-
85
-
86
-
87
-
 88
88 -
 89
89 -
 90
90 -
 91
91 -
 92
92 -
 93
93 -
 94
94 -
 95
95 -
 96
96 -
 97
97 -
 98
98 -
99
-
100
-
101
-
102
-
103
-
104
-
105
-
106
-
107
-
108
-
109
-
110
-
111
-
112
-
113
-
114
-
115
-
116
-
117
-
118
-
119
-
120
-
121
-
122
-
123
-
124
-
125
-
126
-
127
-
128
-
129
-
130
-
131
-
132
-
133
-
134
-
135
-
136
-
137
-
138
-
139
-
140
-
141
-
142
-
143
-
144
-
145
-
146
-
147
-
148
-
149
-
150
-
151
-
152
-
153
-
154
-
155
-
156
-
157
-
158
-
159
-
160
-
161
-
162
-
163
-
164
-
165
-
166
-
167
-
168
-
169
-
170
-
171
-
172
-
173
-
174
-
175
-
176
-
177
-
178
-
179
-
180
 |
 |