Epson T-750 User Manual - Page 24
Connecting the Printer to Your Computer, LINE FEED, FORM FEED
 |
View all Epson T-750 manuals
Add to My Manuals
Save this manual to your list of manuals |
Page 24 highlights
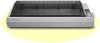
To run the same test in the draft mode, hold down the LINE FEED button instead of the FORM FEED button while you turn the printer on. The T-750 cannot print a draft self test, however, if the NLQ DIP switch is on. Therefore, if the Print Quality line of the self test printout says NLQ, you cannot print a draft test without changing a DIP switch. 9 Connecting the Printer to Your Computer Your T-750 printer communicates with your computer through a Centronics® compatible parallel interface. If your computer uses this type of interface and you have a suitable cable, you can connect your computer immediately. (Be sure that your cable is a shielded cable.) If you do not know what kind of interface your computer requires, consult its manual. For further information on the standard interface, see Appendix E. The parallel interface Before connecting a parallel interface cable, see that both the printer and computer are turned off. Then plug the connector into the printer. Next squeeze the clips gently and click them into place. Some parallel cables have a ground wire. Connect this wire to the ground screw on the printer to protect data from interference. Then plug the other end of the cable into the computer and connect the ground wire on the computer end of the cable if it has one. Figure 1-13 shows a properly connected parallel cable. Figure 1-13. Connecting a parallel cable Setting Up Your T-750 Printer 1-17
-
 1
1 -
2
-
3
-
4
-
5
-
6
-
7
-
8
-
9
-
10
-
11
-
12
-
13
-
14
-
15
-
16
-
17
-
18
-
 19
19 -
 20
20 -
 21
21 -
 22
22 -
 23
23 -
 24
24 -
 25
25 -
 26
26 -
 27
27 -
 28
28 -
 29
29 -
30
-
31
-
32
-
33
-
34
-
35
-
36
-
37
-
38
-
39
-
40
-
41
-
42
-
43
-
44
-
45
-
46
-
47
-
48
-
49
-
50
-
51
-
52
-
53
-
54
-
55
-
56
-
57
-
58
-
59
-
60
-
61
-
62
-
63
-
64
-
65
-
66
-
67
-
68
-
69
-
70
-
71
-
72
-
73
-
74
-
75
-
76
-
77
-
78
-
79
-
80
-
81
-
82
-
83
-
84
-
85
-
86
-
87
-
88
-
89
-
90
-
91
-
92
-
93
-
94
-
95
-
96
-
97
-
98
-
99
-
100
-
101
-
102
-
103
-
104
-
105
-
106
-
107
-
108
-
109
-
110
-
111
-
112
-
113
-
114
-
115
-
116
-
117
-
118
-
119
-
120
-
121
-
122
-
123
-
124
-
125
-
126
-
127
-
128
-
129
-
130
-
131
-
132
-
133
-
134
-
135
-
136
-
137
-
138
-
139
-
140
-
141
-
142
-
143
-
144
-
145
-
146
-
147
-
148
-
149
-
150
-
151
-
152
-
153
-
154
-
155
-
156
 |
 |
