Eureka LightSpeed 4700D Owners Manual - Page 22
HOW TO MAINTAIN, Customer Assistance - how to take lid off
 |
View all Eureka LightSpeed 4700D manuals
Add to My Manuals
Save this manual to your list of manuals |
Page 22 highlights
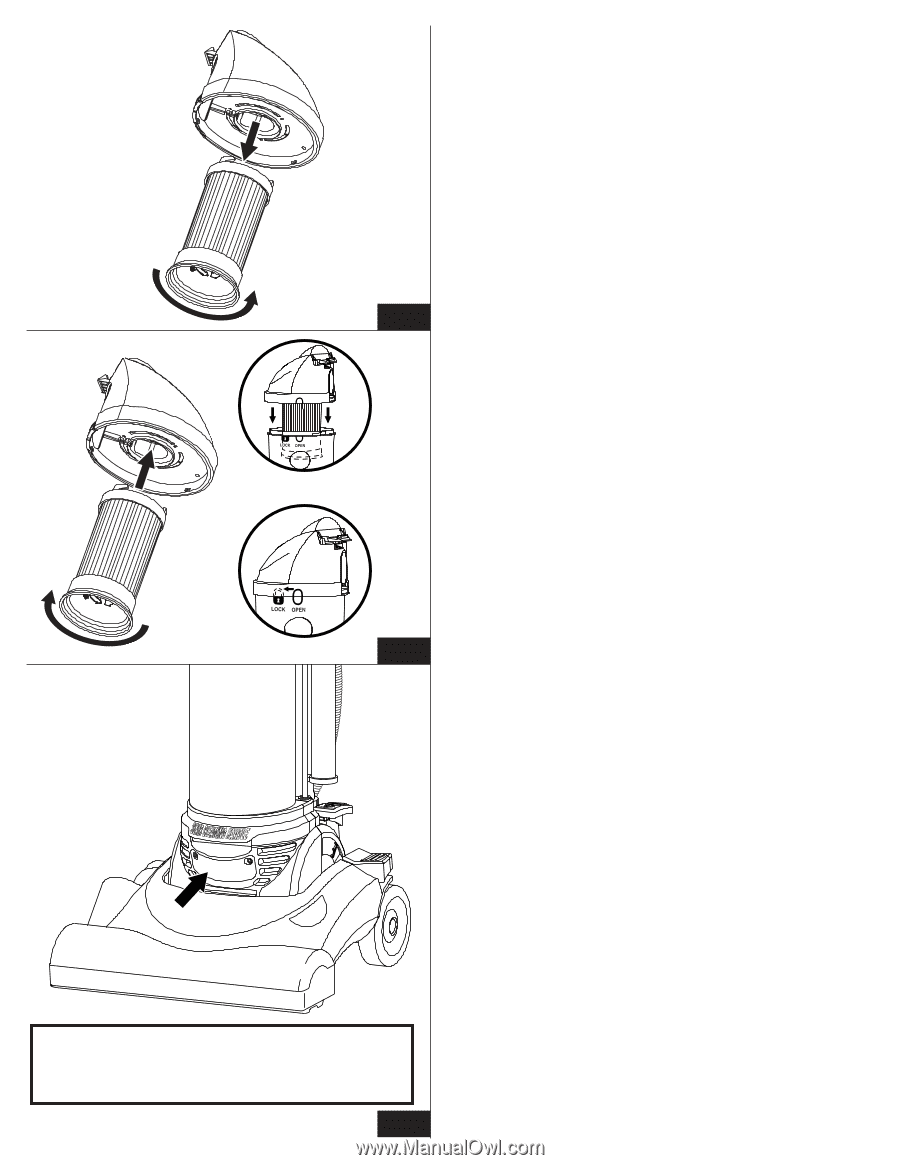
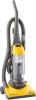
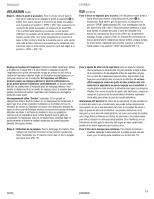
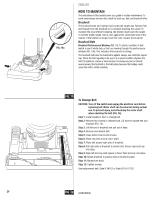
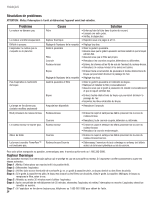
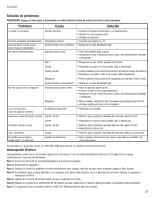
ENGLISH FIG. 21 FIG. 22a FIG. 22b FIG. 22 Headlight is not available on all models. L'éclairage frontal n'est pas disponible sur tous les modèles. La luz frontal no se incluye en todos los modelos. 22 FIG. 23 HOW TO MAINTAIN (continued) To Replace Dust Cup Pleated Filter CAUTION: Turn off the switch and unplug the electrical cord before changing the Pleated Filter. Never operate the vacuum cleaner without the dust cup or the pleated filter assembly. To maintain good performance, check and clean the Pleated Filter each time the dust cup is emptied and clean if needed. The filter can be cleaned by washing it with mild detergent and warm water. Be sure pleated filter is completely dry before reinstalling. To Clean the Pleated Filter Step 1: Remove the dust cup lid assembly by turning the lid counter clockwise and lifting upward and out of the dust cup. Step 2: Grasp the pleated filter and turn counter clockwise to remove (FIG. 21). Step 3: Shake off dust and hair in the trash holding onto the lid. To wash, rinse only using warm water. Shake excess water from filter. Do not submerge filter assembly. Step 4: When all parts are completely dry, replace pleated filter and turn clockwise to lock in place. Pleated Filter Assembly Use The Eureka brand replacement pleated filter, Style DCF-4, part number 62132. Emptying The Dust Cup It is clearly visible when the dust cup is full and needs emptying. There is a fill line to help determine when the cup is full. Remove dust cup from cleaner body, remove the lid and dump debris in a waste container. Reinstalling The Dust Cup To mount the filter assembly into cleaner body, make certain the filter assembly is fully seated in top of dust cup (FIG. 22). Replace dust cup by aligning front of the bottom of dust cup into groove on cleaner. Pivot dust cup up against cleaner and push in place until the dust cup latch is secure. NOTE: The dust cup can be washed in warm water, if desired, but strong detergents should not be used. Dry thoroughly before using again. How To Change Light Bulb (FIG. 23) To replace light bulb, please contact customer service - not available in stores. CAUTION: Turn off the power switch and unplug the electrical cord before changing light bulb. Step 1: Lower handle and remove two screws from lens cover. Step 2: Pull lens cover from cleaner. Step 3: Support socket with one hand and pull light bulb straight out to release. Step 4: Place new light bulb into socket; push to secure. Step 5: Make certain bulb will not touch lens cover. Step 6: Replace lens cover. Step 7: Secure lens cover with two screws. Customer Assistance USA 1-800-282-2886 Mexico (55) 5343-4384 Canada 1-800-282-2886
-
 1
1 -
2
-
3
-
4
-
5
-
6
-
7
-
8
-
9
-
10
-
11
-
12
-
13
-
14
-
15
-
16
-
 17
17 -
 18
18 -
 19
19 -
 20
20 -
 21
21 -
 22
22 -
 23
23 -
 24
24 -
 25
25 -
 26
26 -
 27
27 -
28
-
29
-
30
-
31
-
32
-
33
-
34
-
35
-
36
 |
 |