Garmin iQue M5 Setup Guide - Page 10
Step 9-Install Detailed Maps - sd
 |
UPC - 753759047276
View all Garmin iQue M5 manuals
Add to My Manuals
Save this manual to your list of manuals |
Page 10 highlights
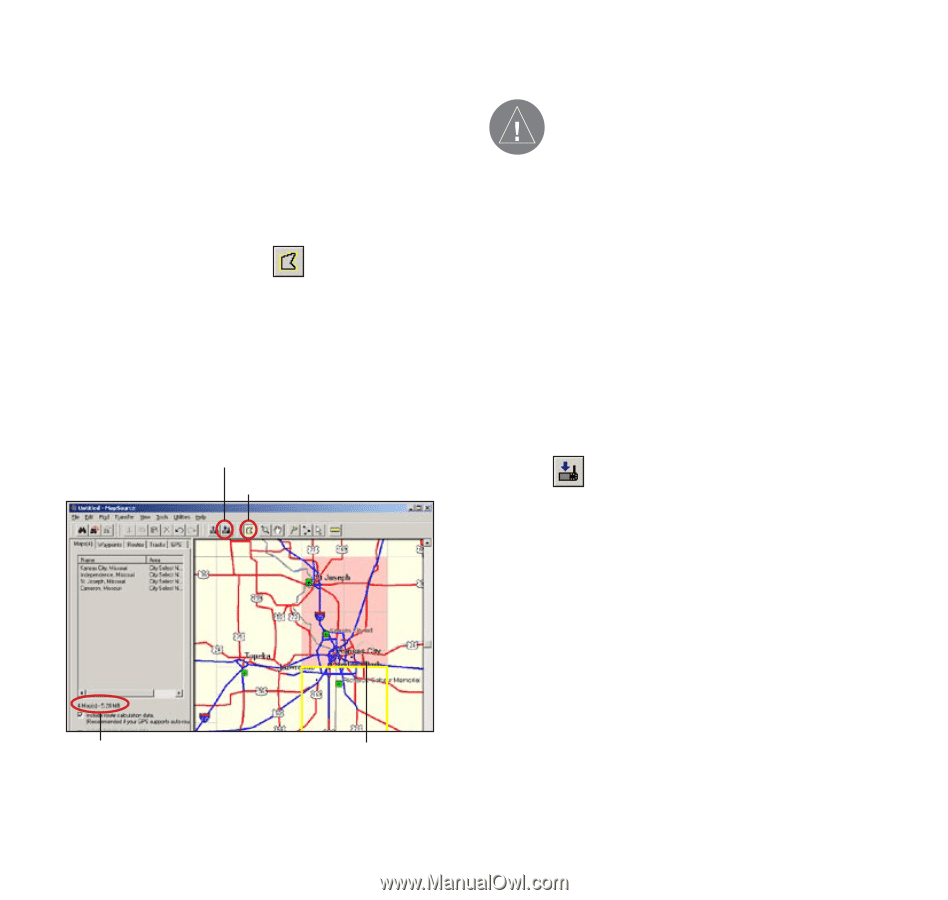
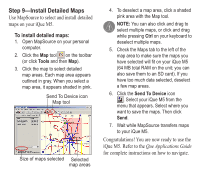
Step 9-Install Detailed Maps Use MapSource to select and install detailed maps on your iQue M5. To install detailed maps: 1. Open MapSource on your personal computer. 2. Click the Map tool on the toolbar (or click Tools and then Map). 3. Click the map to select detailed map areas. Each map area appears outlined in gray. When you select a map area, it appears shaded in pink. Send To Device icon Map tool Size of maps selected Selected map areas 4. To deselect a map area, click a shaded pink area with the Map tool. NOTE: You can also click and drag to select multiple maps, or click and drag while pressing Ctrl on your keyboard to deselect multiple maps. 5. Check the Maps tab to the left of the map area to make sure the maps you have selected will fit on your iQue M5 (64 MB total RAM on the unit; you can also save them to an SD card). If you have too much data selected, deselect a few map areas. 6. Click the Send To Device icon . Select your iQue M5 from the menu that appears. Select where you want to save the maps. Then click Send. 7. Wait while MapSource transfers maps to your iQue M5. Congratulations! You are now ready to use the iQue M5. Refer to the Que Applications Guide for complete instructions on how to navigate.
-
 1
1 -
2
-
3
-
4
-
 5
5 -
 6
6 -
 7
7 -
 8
8 -
 9
9 -
 10
10
 |
 |