Gateway 838GM User Guide
Gateway 838GM - Media Center - 512 MB RAM Manual
 |
View all Gateway 838GM manuals
Add to My Manuals
Save this manual to your list of manuals |
Gateway 838GM manual content summary:
- Gateway 838GM | User Guide - Page 1
Gateway Computer User Guide - Gateway 838GM | User Guide - Page 2
- Gateway 838GM | User Guide - Page 3
Your Computer guide 7 Online help 7 Gateway contact information 8 2 Checking Out Your Gateway Computer 9 Desktop PC Front 10 Desktop PC Back 12 Identifying your model 15 Gateway model and serial number 15 Microsoft Certificate of Authenticity 15 Finding your specifications 16 Accessories - Gateway 838GM | User Guide - Page 4
front bezel 53 Installing memory 54 Replacing the system battery 56 6 Troubleshooting 59 Safety guidelines 60 First steps 60 Troubleshooting 61 Add-in cards 61 Audio 61 Battery 61 CD or DVD drives 61 Computer 63 Diskette drive 63 DVD drives 64 File management 64 ii www.gateway.com - Gateway 838GM | User Guide - Page 5
67 Memory 68 Memory card reader 68 Modem (dial-up 68 Monitor 71 Mouse 73 Networks 73 Passwords 74 Power 74 Printer 74 Sound 76 Telephone support 77 Before calling Gateway Customer Care 77 Telephone numbers 78 Self-help 79 Tutoring 79 Training 79 7 Networking Your Computer 81 - Gateway 838GM | User Guide - Page 6
iv www.gateway.com - Gateway 838GM | User Guide - Page 7
Chapter 1 Getting Help • Using the Gateway Web site • Using Help and Support • Using BigFix • Using Your Computer guide • Using Do More With Gateway • Using online help • Contacting Gateway 1 - Gateway 838GM | User Guide - Page 8
with the best product possible. Please read this manual carefully to familiarize yourself with our range of services and support. We have highlighted some basic care and safety information to help you keep your computer in good operating condition. Gateway stands behind our value proposition to our - Gateway 838GM | User Guide - Page 9
Web site Gateway Web site Gateway's online support is available 24 hours per day, 7 days per week and provides the most current drivers, product specifications, tutorials, and personalized information about your computer. Visit the Gateway eSupport Web site at support.gateway.com. www.gateway.com - Gateway 838GM | User Guide - Page 10
specific to your computer. Click All Downloads to walk through a step-by-step wizard to locate your drivers. Contact Us Click Contact Us to access links to technical support with a live technician, including chat and e-mail. Click Call Us to get a list of Gateway telephone numbers for both sales - Gateway 838GM | User Guide - Page 11
Support Help and Support Your computer includes Help and Support, an easily accessible collection of help information, troubleshooters, and automated support. Use Help and Support to answer questions about Windows and to help you quickly discover and use the many features of your Gateway computer - Gateway 838GM | User Guide - Page 12
Support must be connected to the computer for problems problem, click on that icon to open BigFix. To start BigFix: ■ Click Start, All Programs, Accessories, System Tools, then click BigFix. To learn more about using BigFix: ■ From the BigFix program, click Help, then click Tutorial. 6 www.gateway - Gateway 838GM | User Guide - Page 13
on your hard drive. This guide includes information on using Windows, using the Internet, sending a fax, and changing power-saving settings as well as other topics. To access the Using Your Computer guide: ■ Click Start, All Programs, then click Gateway Documentation. Online help Many programs - Gateway 838GM | User Guide - Page 14
Gateway contact information To help you locate Gateway contact information, you can find the Gateway Web site, Online Support, and technical support contact information on the label located on the side of your computer case. Online Support: Tech Support Phone: Tech Support Hours: 8 www.gateway - Gateway 838GM | User Guide - Page 15
Chapter 2 Checking Out Your Gateway Computer • Identifying features • Locating your computer model and serial number • Locating the Microsoft Certificate of Authenticity • Locating the specifications for your computer • Purchasing accessories 9 - Gateway 838GM | User Guide - Page 16
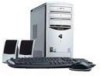
Gateway Computer Desktop PC Front Your computer includes the following components. Important Your computer hardware Memory card reader (optional) Power button/ Power indicator USB ports (optional) IEEE 1394 ports (optional) Web Site: Online Support: Tech Support Hours: 5am to 12pm PST Gateway - Gateway 838GM | User Guide - Page 17
PDA, cellular telephone, or other devices into the memory card reader. Press this button to turn the power on or off. You can also configure the power button to operate in Standby/Resume mode or Hibernate mode. The button lights when the computer is turned on. Plug a microphone into this jack. This - Gateway 838GM | User Guide - Page 18
Chapter 2: Checking Out Your Gateway Computer Desktop PC Back Your computer includes the following components. Important Your computer hardware options and port locations may vary from the illustration below. Power connector Voltage switch PS/2 mouse port PS/2 keyboard Serial port Parallel port - Gateway 838GM | User Guide - Page 19
Desktop PC Back Component Power connector Voltage switch PS/2 mouse port Icon Description Plug the power cord into this connector. Before turning on your computer, make sure that this switch is in the correct position for the correct power available. The switch is preset at the factory with the - Gateway 838GM | User Guide - Page 20
) into this jack. For more information, see "Learning about the Internet" in Using Your Computer which has been included on your hard drive. To access this guide, click Start, All Programs, then click Gateway Documentation. Plug USB (Universal Serial Bus) devices (such as a USB Iomega™ Zip™ drive - Gateway 838GM | User Guide - Page 21
model and serial number The label on the front of your computer case contains information that identifies your computer model and serial number. Gateway Technical Support will need this information if you call for assistance. Microsoft Certificate of Authenticity The Microsoft Certificate of - Gateway 838GM | User Guide - Page 22
2: Checking Out Your Gateway Computer Finding your specifications For more information about your computer, such as memory size, memory type, and hard drive size, visit Gateway's eSupport page at support.gateway.com. The eSupport page also has links to additional Gateway documentation and detailed - Gateway 838GM | User Guide - Page 23
supply (UPS) protects your computer from data loss during a total power failure. A UPS uses a battery to keep your computer running temporarily during a power failure so you can save your work and shut down your computer correctly. A UPS may also provide protection from power surges. www.gateway - Gateway 838GM | User Guide - Page 24
Chapter 2: Checking Out Your Gateway Computer 18 www.gateway.com - Gateway 838GM | User Guide - Page 25
Chapter 3 Getting Started • Using your computer safely • Protecting your computer from power source problems • Turning your computer on and off • Adjusting the volume • Using the keyboard and the mouse • Using the computer display • Installing peripheral devices 19 - Gateway 838GM | User Guide - Page 26
eyes. Reduce glare by installing shades or curtains on windows, and by installing a glare screen filter on your monitor. ■ Use soft, indirect lighting in your work area. Do not use your computer in a dark room. ■ Avoid focusing your eyes on your computer screen for long periods of time. Look away - Gateway 838GM | User Guide - Page 27
■ Adjust the back of the chair so it supports the lower curve of your spine. You can use a pillow or cushion to provide extra back support. Setting up your computer and computer accessories ■ Set up the monitor so the top to break up the work day, and schedule a variety of tasks. www.gateway.com 21 - Gateway 838GM | User Guide - Page 28
set the voltage selection switch incorrectly, your system will be damaged. Make sure this switch is set correctly for your location before turning on your computer. In the United States, the utility power is supplied at a nominal 115 volts at 60 Hz. The power supply should always be set to this when - Gateway 838GM | User Guide - Page 29
selection switch Starting your computer To start your computer: 1 Connect the cables to your computer. See the setup poster. 2 Turn on your computer. 3 If you are starting your computer for the first time, follow the on-screen instructions to set up your computer. 4 Turn on any peripheral devices - Gateway 838GM | User Guide - Page 30
which has been included on your hard drive. To access this guide, click Start, All Programs, then click Gateway Documentation. Turning off your computer Warning When you turn off your computer, certain components in the power supply and system board remain energized. In order to remove all - Gateway 838GM | User Guide - Page 31
on again. Important If your computer does not turn off, press and hold the power button for about five seconds, then release it. As a part of the regular startup process, a program to check the disk status runs automatically. When the checks are finished, Windows starts. Adjusting the volume You - Gateway 838GM | User Guide - Page 32
Editing buttons Internet buttons Audio playback Indicators buttons Navigation keys Internet buttons Windows keys Application key Directional Numeric keys keypad Keyboard features The keyboard has the page, to the beginning of a document, or to the end of a document. 26 www.gateway.com - Gateway 838GM | User Guide - Page 33
key to activate the function. Press one of these keys to open the Windows Start menu. These keys can also be used in combination with other keys and E (Explorer utility). Access shortcut menus and help assistants in Windows. Directional keys Numeric keypad Move the cursor up, down, right, - Gateway 838GM | User Guide - Page 34
Getting Started Using the mouse The mouse is a device that controls the pointer movement on the computer display. This illustration shows the standard mouse. Right button Left button Scroll wheel As you move move through a document. This feature is not available in all programs. 28 www.gateway.com - Gateway 838GM | User Guide - Page 35
hold it down. Move (drag) the object to the appropriate part of the computer display. Release the button to drop the object where you want Your Computer which has been included on your hard drive. To access this guide, click Start, All Programs, then click Gateway Documentation. For instructions - Gateway 838GM | User Guide - Page 36
line cord. To connect the modem: 1 Insert one end of the modem cable into the modem jack computer. on the back of your 2 Insert the other end of the modem cable into a telephone wall jack. The modem will not work with digital or PBX telephone lines. 3 Start your computer - Gateway 838GM | User Guide - Page 37
, such as cable modems and DSL modems, connect to your computer's Ethernet jack. For more information, see "Using the Internet" in Using Your Computer which has been included on your hard drive. To access this guide, click Start, All Programs, then click Gateway Documentation. www.gateway.com 31 - Gateway 838GM | User Guide - Page 38
device documentation and installation instructions. Your computer has one or more connect peripheral devices such as printers, scanners, and digital cameras to your computer. For more information about port locations, "Checking Out Your Gateway Computer" on page 9. IEEE 1394 and USB ports support - Gateway 838GM | User Guide - Page 39
Chapter 4 Using Drives and Ports • Using the diskette drive • Using the memory card reader • Using CD or DVD drives 33 - Gateway 838GM | User Guide - Page 40
memory card reader to transfer pictures from a digital camera to your computer. You can also use the memory card reader to transfer data between your computer and a device that uses memory cards, such as a PDA, MP3 player, or cellular phone. Media reader slots Activity indicator 34 www.gateway - Gateway 838GM | User Guide - Page 41
. To use a memory card: 1 Insert the memory card into the memory card slot as indicated in the previous table. 2 To access a file on the memory card, click Start, then click My Computer. Double-click the drive letter (for example, the E: drive), then double-click the file name. www.gateway.com 35 - Gateway 838GM | User Guide - Page 42
remove the media or turn off the computer while the media reader access indicator is blinking. You could lose data. Also, remove the media from the reader before you turn off the computer. Important Do not use the remove hardware the memory card. icon in the taskbar to remove 36 www.gateway.com - Gateway 838GM | User Guide - Page 43
DVD drive You can use your computer to enjoy a wide variety of multimedia features. Identifying drive types Your Gateway computer may contain one of the following programs, playing audio CDs, playing DVDs, accessing data, and recording video and data to double layer DVD+R discs. Note: To use the - Gateway 838GM | User Guide - Page 44
Manual eject hole Activity indicator (location varies) (location varies) Eject button Important Some music CDs have copy protection software. You may not be able to play these CDs on your computer a CD Use the music program or Windows Media Player on your computer to: ■ Play music CDs ■ Create - Gateway 838GM | User Guide - Page 45
the DVD program or Windows Media Player on your computer. Tips & Tricks For more information about playing DVDs, see "Playing DVDs" in Using Your Computer which has been included on your hard drive. To access this guide, click Start, All Programs, then click Gateway Documentation. Creating CDs - Gateway 838GM | User Guide - Page 46
Chapter 4: Using Drives and Ports 40 www.gateway.com - Gateway 838GM | User Guide - Page 47
Chapter 5 Maintaining Your Computer • Caring for your computer • Updating Windows • Protecting your computer from viruses • Cleaning your computer • Restoring your system • Opening the computer case • Adding memory and replacing the battery 41 - Gateway 838GM | User Guide - Page 48
apply only to the software and hardware on your computer. To run Windows Update: 1 Connect to the Internet. 2 Click Start, All Programs, then click Windows Update. 3 Click Scan for Available Updates. Help and Support 42 For more information about Windows Update, click Start, then click Help and - Gateway 838GM | User Guide - Page 49
service when you purchased your computer. will warn you if a document that you are opening contains a macro that might have a virus. ■ Periodically updating the Norton AntiVirus program to protect against the latest viruses. Help and Support For more information about protecting your computer - Gateway 838GM | User Guide - Page 50
for Viruses area, then under Actions, click Scan. To remove a virus: 1 If Norton AntiVirus finds a virus, follow all on-screen instructions to remove the virus. 2 Turn off your computer and leave it off for at least 30 seconds. 3 Turn on your computer and rescan for the virus. 44 www.gateway.com - Gateway 838GM | User Guide - Page 51
the wall outlets. Always turn off your computer and other peripherals before cleaning any components. Use a damp, lint-free cloth to clean your computer and other parts of your system. Do not use abrasive or solvent cleaners because they can damage the finish on components. www.gateway.com 45 - Gateway 838GM | User Guide - Page 52
circulated through the vents on the case, so keep the vents free of dust. With your computer turned off and unplugged, brush the mouse pointer begins moving erratically across the computer screen or becomes difficult to control precisely, cleaning the mouse will likely improve its accuracy. To clean - Gateway 838GM | User Guide - Page 53
Cleaning your computer To clean your trackball mouse: 1 Turn the mouse upside down. 2 Rotate the retaining ring on the bottom of the mouse counter-clockwise, then remove dipped in isopropyl alcohol. Mouse rollers 5 Replace the mouse ball and lock the retaining ring into place. www.gateway.com 47 - Gateway 838GM | User Guide - Page 54
with the recovery media program, on the hard drive, or on restore discs that were included with your computer. If you need to restore your computer to the original configuration, you can use the backup restore discs or you can use the backup files located on the hard drive. The instructions for - Gateway 838GM | User Guide - Page 55
computer case, follow these guidelines: ■ Turn off your computer. ■ Wear a grounding wrist strap (available at most electronics stores) and attach it to a bare metal part of your computer. Warning To prevent risk of electric shock, do not insert any object into the vent holes of the power supply - Gateway 838GM | User Guide - Page 56
. Warning To avoid exposure to dangerous electrical voltages and moving parts, turn off your computer, then unplug the power cord and modem cable before opening the case. Removing the side panel To remove the side panel: 1 Follow the instructions in "First steps" on page 60. 2 Shut down your - Gateway 838GM | User Guide - Page 57
are cables connected to the back of the bezel. When the bezel is loose from the case: Carefully set the bezel to the side of the case with the cables attached. - OR Disconnect the cables from the system board so you can remove the front bezel and cables away from the computer. www.gateway.com - Gateway 838GM | User Guide - Page 58
side panel: 1 Make sure that all of the internal cables are arranged inside the case so they will not be pinched when you close the case. 2 Align the side panel, then slide the side panel toward the front of the computer to secure it into place. 3 Replace the side panel thumbscrews. 4 Reconnect the - Gateway 838GM | User Guide - Page 59
Replacing the front bezel To replace the front bezel: 1 Align the latch pins with the computer latch holes. Closing the case 2 Press the bezel firmly into place. www.gateway.com 53 - Gateway 838GM | User Guide - Page 60
type of memory module for your computer. Your computer uses DIMM memory. To install or replace DIMM memory: 1 Remove the side panel by following the instructions in "Removing the side panel" on page 50. 2 For more stability, place your computer on its side. To avoid scratching the case, place it - Gateway 838GM | User Guide - Page 61
. 6 Replace the side panel by following the instructions in "Replacing the side panel" on page 52. 7 Return your computer to its upright position. 8 Reconnect the cables and the power cord. 9 Turn on your computer. Windows starts and the Windows desktop appears. 10 Click Start, Control Panel, then - Gateway 838GM | User Guide - Page 62
following the instructions in "Removing the side panel" on page 50. 6 For more stability, place your computer on its side. To avoid scratching the case, place it on a towel or other non-abrasive surface. 7 Locate the old battery on the system board and note its orientation. You will need to install - Gateway 838GM | User Guide - Page 63
the socket until it snaps into place. 10 Replace the side panel by following the instructions in "Replacing the side panel" on page 52. 11 Reconnect all external cables and the power cord. 12 Turn on your computer. 13 Open the BIOS Setup utility. 14 In the BIOS Setup utility, restore any settings - Gateway 838GM | User Guide - Page 64
Chapter 5: Maintaining Your Computer 58 www.gateway.com - Gateway 838GM | User Guide - Page 65
Chapter 6 Troubleshooting • Troubleshooting typical hardware and software problems • Getting telephone support • Using automated troubleshooting systems • Getting tutoring and training 59 - Gateway 838GM | User Guide - Page 66
Safety guidelines While troubleshooting your computer, follow these safety guidelines: ■ Never remove your computer case cover while your computer is turned on and while the modem cable and the power cord are connected. ■ Make sure that you are correctly grounded before accessing internal - Gateway 838GM | User Guide - Page 67
Troubleshooting Add-in cards The computer does not recognize an add-in card ■ Shut down and restart your computer. ■ Make sure that you have installed the required software. For more information, see the documentation that came with your add-in card. Audio See "Sound" on page 76. Battery See "Power - Gateway 838GM | User Guide - Page 68
on page 25. ■ Make sure that the speaker cables are connected correctly and securely. ■ Shut down and restart your computer. ■ Clean the disc. For more information, see "Cleaning CDs or DVDs" on page 48. ■ Reinstall the audio device drivers. A DVD movie will not play ■ Make sure that you have a DVD - Gateway 838GM | User Guide - Page 69
Troubleshooting The computer will not start ■ Make sure that the power cord is connected to an AC power source and your computer is turned on. Diskette drive The diskette drive is not recognized ■ Shut down and restart your computer. You cannot save a file to diskette or you see the message "disk - Gateway 838GM | User Guide - Page 70
6: Troubleshooting ■ Run Error checking on the diskette. For more information, see "Checking the hard drive for errors" in Using Your Computer which has been included on your hard drive. To access this guide, click Start, All Programs, then click Gateway Documentation. You see a "Non-system disk" or - Gateway 838GM | User Guide - Page 71
Troubleshooting You see an "Insufficient disk space" error message ■ Delete unnecessary files from the hard drive using Disk Cleanup. For instructions on deleting unnecessary files, see "Using Disk Cleanup" in Using Your Computer which has been included on your hard drive. To access this guide - Gateway 838GM | User Guide - Page 72
jack. See "Desktop PC Back" on page 12 to make sure that the connections have been made correctly. ■ Make sure that your account with your Internet service provider (ISP) is set up correctly. Contact your ISP technical support for help. ■ Make sure that you do not have a problem with your modem - Gateway 838GM | User Guide - Page 73
Troubleshooting People are sending you e-mail messages, but you have not received any mail ■ Click the receive button in your e-mail program. ■ Make sure that your account with your Internet service provider (ISP) is set up correctly. Contact your ISP for technical support. Keyboard The keyboard - Gateway 838GM | User Guide - Page 74
the memory card slots do not appear in the My Computer window ■ Reboot your computer. Modem (dial-up) See also "Internet" on page 66. Your modem does not dial or does not connect ■ Make sure that the modem cable is plugged into the modem jack and not the Ethernet network jack. See "Desktop PC Back - Gateway 838GM | User Guide - Page 75
do not work with your modem. ■ Check for line noise (scratchy, crackling, or popping sounds). Line noise is a common problem that can cause the modem to connect at a slower rate, abort downloads, or even disconnect. The faster the modem, the less line noise it can tolerate and still work correctly - Gateway 838GM | User Guide - Page 76
. Contact your ISP for technical support. ■ See if the modem works with a different communications program. The problem may be with just one program. ■ Review the troubleshooting information under "Internet" on page 66 Your 56K modem does not connect at 56K Current FCC regulations restrict - Gateway 838GM | User Guide - Page 77
For more information about modem troubleshooting, click Start, then click Help and Support. Type the keyword modem troubleshooting in the Search box , then click the arrow. The modem is noisy when it dials and connects When your modem tries to connect to another modem, it begins handshaking - Gateway 838GM | User Guide - Page 78
is turned on, the power LED should be lit. ■ Adjust the brightness and contrast controls to the center position. ■ Make sure that the monitor cable is connected to the video port on the back of your computer. ■ Check the cable for bent or damaged pins. ■ Reinstall the device driver. ■ Connect - Gateway 838GM | User Guide - Page 79
Tips & Tricks For more information, see "Adjusting the screen and desktop settings" in Using Your Computer which has been included on your hard drive. To access this guide, click Start, All Programs, then click Gateway Documentation. ■ Move the monitor away from sources of electrical interference - Gateway 838GM | User Guide - Page 80
Support. Type the keyword network troubleshooting in the Search box , then click the arrow. Passwords Your computer does not accept your password Make sure that CAPS LOCK is turned off, then retype the password. Power Your computer will not turn on ■ Make sure that your power cord is connected - Gateway 838GM | User Guide - Page 81
. The Printers and Faxes window opens. 3 Right-click the name of the printer you want to be the default printer, then click Set as Default Printer. ■ Reinstall the printer driver. See the guide that came with your printer for instructions on installing the printer driver. You see a "Printer queue - Gateway 838GM | User Guide - Page 82
sure that mute controls are turned off. For more information, see "Adjusting the volume" on page 25. ■ If you are using external speakers, see the speaker setup poster to check your speaker connections. Help and Support For more information about sound troubleshooting, click Start, then click Help - Gateway 838GM | User Guide - Page 83
Telephone support Telephone support Before calling Gateway Customer Care If you have a technical problem with your computer, follow these recommendations before contacting Gateway Customer Care: ■ Make sure that your computer is connected correctly to a grounded AC outlet that is supplying power. - Gateway 838GM | User Guide - Page 84
Troubleshooting Telephone numbers Gateway offers a wide range of customer service, Customer Care, and information services. Automated troubleshooting system Service description How to reach Use an automated menu system and your telephone 800-846-2118 keypad to find answers to common problems - Gateway 838GM | User Guide - Page 85
cases, additional product information and online documentation for Gateway-supplied hardware can be found in our Web site's Documentation Library. ■ This user guide and the Using Your Computer guide. ■ The software publisher's Web site. Help and Support For more how-to information about Windows - Gateway 838GM | User Guide - Page 86
Chapter 6: Troubleshooting 80 www.gateway.com - Gateway 838GM | User Guide - Page 87
Chapter 7 Networking Your Computer • Introducing networking • Creating an Ethernet network • Testing your network • Sharing your resources • Troubleshooting your Ethernet network 81 - Gateway 838GM | User Guide - Page 88
network. Streaming audio and video files With a network, you can store audio files (such as the popular .MP3 files) and video files on any networked computer, then play them on any of the other computers or devices connected to your network. This process is called streaming. 82 www.gateway.com - Gateway 838GM | User Guide - Page 89
of connection you will use. Gateway products support wired and wireless Ethernet networks. Use the following criteria as a guide when selecting a network connection. Wireless Ethernet network A wireless Ethernet network is created by using radio emitters that may be embedded into your computer or - Gateway 838GM | User Guide - Page 90
"Safety, Regulatory, and Legal Information" in your user's guide for general wireless regulatory and safety guidelines. To find out if your computer has an internal wireless device, check the device manager. telephones and microwaves ■ Not compatible with IEEE 802.11a networks 84 www.gateway.com - Gateway 838GM | User Guide - Page 91
access to the Internet. Each of the computers or Ethernet-ready devices communicate with the access point using radio waves. If your computer does not have a built-in wireless Ethernet emitter, you need to add a wireless PCI card (desktop), PC card (notebook), or USB adapter. www.gateway.com 85 - Gateway 838GM | User Guide - Page 92
" on page 88. Equipment you need for an access point wireless Ethernet network For an access point wireless Ethernet network you need: ■ Two or more computers with wireless Ethernet emitters ■ One access point ■ One broadband Internet connection (optional) 86 www.gateway.com - Gateway 838GM | User Guide - Page 93
.11a and IEEE 802.11g components will not work. Some wireless devices can broadcast and , including: ■ 802.11g support - for next-generation, high computers To determine if wireless Ethernet is already installed on your computer: 1 Click Start, then click Control Panel. The Control Panel window - Gateway 838GM | User Guide - Page 94
computer ■ Your computer has an Ethernet jack for connecting to the network Using a wired Ethernet network A wired Ethernet network consists of two or more computers connected together through an Ethernet cable. This connection IP addresses to each computer or network device. 88 www.gateway.com - Gateway 838GM | User Guide - Page 95
" on page 83. Equipment you need for a router-based wired Ethernet network For a wired Ethernet network you need: ■ Two or more computers with Ethernet jacks ■ One router ■ One broadband Internet connection (optional) ■ Ethernet cables connecting all of the network equipment www.gateway.com 89 - Gateway 838GM | User Guide - Page 96
are using for your network, you need to install Ethernet cards and drivers on the computers that do not have Ethernet already installed. To order wired or wireless Ethernet PCI or PC cards, visit the Accessories Store at accessories.gateway.com. Use the documentation that comes with your Ethernet - Gateway 838GM | User Guide - Page 97
the installation the line will be activated. Important Broadband Internet settings will differ from ISP to ISP. Before you begin setting up your network, you should contact your ISP for any specific instructions they have for setting up a network. Naming the computers and the workgroup Important - Gateway 838GM | User Guide - Page 98
each computer you is set up in Windows XP, TCP/IP is window opens. If your Control Panel is in Category View, click Network and Internet Connections. The Network and Internet Connections window opens. 2 Click/Double-click Network Connections. The Network Connections window opens. 92 www.gateway - Gateway 838GM | User Guide - Page 99
dialog box opens. - OR - If you do not have a LAN connection setup, click Create a new connection and follow the instructions in the New Connection Wizard. 4 Click to select the Internet Protocol (TCP/IP) check box in the This connection uses the following items list. If you do not see TCP/IP, drag - Gateway 838GM | User Guide - Page 100
the Internet Protocol (TCP/IP) Properties dialog box. 9 Click OK to close the Local Area Connection Properties dialog box. 10 Click X to close the Network Connections window. 11 Repeat this procedure for every computer on your network. Where to go from here If you are setting up a wireless Ethernet - Gateway 838GM | User Guide - Page 101
. 3 Plug one end of the power adapter into the AC connector on the router and the other end into a grounded, 110V electrical outlet. 4 Turn on the DSL or cable modem. 5 Press the reset button on the wireless access point router. 6 Temporarily connect a computer to the wireless access point router - Gateway 838GM | User Guide - Page 102
Enable to turn on the connected a computer to the access point router in Step 6, disconnect it. 13 Reset the power on your cable or DSL modem. 14 Restart all of your computers on the network. 15 To connect to the access point, see "Connecting to an access point network" on page 97. 96 www.gateway - Gateway 838GM | User Guide - Page 103
to set up the network connection on your computers. To connect to an access point wireless Ethernet network: 1 Before connecting to an access point, you must turn on the wireless Ethernet emitter by clicking Start, then clicking Control Panel. The Control Panel window opens. If your Control Panel - Gateway 838GM | User Guide - Page 104
. To configure computer settings with WEP security for an access point wireless Ethernet network: 1 With the Wireless Network Connection window open, click Change advanced settings. The Wireless Network Connection Properties dialog box opens. 2 Click the Wireless Networks tab. 98 www.gateway.com - Gateway 838GM | User Guide - Page 105
the This is a computer-to-computer (ad hoc) network; wireless access points are not used check box is not selected. 7 Click OK to close the Wireless Network Properties dialog box. Your network should be running. Go to "Testing your network" on page 105. Help and Support - Gateway 838GM | User Guide - Page 106
the access point" on page 95. To manually add an access point wireless Ethernet network: 1 With the Wireless Network Connection window open, click Change order of preferred networks. The Wireless Network Connection Properties dialog box opens. 2 Click the Wireless Networks tab. 100 www.gateway.com - Gateway 838GM | User Guide - Page 107
is provided automatically, then leave the check mark in The key is provided for me automatically check box. 8 Make sure that the This is a computer-to-computer (ad hoc) network; wireless access points are not used check box is not selected. 9 Click OK to close the Wireless Network Properties dialog - Gateway 838GM | User Guide - Page 108
Your Computer Help and Support For more information about configuring a wireless network, click Start, then click Help and Support. Type up a network for more than two computers and you will be connecting your network to a high-speed Broadband Internet connection (cable or DSL modem), we recommend - Gateway 838GM | User Guide - Page 109
you want to connect to the network. Cable/DSL modem Router WAN port To set up a network using a router: 1 Plug one end of the power adapter into the AC connector on the router and the other end into a grounded, 110V electrical outlet. 2 Turn on your computers. 3 Plug one end of a straight-through - Gateway 838GM | User Guide - Page 110
computers and set up TCP/IP on them, you can configure your router using your Web browser. For these instructions, we assume that you are using the router to connect your network to a high-speed Broadband Internet connection through an Internet service , leaving the fields blank will work. ■ LAN IP - Gateway 838GM | User Guide - Page 111
in the router or access point literature ■ Temporarily turn off any firewall software on your desktop computer ■ Turn off all of the devices, then power them back on ■ Refer to your router's or access point's troubleshooting information ■ Contact your Internet service provider www.gateway.com 105 - Gateway 838GM | User Guide - Page 112
your resources Sharing an Internet connection Internet sharing lets all computers on the network access the Internet at the same time using one Internet service provider (ISP) connection. Important The Internet setup procedure uses the Windows XP New Connection Wizard and Internet Explorer. The - Gateway 838GM | User Guide - Page 113
3 Click the Connections tab. Sharing your resources 4 Click Setup. The New Connection Wizard opens. 5 Click Next. The Network Connection Type screen opens. www.gateway.com 107 - Gateway 838GM | User Guide - Page 114
my connection manually, then click Next. The Internet Connection screen opens. 8 Click the type of Internet connection you are setting up, then click Next. 9 Click Finish. 10 Repeat this procedure for each computer on your network. Go to "Accessing the Internet" on page 109. 108 www.gateway.com - Gateway 838GM | User Guide - Page 115
to install the printer drivers on each computer. Sharing drives or folders If you want to share a drive or folder, use the following instructions. To share drives or folders: 1 Make sure that each computer on your network has Windows file and printer sharing turned on by following the steps - Gateway 838GM | User Guide - Page 116
Chapter 7: Networking Your Computer 3 Click the Sharing tab. 4 If this is the first time you have shared a drive or folder, click Network Setup Wizard to enable remote access, then follow the on-screen instructions. - OR - network users to change my files check box 5 Click OK. 110 www.gateway.com - Gateway 838GM | User Guide - Page 117
: 1 In My Computer or Windows Explorer, right-click click Control Panel. The Control Panel window opens. If your Control Panel is in and Faxes icon. The Printers and Faxes window opens. 3 Right-click the name of the and printers on each network computer are shared, you can: ■ View shared drives - Gateway 838GM | User Guide - Page 118
Entire Network, click entire contents. 3 Double-click Microsoft Windows Network. 4 Double-click the name of your workgroup. The names of each of the computers in your workgroup are listed. For more information about workgroups time you log on to the network. 5 Click Finish. 112 www.gateway.com - Gateway 838GM | User Guide - Page 119
My Computer window opens. 2 Browse to the network drive that contains the file you want to copy. 3 Browse to the file you want to copy. 4 Click the file. 5 Click Edit, then click Copy. 6 Double-click the folder where you want to copy the file to. 7 Click Edit, then click Paste. www.gateway.com - Gateway 838GM | User Guide - Page 120
will provide you with the necessary connection information. To access any new network, obtain information about the network (such as the SSID, password key, and security settings to use) and enter that information. See "Configuring computer settings for an access point" on page 98 for instructions - Gateway 838GM | User Guide - Page 121
software. For more information, see the documentation that came with your Ethernet card. ■ Reseat the card. For more information, about opening your computer case, see "Opening the case" on page 50. For more information about your Ethernet card, see the documentation that came with your Ethernet - Gateway 838GM | User Guide - Page 122
Start, then click Control Panel. The Control Panel window opens. If your Control Panel is in Category View, click Network and Internet Connections. The Network and Internet Connections window opens. 2 Click/Double-click Network Connections. The Network Connections window opens. 116 www.gateway.com - Gateway 838GM | User Guide - Page 123
files, print, or get to the Web. ■ If WEP is used by your access point, go to the Windows XP Wireless Networking Properties window and make sure that both the WAP and the WLAN in the computer have matching WEP keys. You are in a wireless network, but no available networks are listed in the - Gateway 838GM | User Guide - Page 124
Chapter 7: Networking Your Computer 118 www.gateway.com - Gateway 838GM | User Guide - Page 125
Appendix A Safety, Regulatory, and Legal Information • Safety information • Regulatory statements • Notices 119 - Gateway 838GM | User Guide - Page 126
by the manufacturer. Dispose of batteries according to the manufacturer's instructions. ■ When the computer is turned off, a small amount of electrical current still flows through the computer. To avoid electrical shock, always unplug all power cables and modem cables from the wall outlets before - Gateway 838GM | User Guide - Page 127
circuit from that to which the receiver is connected ■ Consult the dealer or an experienced radio/TV technician for help. Compliance Accessories: The accessories associated with this equipment are: shielded video cable when an external monitor is connected. These accessories are required to be used - Gateway 838GM | User Guide - Page 128
Your modem complies with Part 68 of the Code of Federal Regulations (CFR 47) rules. On the computer or modem card is a label that will notify you in advance that temporary discontinuance of service may be required. The telephone company may request that you disconnect the equipment until the problem - Gateway 838GM | User Guide - Page 129
servicing, contact an authorized service location. Warning Use of controls or adjustments or performance of procedures other than those specified in this manual TV tuner cards) External television antenna grounding If an outside antenna or cable system is to be connected to your Gateway PC, make - Gateway 838GM | User Guide - Page 130
Information Power lines Do not locate the antenna near overhead light or power circuits, or where it could fall into such power lines grounding Reference Grounding component 1 Electric service equipment 2 Power service grounding electrode system (NEC Art 250, Part H) 3 Ground clamps 4 - Gateway 838GM | User Guide - Page 131
This publication is protected by copyright and all rights are reserved. No part of it may be reproduced or transmitted by any means or in any form, without prior consent in writing from Gateway. The information in this manual has been carefully checked and is believed to be accurate. However - Gateway 838GM | User Guide - Page 132
Appendix A: Safety, Regulatory, and Legal Information 126 www.gateway.com - Gateway 838GM | User Guide - Page 133
cards supported 35 case closing 52 opening 50 CD cleaning 48 inserting 38 playing audio 38 recording 39 troubleshooting 61 CD drive identifying 37 locating drive 11 troubleshooting 61 using 37 cellular phone memory cards 34 Certificate of Authenticity 15 cleaning case 45 CD 48 computer exterior 45 - Gateway 838GM | User Guide - Page 134
video camera IEEE 1394 port 11, 14 DIMM See memory directional keys 27 diskette drive 34 troubleshooting 63 diskette drive identifying 34 troubleshooting 63 using 34 display troubleshooting 64 documentation Gateway Web site 3 help 5 Help and Support 5 online help 7 Using Your Computer 7 domain - Gateway 838GM | User Guide - Page 135
4 Ethernet connecting 31 installing cards 90 installing drivers 90 jack 31 Ethernet jack 14 Ethernet network creating 90 external audio jack 13 F Fast Ethernet 88 faxes troubleshooting 70 files opening 29 opening shared 113 troubleshooting 64 finding Help and Support topics 6 specifications 16 - Gateway 838GM | User Guide - Page 136
cleaning case 45 cleaning component exteriors 45 cleaning computer display 46 cleaning computer screen 46 cleaning keyboard 46 cleaning mouse 46 protecting from viruses 43 mapping network drives 112 memory adding 54 installing 54 purchasing 16 replacing 54 troubleshooting 68 www.gateway.com - Gateway 838GM | User Guide - Page 137
82 streaming audio 82 streaming video 82 New Connection Wizard 106 non-technical support Accounting 78 Sales 78 Warranty 78 Norton Antivirus 43 numeric keypad 27 indicator 27 O online help 5, 7 opening computer case 50 files 29 files across network 113 folders 29 front bezel 51 www.gateway.com 131 - Gateway 838GM | User Guide - Page 138
and Play devices IEEE 1394 support for 32 USB support for 32 pointer 28 moving 29 ports See connections power button 11 connector 13 Hibernate mode 11 indicator 11 source problems 22 Standby/Resume 11 troubleshooting 74 turning off computer 24 turning on computer 23 power button 11 printer default - Gateway 838GM | User Guide - Page 139
contacting 77 tutorial service 78 telephone jack 13 telephone support 77 testing network 105 training CD 79 classroom 79 Gateway Learning Libraries 79 Learn With Gateway 79 troubleshooting add-in cards 61 automated system 78 cards 61 CD drive 61 cleaning CD 48 cleaning DVD 48 computer startup 63 - Gateway 838GM | User Guide - Page 140
site connection speed 66 turning off computer 11, 24, 25 turning on computer 11, 23 tutoring fee-based 79 U uninterruptible power supply (UPS) 17, 22 updating device drivers 4 updating Norton AntiVirus 43 updating Windows 42 UPS 17, 22 USB port 11, 14, 32 V video playing 39 streaming 82 video file - Gateway 838GM | User Guide - Page 141
- Gateway 838GM | User Guide - Page 142
- Gateway 838GM | User Guide - Page 143
- Gateway 838GM | User Guide - Page 144
MAN GEM CONS USR GDE R0 8/04
-
 1
1 -
 2
2 -
 3
3 -
 4
4 -
 5
5 -
 6
6 -
 7
7 -
8
-
9
-
10
-
11
-
12
-
13
-
14
-
15
-
16
-
17
-
18
-
19
-
20
-
21
-
22
-
23
-
24
-
25
-
26
-
27
-
28
-
29
-
30
-
31
-
32
-
33
-
34
-
35
-
36
-
37
-
38
-
39
-
40
-
41
-
42
-
43
-
44
-
45
-
46
-
47
-
48
-
49
-
50
-
51
-
52
-
53
-
54
-
55
-
56
-
57
-
58
-
59
-
60
-
61
-
62
-
63
-
64
-
65
-
66
-
67
-
68
-
69
-
70
-
71
-
72
-
73
-
74
-
75
-
76
-
77
-
78
-
79
-
80
-
81
-
82
-
83
-
84
-
85
-
86
-
87
-
88
-
89
-
90
-
91
-
92
-
93
-
94
-
95
-
96
-
97
-
98
-
99
-
100
-
101
-
102
-
103
-
104
-
105
-
106
-
107
-
108
-
109
-
110
-
111
-
112
-
113
-
114
-
115
-
116
-
117
-
118
-
119
-
120
-
121
-
122
-
123
-
124
-
125
-
126
-
127
-
128
-
129
-
130
-
131
-
132
-
133
-
134
-
135
-
136
-
137
-
138
-
139
-
140
-
141
-
142
-
143
-
144
 |
 |
Gateway
C
omputer
User Guide