GE C2S980S Use and Care Manual - Page 51
Level the Range, Quality of Flames, Check Ignition of Surface Burners
 |
View all GE C2S980S manuals
Add to My Manuals
Save this manual to your list of manuals |
Page 51 highlights
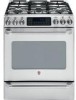
Safety Instructions Operating Instructions Read these instructions completely and carefully. Check Ignition of Surface Burners Operation of all cooktop burners should be checked after the range and gas supply lines have been carefully checked for leaks. Electric Ignition Select a top burner knob and simultaneously push in and turn to LITE position. You will hear a clicking sound indicating proper operation of the spark module. Once the air has been purged from the supply lines, burners should light within 4 seconds. After burner lights, rotate knob out of the LITE position. Try each burner in succession until all burners have been checked. Installation Instructions Troubleshooting Tips Consumer Support Quality of Flames The combustion quality of burner flames needs to be determined visually. (A) Yellow flames- Call for service (B) Yellow tips on outer cones- Normal for LP gas (C) Soft blue flames-Normal for natural gas If burner flames look like (A), call for service. Normal burner flames should look like (B) or (C), depending on the type of gas you use. With LP gas, some yellow tipping on outer cones is normal. Level the Range Install the oven shelves in the oven and position the range where it will be installed. Leg leveler Lower range Raise range Lower range Raise range (on some models) (on some models) Check for levelness by placing a spirit level or a cup, partially filled with water, on one of the oven shelves. If using a spirit level, take two readings-with the level placed diagonally first in one direction and then the other. Remove the lower oven drawer. See the Care and cleaning of the range section. The front leveling legs can be adjusted from the bottom and the rear legs can be adjusted from the top or the bottom. Use an open-end or adjustable wrench to adjust the leveling legs until the range is level. WARNING: Never completely remove the leveling leg as the range will not be secured to the anti-tip device properly. After the range is level, slide the range away from the wall so that the Anti-Tip device can be installed. 51
-
 1
1 -
2
-
3
-
4
-
5
-
6
-
7
-
8
-
9
-
10
-
11
-
12
-
13
-
14
-
15
-
16
-
17
-
18
-
19
-
20
-
21
-
22
-
23
-
24
-
25
-
26
-
27
-
28
-
29
-
30
-
31
-
32
-
33
-
34
-
35
-
36
-
37
-
38
-
39
-
40
-
41
-
42
-
43
-
44
-
45
-
 46
46 -
 47
47 -
 48
48 -
 49
49 -
 50
50 -
 51
51 -
 52
52 -
 53
53 -
 54
54 -
 55
55 -
 56
56 -
57
-
58
-
59
-
60
-
61
-
62
-
63
-
64
 |
 |
