Gigabyte B650I AORUS ULTRA User Manual - Page 23
M2B_CPU, M2C_SB, M.2 Socket 3 Connectors
 |
View all Gigabyte B650I AORUS ULTRA manuals
Add to My Manuals
Save this manual to your list of manuals |
Page 23 highlights
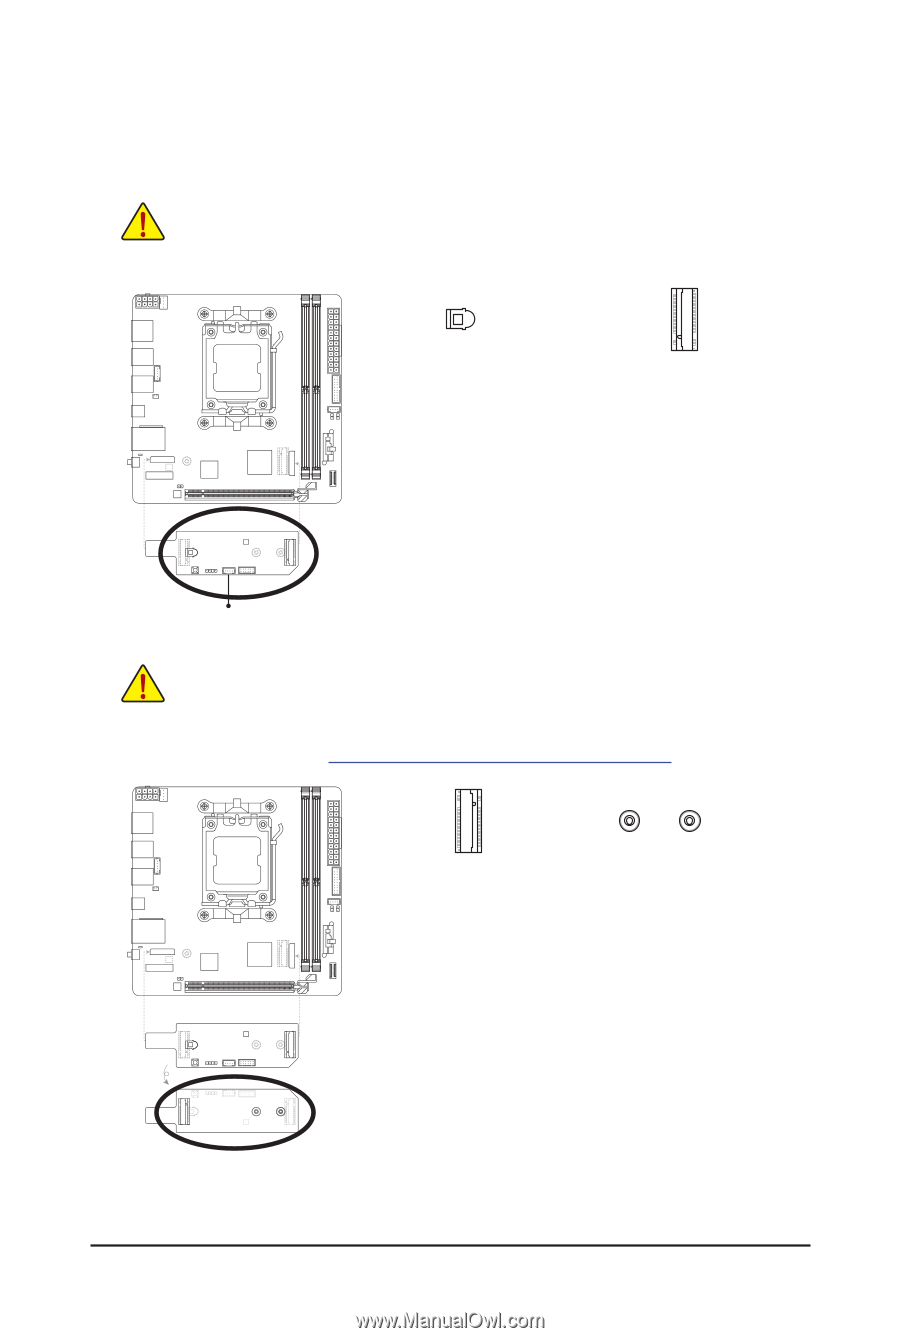
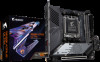
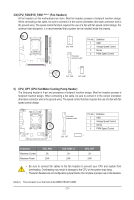
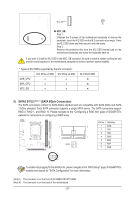
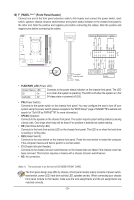
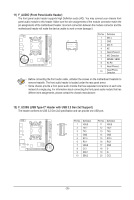
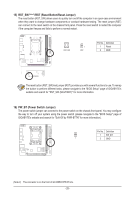
8) M2B_CPU (Note 2)/M2A_CPU (Note 3)/M2C_SB (Note 4) (M.2 Socket 3 Connectors) There are two types of M.2 SSDs: M.2 SATA SSDs and M.2 PCIe SSDs. This motherboard only supports M.2 PCIe SSDs. Please note that an M.2 PCIe SSD cannot be used to create a RAID set with a SATA hard drive. Please navigate to the "Configuring a RAID Set" page of GIGABYTE's website for instructions on configuring a RAID array. We suggest that you use an M.2 SSD without its own heatsink and use the included cooling fan which is connected to the SYS_FAN2 header to achieve optimum system stability. An M.2 SSD that came with heatsink may interfere with other components, which makes it unable to be installed into the M.2 connector. In that case, remove the heatsink from the M.2 SSD. M2B_CPU (Note 2) 80 SYS_FAN2 Follow the steps below to correctly install an M.2 SSD in the M.2 connector. u M2B_CPU: Step 1: Unfasten the screws on the motherboard heatsink diagonally to remove the heatsink. Step 2: Press down on the M.2 EZ-Latch clip to open it and remove the protective film from the thermal pad on the M.2 connector. Insert the M.2 SSD into the M.2 connector at an angle. Press down on the front end of the M.2 SSD and close M.2 EZ-Latch clip to secure the M.2 SSD. Step 3: Remove the protective film from the thermal pad at the bottom of the M.2 heatsink and then replace the heatsink and tighten the screws diagonally. If you want to install an M.2 SSD that came with its own heatsink into the M2B_CPU connector, you have to remove the EZ-Latch clip first and use the provided screw and standoff to fasten the SSD. In that case, the motherboard heatsink may not be able to be installed. Use your own cooling fan instead. && Please visit GIGABYTE's website for details on using M.2 EZ-Latch. Install the M.2 SSD: https://www.gigabyte.com/WebPage/919/M2-ezlatch.html 42 M2A_CPU (Note 3) 60A 80A v M2A_CPU: Step 1: Unfasten the screws on the motherboard heatsink diagonally to remove the heatsink. Use a screwdriver to remove the screw from GC-B650I BTB PLUG. Lift GC-B650I BTB PLUG upwards and remove it. Step 2: Locate the proper mounting hole based on the length of your M.2 SSD drive. If needed, move the standoff to the desired mounting hole. Insert the M.2 SSD into the M.2 connector at an angle. Press the M.2 SSD down and then secure it with the screw. Step 3: Remove the protective film from the thermal pad on the M.2 connector at the bottom of the motherboard. Insert GC-B650I BTB PLUG vertically into the BTB connectors and secure it with the screw. Then screw the motherboard heatsink back on. U (Note 2) The connector is on the front of GC-B650I BTB PLUG. (Note 3) The connector is on the back of GC-B650I BTB PLUG. (Note 4) The connector is on the back of the motherboard. - 23 - _3
-
 1
1 -
2
-
3
-
4
-
5
-
6
-
7
-
8
-
9
-
10
-
11
-
12
-
13
-
14
-
15
-
16
-
17
-
 18
18 -
 19
19 -
 20
20 -
 21
21 -
 22
22 -
 23
23 -
 24
24 -
 25
25 -
 26
26 -
 27
27 -
 28
28 -
29
-
30
-
31
-
32
-
33
-
34
-
35
-
36
-
37
-
38
 |
 |