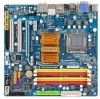
Gigabyte GA-E7AUM-DS2H Manual - Page 88
NVIDIA nForce RAID Controller
 |
View all Gigabyte GA-E7AUM-DS2H manuals
Add to My Manuals
Save this manual to your list of manuals |
Page 88 highlights
Step 3: When a screen as shown in Figure 9 appears, select NVIDIA nForce RAID Controller (Note) and press Next. Figure 9 Step 4: After the driver is loaded, the screen will show the RAID hard drive. Select the RAID hard drive onto which you want to install the operating system and then press Next to continue the OS installation (Figure 10). Figure 10 (Note) The selectable item(s) displayed in Figure 9 may differ according to the RAID or AHCI driver you will install. GA-E7AUM-DS2H Motherboard - 88 -
-
 1
1 -
2
-
3
-
4
-
5
-
6
-
7
-
8
-
9
-
10
-
11
-
12
-
13
-
14
-
15
-
16
-
17
-
18
-
19
-
20
-
21
-
22
-
23
-
24
-
25
-
26
-
27
-
28
-
29
-
30
-
31
-
32
-
33
-
34
-
35
-
36
-
37
-
38
-
39
-
40
-
41
-
42
-
43
-
44
-
45
-
46
-
47
-
48
-
49
-
50
-
51
-
52
-
53
-
54
-
55
-
56
-
57
-
58
-
59
-
60
-
61
-
62
-
63
-
64
-
65
-
66
-
67
-
68
-
69
-
70
-
71
-
72
-
73
-
74
-
75
-
76
-
77
-
78
-
79
-
80
-
81
-
82
-
 83
83 -
 84
84 -
 85
85 -
 86
86 -
 87
87 -
 88
88 -
 89
89 -
 90
90 -
 91
91 -
 92
92 -
 93
93 -
94
-
95
-
96
-
97
-
98
-
99
-
100
-
101
-
102
-
103
-
104
 |
 |

GA-E7AUM-DS2H Motherboard
- 88 -
Step 4:
After the driver is loaded, the screen will show the RAID hard drive. Select the RAID hard drive onto
which you want to install the operating system and then press
Next
to continue the OS installation
(Figure 10).
Figure 9
Figure 10
Step 3:
When a screen as shown in Figure 9 appears, select
NVIDIA nForce RAID Controller
(Note)
and press
Next
.
(Note)
The selectable item(s) displayed in Figure 9 may differ according to the RAID or AHCI driver
you will install.