Gigabyte GA-MA69G-S3H Manual - Page 91
Installing the TV Out Bracket Optional
 |
UPC - 818313003416
View all Gigabyte GA-MA69G-S3H manuals
Add to My Manuals
Save this manual to your list of manuals |
Page 91 highlights
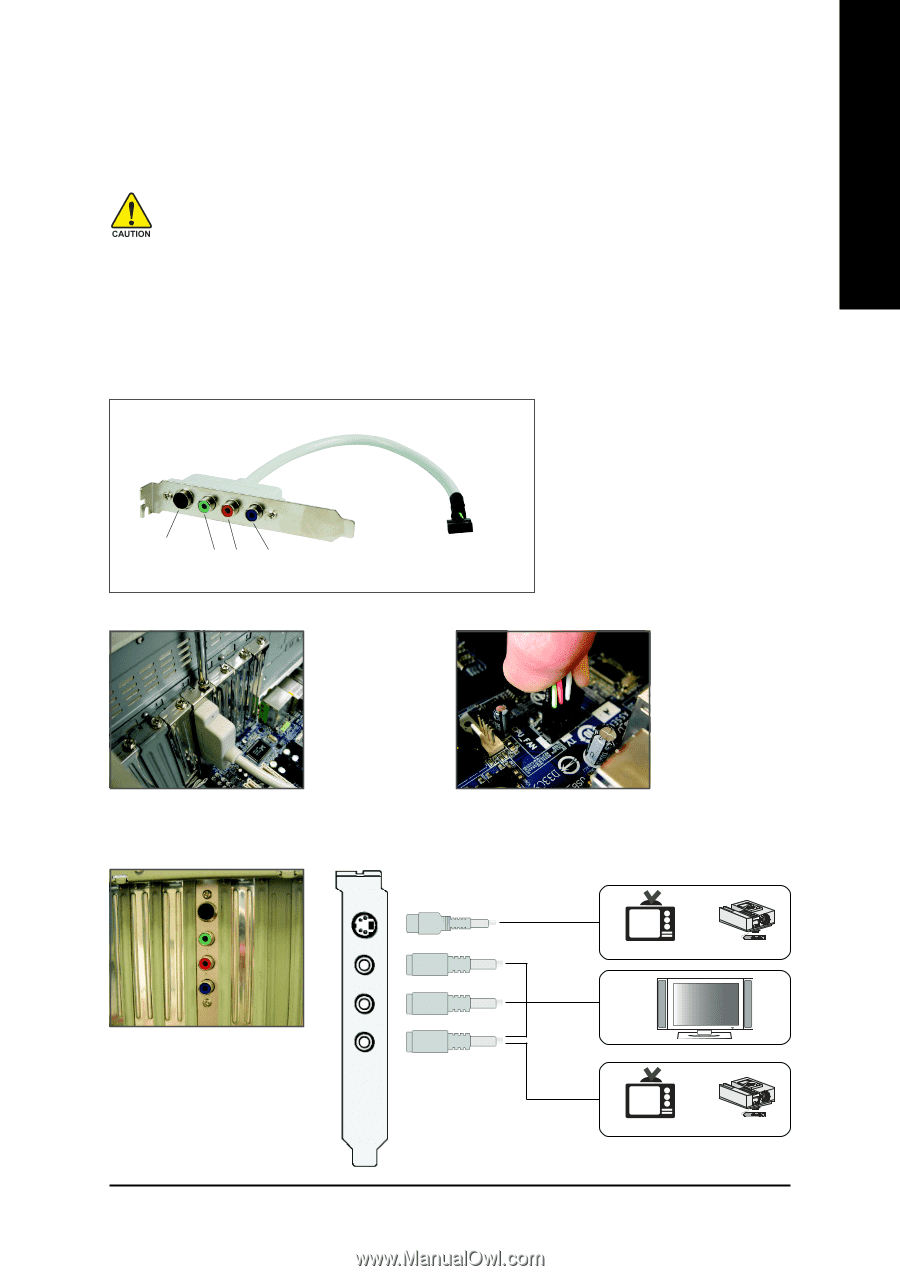
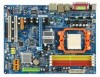
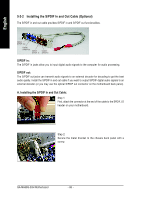
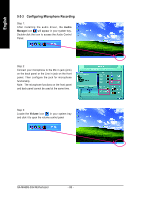
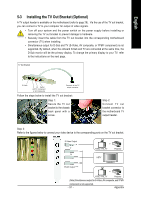
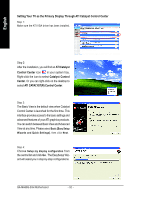
English 5-3 Installing the TV Out Bracket (Optional) A TV output header is available on the motherboard (refer to page 29). Via the use of the TV out bracket, you can connect a TV to your computer for output of video signals. • Turn off your system and the power switch on the power supply before installing or removing the TV out bracket to prevent damage to hardware. • Securely insert the cable from the TV out bracket into the corresponding motherboard connector (TV) when installing. • Simultaneous output for D-Sub and TV (S-Video, AV composite, or YPbPr component) is not supported. By default, when the onboard D-Sub and TV are connected at the same time, the D-Sub monior will be the primary display. To change the primary display to your TV, refer to the instructions on the next page. TV Out Bracket S-Video Y Pr Pb/AV (HDTV Component or AV Composite) Connects to the TV output connector Follow the steps below to install the TV out bracket: Step 1: Secure the TV out bracket to the chassis back panel with a screw. Step 2: Connect TV out bracket connector to the motherboard TV output header. Step 3: Refer to the figures below to connect your video device to the corresponding ports on the TV out bracket. S-Video Output Y Pr or NTSC / PAL TV Projector HDTV Pb/AV Output (Note) or NTSC / PAL TV Projector (Note) Simultaneous output for S-Video, AV composite, and YPbPr component is not supported. - 91 - Appendix
-
 1
1 -
2
-
3
-
4
-
5
-
6
-
7
-
8
-
9
-
10
-
11
-
12
-
13
-
14
-
15
-
16
-
17
-
18
-
19
-
20
-
21
-
22
-
23
-
24
-
25
-
26
-
27
-
28
-
29
-
30
-
31
-
32
-
33
-
34
-
35
-
36
-
37
-
38
-
39
-
40
-
41
-
42
-
43
-
44
-
45
-
46
-
47
-
48
-
49
-
50
-
51
-
52
-
53
-
54
-
55
-
56
-
57
-
58
-
59
-
60
-
61
-
62
-
63
-
64
-
65
-
66
-
67
-
68
-
69
-
70
-
71
-
72
-
73
-
74
-
75
-
76
-
77
-
78
-
79
-
80
-
81
-
82
-
83
-
84
-
85
-
 86
86 -
 87
87 -
 88
88 -
 89
89 -
 90
90 -
 91
91 -
 92
92 -
 93
93 -
 94
94 -
 95
95 -
 96
96 -
97
-
98
-
99
-
100
-
101
-
102
-
103
-
104
 |
 |