HTC Touch Pro2 T-Mobile User Manual - Page 204
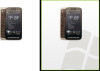
Menu Panel, Touch Focus / Auto‑focus indicator, Virtual Camera button, Template Selector icon
 |
View all HTC Touch Pro2 T-Mobile manuals
Add to My Manuals
Save this manual to your list of manuals |
Page 204 highlights
204 Camera and Multimedia 3 Touch Focus / Auto-focus indicator. See "Using the focus" for details. 4 Menu. Open the Menu Panel. See "Menu Panel" for details. 5 Virtual Camera button. Activates the auto-focus and functions as the shutter release button. 6 Template Selector icon. In Picture Theme mode, tap to select another frame. 7 Progress indicator. In Picture Theme and Panorama modes, this shows the number of consecutive shots. Menu Panel The Menu panel lets you quickly adjust common camera settings and provides access to more advanced camera settings. To open the Menu panel, tap on the Camera screen, and then tap . To adjust a setting, keep tapping a button, for instance, White Balance, to cycle through the available settings. Note The available menu panel buttons depend on the selected capture mode. Icon Function Select the white balance setting according to the current lighting condition to capture colors more accurately. Open the Brightness bar and adjust the brightness level. Tap outside the Brightness bar to apply the change. Set the ISO level manually to 100, 200, 400, or 800, or set it back to AUTO. Higher ISO numbers are better for taking pictures in low light conditions. Note The camera automatically adjusts the ISO level up to 400 only. Set the self-timer to 2 seconds, 10 seconds, or Off when in Photo or Contacts Picture mode. Open the advanced camera settings. See "Setting advanced options" for details.
-
 1
1 -
2
-
3
-
4
-
5
-
6
-
7
-
8
-
9
-
10
-
11
-
12
-
13
-
14
-
15
-
16
-
17
-
18
-
19
-
20
-
21
-
22
-
23
-
24
-
25
-
26
-
27
-
28
-
29
-
30
-
31
-
32
-
33
-
34
-
35
-
36
-
37
-
38
-
39
-
40
-
41
-
42
-
43
-
44
-
45
-
46
-
47
-
48
-
49
-
50
-
51
-
52
-
53
-
54
-
55
-
56
-
57
-
58
-
59
-
60
-
61
-
62
-
63
-
64
-
65
-
66
-
67
-
68
-
69
-
70
-
71
-
72
-
73
-
74
-
75
-
76
-
77
-
78
-
79
-
80
-
81
-
82
-
83
-
84
-
85
-
86
-
87
-
88
-
89
-
90
-
91
-
92
-
93
-
94
-
95
-
96
-
97
-
98
-
99
-
100
-
101
-
102
-
103
-
104
-
105
-
106
-
107
-
108
-
109
-
110
-
111
-
112
-
113
-
114
-
115
-
116
-
117
-
118
-
119
-
120
-
121
-
122
-
123
-
124
-
125
-
126
-
127
-
128
-
129
-
130
-
131
-
132
-
133
-
134
-
135
-
136
-
137
-
138
-
139
-
140
-
141
-
142
-
143
-
144
-
145
-
146
-
147
-
148
-
149
-
150
-
151
-
152
-
153
-
154
-
155
-
156
-
157
-
158
-
159
-
160
-
161
-
162
-
163
-
164
-
165
-
166
-
167
-
168
-
169
-
170
-
171
-
172
-
173
-
174
-
175
-
176
-
177
-
178
-
179
-
180
-
181
-
182
-
183
-
184
-
185
-
186
-
187
-
188
-
189
-
190
-
191
-
192
-
193
-
194
-
195
-
196
-
197
-
198
-
 199
199 -
 200
200 -
 201
201 -
 202
202 -
 203
203 -
 204
204 -
 205
205 -
 206
206 -
 207
207 -
 208
208 -
 209
209 -
210
-
211
-
212
-
213
-
214
-
215
-
216
-
217
-
218
-
219
-
220
-
221
-
222
-
223
-
224
-
225
-
226
-
227
-
228
-
229
-
230
-
231
-
232
-
233
-
234
-
235
-
236
-
237
-
238
-
239
-
240
-
241
-
242
-
243
-
244
-
245
-
246
-
247
-
248
-
249
-
250
-
251
-
252
-
253
-
254
-
255
-
256
-
257
-
258
-
259
-
260
-
261
-
262
-
263
-
264
-
265
 |
 |
