HealthRider H400 Treadmill English Manual - Page 7
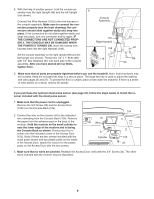
Be careful not to over, tighten the Latch Screws., Make sure that the Extension Legs 86 re, main
 |
View all HealthRider H400 Treadmill manuals
Add to My Manuals
Save this manual to your list of manuals |
Page 7 highlights
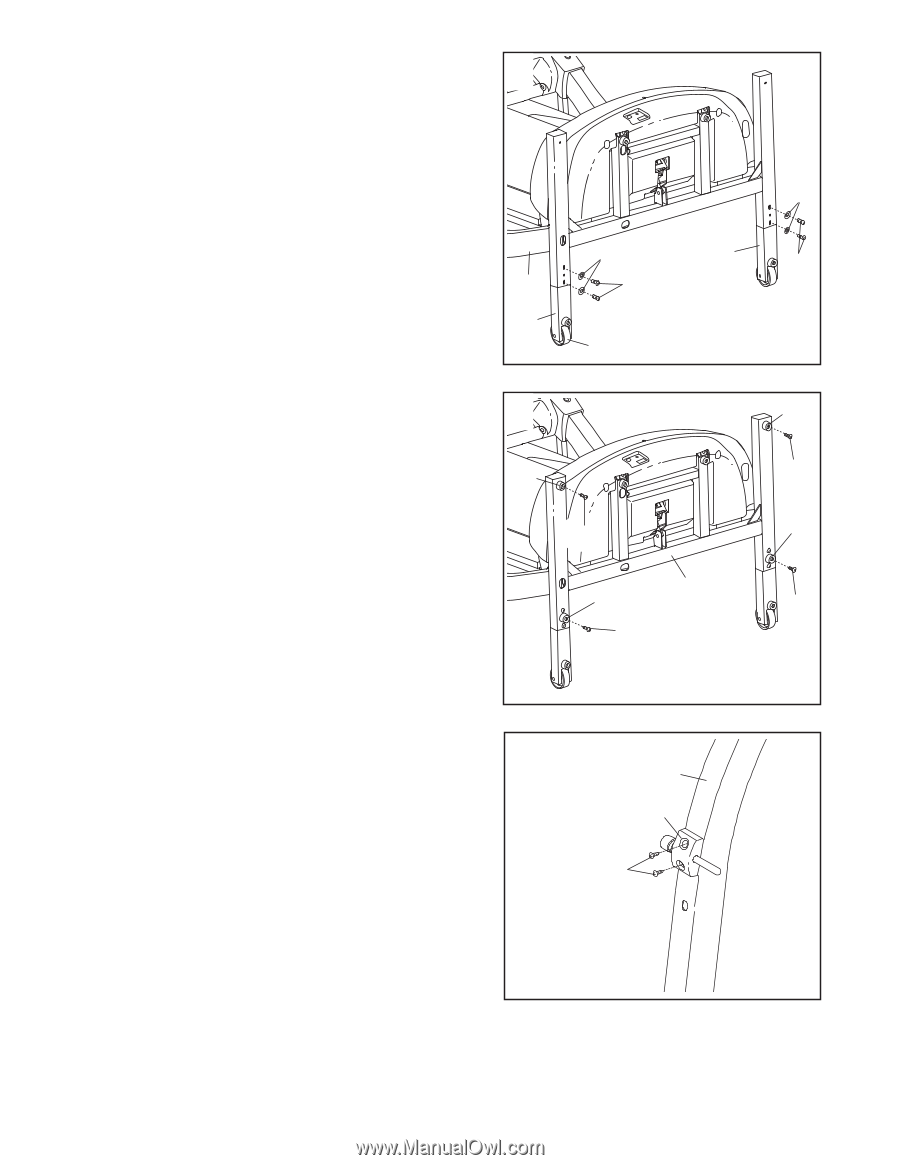
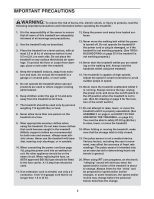
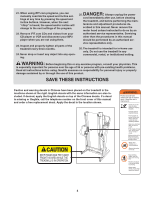
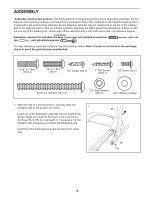
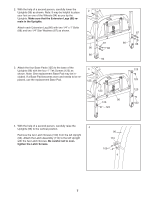
2. With the help of a second person, carefully lower the Uprights (96) as shown. Note: It may be helpful to place 2 your foot on one of the Wheels (94) as you tip the Uprights. Make sure that the Extension Legs (86) re- main in the Uprights. Attach each Extension Leg (86) with two 1/4" x 1" Bolts (88) and two 1/4" Star Washers (87) as shown. 87 87 96 88 86 94 86 88 3. Attach the four Base Pads (125) to the base of the Uprights (96) with the four 1" Tek Screws (123) as 3 125 shown. Note: One replacement Base Pad may be in- cluded. If a Base Pad becomes worn and needs to be re- placed, use the replacement Base Pad. 125 123 123 125 96 125 123 123 4. With the help of a second person, carefully raise the Uprights (96) to the vertical position. 4 Remove the two Latch Screws (109) from the left Upright (96). Attach the Latch Assembly (110) to the left Upright with the two Latch Screws. Be careful not to overtighten the Latch Screws. 96 110 109 7
-
 1
1 -
 2
2 -
 3
3 -
 4
4 -
 5
5 -
 6
6 -
 7
7 -
 8
8 -
 9
9 -
 10
10 -
 11
11 -
 12
12 -
13
-
14
-
15
-
16
-
17
-
18
-
19
-
20
-
21
-
22
-
23
-
24
-
25
-
26
-
27
-
28
-
29
-
30
-
31
-
32
-
33
-
34
 |
 |