HP 1320n HP LaserJet 1320nw - (Multiple Language) Wireless Getting Started Gui - Page 29
Join a Specific Network, Network Name SSID - laserjet configuration page
 |
UPC - 829160407364
View all HP 1320n manuals
Add to My Manuals
Save this manual to your list of manuals |
Page 29 highlights
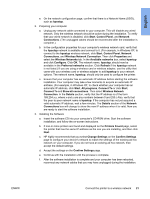
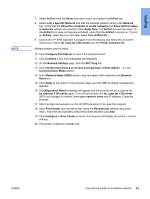
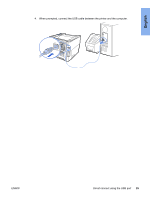
English NOTE 7. Select AirPort from the Show drop-down menu and select the AirPort tab. 8. Select Join a Specific Network and add the wireless network name in the Network box. Verify that the Allow this computer to create networks and Show AirPort status in menu bar options are checked. Click Apply Now. The AirPort process launches. (If the AirPort icon does not become activated, verify that the AirPort is turned on. To turn on AirPort, select the icon, and then select Turn AirPort On.) 9. Launch the HP WPS Assistant X program from the desktop and follow the on-screen instructions. Select hp LaserJet 1320 series from the Printer selection list. Multiple printers may be listed. 10. Click Configure Print Server to launch the default browser. 11. Click Continue if any error messages are displayed. 12. On the Network Settings page, click the 802.11b/g tab. 13. Click Infrastructure (Using an access point gateway or Base Station ...) in the Communication Mode section. 14. In the Network Name (SSID) section, type the name of the network in the Network Name box. 15. Click Apply at the bottom of the browser page, and click OK if a dialog message box appears. 16. A Configuration Result message will appear and the browser will try to access the hp LaserJet 1320 series again. This will fail because the hp LaserJet 1320 series WPS has changed to network name your network name and IP address. Close the browser. 17. Click the Right Arrow button on the HP WPS Assistant X to close the program. 18. Open Print Center and add the printer using the Rendezvous network drop-down menu. From the list of printers, select the printer and then click Add. 19. Click Configure in Print Center to launch the browser and display the printer's current settings. 20. The printer is ready for wireless use. ENWW Connect the printer to a wireless network 23
-
 1
1 -
2
-
3
-
4
-
5
-
6
-
7
-
8
-
9
-
10
-
11
-
12
-
13
-
14
-
15
-
16
-
17
-
18
-
19
-
20
-
21
-
22
-
23
-
 24
24 -
 25
25 -
 26
26 -
 27
27 -
 28
28 -
 29
29 -
 30
30 -
 31
31 -
 32
32 -
 33
33 -
 34
34 -
35
-
36
-
37
-
38
-
39
-
40
-
41
-
42
-
43
-
44
-
45
-
46
-
47
-
48
-
49
-
50
-
51
-
52
-
53
-
54
-
55
-
56
-
57
-
58
-
59
-
60
-
61
-
62
-
63
-
64
 |
 |
