HP 4020 HP Designjet 4020 and 4520 Printer Series - User's Guide: English - Page 111
Align the printheads, Reseat, Replace, Printer configuration, Auto printhead alignment
 |
UPC - 884420909606
View all HP 4020 manuals
Add to My Manuals
Save this manual to your list of manuals |
Page 111 highlights
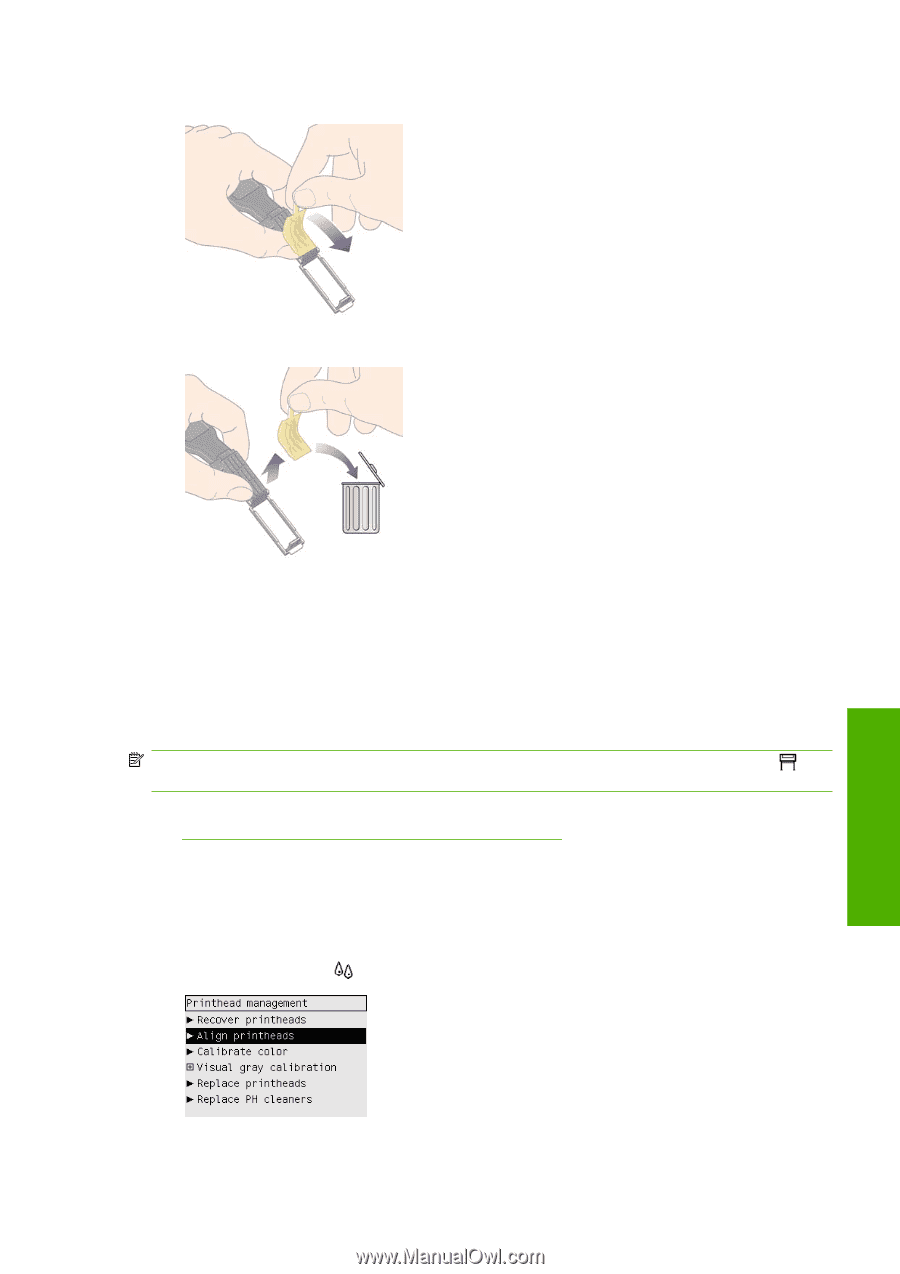
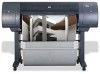
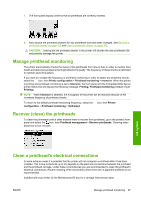
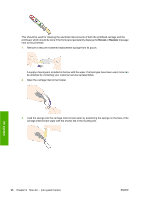
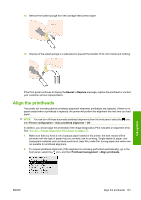
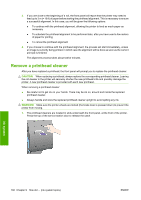
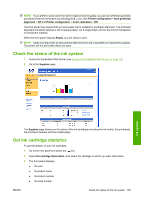
12. Remove the soiled sponge from the carriage interconnect wiper. 13. Dispose of the soiled sponge in a safe place to prevent the transfer of ink onto hands and clothing. Ink system If the front panel continues to display the Reseat or Replace message, replace the printhead or contact your customer service representative. Align the printheads The printer will normally perform printhead alignment whenever printheads are replaced. If there is no paper loaded when a printhead is replaced, the printer will perform the alignment the next time you load paper. NOTE: You can turn off these automatic printhead alignments from the front panel: select the icon, then Printer configuration > Auto printhead alignment > Off. In addition, you should align the printheads if the Image Diagnostics Print indicates an alignment error. See How do I... (Image Diagnostics Print topics) on page 117. 1. Make sure that you have a roll of opaque paper loaded in the printer; the best results will be achieved with the type of paper that you normally use for printing. Single sheets of paper, and transparent materials such as translucent bond, clear film, matte film, tracing paper and vellum are not suitable for printhead alignment. 2. To request printhead alignment (if the alignment is not being performed automatically), go to the front panel, select the icon, and then Printhead management > Align printheads. ENWW Align the printheads 101
-
 1
1 -
2
-
3
-
4
-
5
-
6
-
7
-
8
-
9
-
10
-
11
-
12
-
13
-
14
-
15
-
16
-
17
-
18
-
19
-
20
-
21
-
22
-
23
-
24
-
25
-
26
-
27
-
28
-
29
-
30
-
31
-
32
-
33
-
34
-
35
-
36
-
37
-
38
-
39
-
40
-
41
-
42
-
43
-
44
-
45
-
46
-
47
-
48
-
49
-
50
-
51
-
52
-
53
-
54
-
55
-
56
-
57
-
58
-
59
-
60
-
61
-
62
-
63
-
64
-
65
-
66
-
67
-
68
-
69
-
70
-
71
-
72
-
73
-
74
-
75
-
76
-
77
-
78
-
79
-
80
-
81
-
82
-
83
-
84
-
85
-
86
-
87
-
88
-
89
-
90
-
91
-
92
-
93
-
94
-
95
-
96
-
97
-
98
-
99
-
100
-
101
-
102
-
103
-
104
-
105
-
 106
106 -
 107
107 -
 108
108 -
 109
109 -
 110
110 -
 111
111 -
 112
112 -
 113
113 -
 114
114 -
 115
115 -
 116
116 -
117
-
118
-
119
-
120
-
121
-
122
-
123
-
124
-
125
-
126
-
127
-
128
-
129
-
130
-
131
-
132
-
133
-
134
-
135
-
136
-
137
-
138
-
139
-
140
-
141
-
142
-
143
-
144
-
145
-
146
-
147
-
148
-
149
-
150
-
151
-
152
-
153
-
154
-
155
-
156
-
157
-
158
-
159
-
160
-
161
-
162
-
163
-
164
-
165
-
166
-
167
-
168
-
169
-
170
-
171
-
172
-
173
-
174
-
175
-
176
-
177
-
178
-
179
-
180
-
181
-
182
-
183
-
184
-
185
-
186
-
187
-
188
-
189
-
190
-
191
-
192
-
193
-
194
-
195
-
196
-
197
-
198
-
199
-
200
-
201
-
202
-
203
-
204
-
205
-
206
-
207
-
208
-
209
-
210
-
211
-
212
-
213
-
214
-
215
-
216
-
217
-
218
-
219
-
220
-
221
-
222
-
223
-
224
-
225
-
226
-
227
-
228
-
229
-
230
-
231
-
232
-
233
-
234
-
235
 |
 |