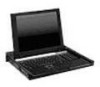
HP 5600 TFT5600 Rackmount Keyboard and Monitor (RKM) User Guide - Page 18
Hook the tabs on the mounting rail into the appropriate holes on the rear of, rear of the rack. - rkm rails
 |
UPC - 720591607586
View all HP 5600 manuals
Add to My Manuals
Save this manual to your list of manuals |
Page 18 highlights
Installation 2. Install the mounting rails with slides. a. Insert one cage nut (1) into the hole marked with the rack template on the rear of the rack. b. Hook the tabs on the mounting rail into the appropriate holes on the rear of the rack, and insert one screw (2). IMPORTANT: Be sure to align the front screw holes when attaching the mounting rail to the rear of the rack. c. Insert two M-6 screws into the holes at the front of the rack, and then tighten (3). d. Repeat steps 2a through 2c to install the other mounting rail. 1 3 2 Figure 2-2: Installing mounting rails to the rear and front of the rack HP TFT5600 Rackmount Keyboard and Monitor (RKM) User Guide 2-3
-
 1
1 -
2
-
3
-
4
-
5
-
6
-
7
-
8
-
9
-
10
-
11
-
12
-
 13
13 -
 14
14 -
 15
15 -
 16
16 -
 17
17 -
 18
18 -
 19
19 -
 20
20 -
 21
21 -
 22
22 -
 23
23 -
24
-
25
-
26
-
27
-
28
-
29
-
30
-
31
-
32
-
33
-
34
-
35
-
36
-
37
-
38
-
39
-
40
-
41
-
42
-
43
-
44
-
45
-
46
-
47
-
48
-
49
-
50
-
51
-
52
-
53
-
54
-
55
-
56
-
57
-
58
-
59
-
60
-
61
-
62
-
63
 |
 |

Installation
HP TFT5600 Rackmount Keyboard and Monitor (RKM) User Guide
2-3
2.
Install the mounting rails with slides.
a.
Insert one cage nut (1) into the hole marked with the rack template on the
rear of the rack.
b.
Hook the tabs on the mounting rail into the appropriate holes on the rear of
the rack, and insert one screw (2).
IMPORTANT:
Be sure to align the front screw holes when attaching the mounting rail to
the rear of the rack.
c.
Insert two M-6 screws into the holes at the front of the rack, and then
tighten (3).
d.
Repeat steps 2a through 2c to install the other mounting rail.
2
1
3
Figure 2-2:
Installing mounting rails to the rear and
front of the rack