HP 5600 TFT5600 Rackmount Keyboard and Monitor (RKM) User Guide - Page 22
Place the tray back into the rack., Slide the locking bar 1 to unlock.
 |
UPC - 720591607586
View all HP 5600 manuals
Add to My Manuals
Save this manual to your list of manuals |
Page 22 highlights
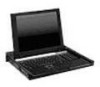
Installation 7. Place the tray back into the rack. a. Slide the locking bar (1) to unlock. IMPORTANT: If the TFT5600 RKM is not properly aligned with other rack-mounted devices when installed, cosmetic damage to the top of the unit can occur due to interference. Leave protective sheet on the unit while adjusting. b. Carefully push the tray (2) into the rack. IMPORTANT: If the TFT5600 RKM interferes with the other rack-mounted devices, above or below, loosen the M-6 screws on the mounting rails to make appropriate adjustments (See Figure 2-2). Figure 2-7: Placing tray back into the rack HP TFT5600 Rackmount Keyboard and Monitor (RKM) User Guide 2-7
-
 1
1 -
2
-
3
-
4
-
5
-
6
-
7
-
8
-
9
-
10
-
11
-
12
-
13
-
14
-
15
-
16
-
 17
17 -
 18
18 -
 19
19 -
 20
20 -
 21
21 -
 22
22 -
 23
23 -
 24
24 -
 25
25 -
 26
26 -
 27
27 -
28
-
29
-
30
-
31
-
32
-
33
-
34
-
35
-
36
-
37
-
38
-
39
-
40
-
41
-
42
-
43
-
44
-
45
-
46
-
47
-
48
-
49
-
50
-
51
-
52
-
53
-
54
-
55
-
56
-
57
-
58
-
59
-
60
-
61
-
62
-
63
 |
 |

Installation
HP TFT5600 Rackmount Keyboard and Monitor (RKM) User Guide
2-7
7.
Place the tray back into the rack.
a.
Slide the locking bar (1) to unlock.
IMPORTANT:
If the TFT5600 RKM is not properly aligned with other rack-mounted
devices when installed, cosmetic damage to the top of the unit can occur due to
interference. Leave protective sheet on the unit while adjusting.
b.
Carefully push the tray (2) into the rack.
IMPORTANT:
If the TFT5600 RKM interferes with the other rack-mounted devices,
above or below, loosen the M-6 screws on the mounting rails to make appropriate
adjustments (See Figure 2-2).
Figure 2-7:
Placing tray back into the rack