HP Color LaserJet 5550 HP Color LaserJet 5550 series - User Guide - Page 78
Setting the subnet mask, Setting the syslog server, MANUAL SETTINGS, MANUAL, IP ADDRESS, Ready, MENUS
 |
View all HP Color LaserJet 5550 manuals
Add to My Manuals
Save this manual to your list of manuals |
Page 78 highlights
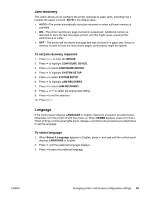
Note Note 10. Press to select MANUAL SETTINGS. 11. Press to highlight MANUAL. 12. Press to highlight IP ADDRESS. 13. Press to select IP ADDRESS. The first of three sets of numbers is highlighted. If there is not a number highlighted, a highlighted empty underscore appears. 14. Press or to increase or decrease the number for configuring the IP address. 15. Press to move to the next set of numbers. 16. Repeat steps 15 and 16 until the correct IP address is entered. 17. Press the MENU button to return to the Ready state. Setting the subnet mask 1. Press MENU to enter the MENUS. 2. Press to highlight CONFIGURE DEVICE. 3. Press to select CONFIGURE DEVICE. 4. Press to highlight I/O. 5. Press to select I/O. 6. Press to highlight EIO X (where X = 1, 2, or 3). 7. Press to select EIO X. 8. Press to highlight TCP/IP. 9. Press to select TCP/IP. 10. Press to highlight MANUAL SETTINGS. 11. Press to select MANUAL SETTINGS. 12. Press to highlight SUBNET MASK. 13. Press to select SUBNET MASK. The first of three sets of numbers is highlighted. 14. Press or to increase or decrease the number for configuring the subnet mask. 15. Press to move to the next set of numbers. 16. Repeat steps 14 and 15 until the correct subnet mask is entered. 17. Press the MENU button to return to the Ready state. Setting the syslog server 1. Press MENU to enter the MENUS. 2. Press to highlight CONFIGURE DEVICE. 3. Press to select CONFIGURE DEVICE. 4. Press to highlight I/O. 5. Press to select I/O. 64 Chapter 3 I/O Configuration ENWW
-
 1
1 -
2
-
3
-
4
-
5
-
6
-
7
-
8
-
9
-
10
-
11
-
12
-
13
-
14
-
15
-
16
-
17
-
18
-
19
-
20
-
21
-
22
-
23
-
24
-
25
-
26
-
27
-
28
-
29
-
30
-
31
-
32
-
33
-
34
-
35
-
36
-
37
-
38
-
39
-
40
-
41
-
42
-
43
-
44
-
45
-
46
-
47
-
48
-
49
-
50
-
51
-
52
-
53
-
54
-
55
-
56
-
57
-
58
-
59
-
60
-
61
-
62
-
63
-
64
-
65
-
66
-
67
-
68
-
69
-
70
-
71
-
72
-
 73
73 -
 74
74 -
 75
75 -
 76
76 -
 77
77 -
 78
78 -
 79
79 -
 80
80 -
 81
81 -
 82
82 -
 83
83 -
84
-
85
-
86
-
87
-
88
-
89
-
90
-
91
-
92
-
93
-
94
-
95
-
96
-
97
-
98
-
99
-
100
-
101
-
102
-
103
-
104
-
105
-
106
-
107
-
108
-
109
-
110
-
111
-
112
-
113
-
114
-
115
-
116
-
117
-
118
-
119
-
120
-
121
-
122
-
123
-
124
-
125
-
126
-
127
-
128
-
129
-
130
-
131
-
132
-
133
-
134
-
135
-
136
-
137
-
138
-
139
-
140
-
141
-
142
-
143
-
144
-
145
-
146
-
147
-
148
-
149
-
150
-
151
-
152
-
153
-
154
-
155
-
156
-
157
-
158
-
159
-
160
-
161
-
162
-
163
-
164
-
165
-
166
-
167
-
168
-
169
-
170
-
171
-
172
-
173
-
174
-
175
-
176
-
177
-
178
-
179
-
180
-
181
-
182
-
183
-
184
-
185
-
186
-
187
-
188
-
189
-
190
-
191
-
192
-
193
-
194
-
195
-
196
-
197
-
198
-
199
-
200
-
201
-
202
-
203
-
204
-
205
-
206
-
207
-
208
-
209
-
210
-
211
-
212
-
213
-
214
-
215
-
216
-
217
-
218
-
219
-
220
-
221
-
222
-
223
-
224
-
225
-
226
-
227
-
228
-
229
-
230
-
231
-
232
-
233
-
234
-
235
-
236
-
237
-
238
-
239
-
240
-
241
-
242
-
243
-
244
-
245
-
246
-
247
-
248
-
249
-
250
-
251
-
252
-
253
-
254
-
255
-
256
-
257
-
258
-
259
-
260
-
261
-
262
-
263
-
264
-
265
-
266
-
267
-
268
-
269
-
270
-
271
-
272
-
273
-
274
-
275
-
276
-
277
-
278
-
279
-
280
-
281
-
282
-
283
-
284
-
285
-
286
-
287
-
288
-
289
-
290
-
291
-
292
-
293
-
294
 |
 |