HP EliteBook 8770w Displaying a custom logo during bootup of HP commercial not - Page 8
Adding a custom logo to the HP_Tools partition
 |
View all HP EliteBook 8770w manuals
Add to My Manuals
Save this manual to your list of manuals |
Page 8 highlights
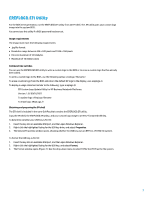
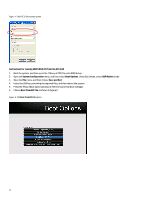
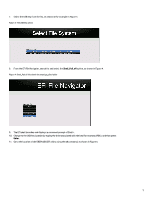
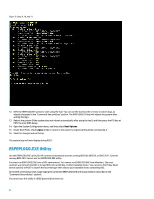
C:\> EREPLOGO /e HPQ EFI BIOS Logo Replace - Version 1.01 Copyright 2008 - Hewlett-Packard Corporation Logo erased from EFI BIOS Done. Adding a custom logo to the HP_Tools partition Instead of using one of the EREPLOGO utilities to replace the default HP logo, you can also place your custom image in a specific location in the HP_Tools partition. 1. Select the custom logo image you want to use. For BIOS 09, BIOS 2011, and BIOS 2012, it must be in .jpg file format. For BIOS 08 it must be in .bmp file format. 2. In the Hewlett-Packard folder on the HP_TOOLS partition, create a folder called "Logo." 3. Save the image in the \Hewlett-Packard\Logo folder. 4. Rename the image as HPlogo.jpg (or HPlogo.bmp for BIOS 08 systems). 5. Reboot the computer, and then press the f10 key at POST to enter the BIOS Setup. 6. Select System Configuration, and then select Boot Options. 7. Select Custom Logo, and then select Enabled. 8. For BIOS 2011 and BIOS 2012 generations, clear the checkbox for FastBoot. 9. Save the changes and exit Setup. The custom logo will now display during POST. Priority order of the BIOS-replaced image and the custom logo in the HP_Tools partition By default, the HP logo is displayed during POST. Because it is possible to have a custom logo in the HP_Tools partition and a custom logo burned into the FLASH ROM (by using one of the EREPLOGO utilities), it is important to understand the priority display order of these three logo images. Systems running BIOS 08 In the f10 menu there is a "Custom Logo" option as shown in Figure 6. If you disable this option: • Only the default HP logo will display. • The image set by EREPLOGO.EXE will not display. • Any image copied under HP_TOOLS partition (for example, "Hewlett-Packard\Logo\HPLogo.jpg") will not display. 8
-
 1
1 -
2
-
 3
3 -
 4
4 -
 5
5 -
 6
6 -
 7
7 -
 8
8 -
 9
9 -
 10
10
 |
 |