HP G4050 User Guide
HP G4050 - ScanJet Photo Scanner Manual
 |
UPC - 882780686793
View all HP G4050 manuals
Add to My Manuals
Save this manual to your list of manuals |
HP G4050 manual content summary:
- HP G4050 | User Guide - Page 1
HP Scanjet G4000 series User Guide - HP G4050 | User Guide - Page 2
- HP G4050 | User Guide - Page 3
maintenance 17 Clean the scanner glass 17 Clean the transparent materials adapter (TMA 17 Order maintenance and scanner supplies 17 3 Troubleshooting 18 Scanner initialization or hardware problems 18 Scanner operation problems 19 Slides, negatives, and TMA issues 22 Index...24 User Guide 1 - HP G4050 | User Guide - Page 4
to use the scanner This manual describes how to use the HP Scanjet G4000 series Photo Scanners and their accessories. This section presents an overview of the scanner and how to use it. ● Where to get additional information ● Accessibility ● How to use the HP Photosmart software ● Front panel and - HP G4050 | User Guide - Page 5
Files\Common Files\Hewlett-Packard \Scanjet\G4000\. 2. Double-click hpbdu.exe. The HP Button Disable Utility dialog box is displayed. 3. Select the scanner, and then click Enable Buttons or Disable Buttons. How to use the HP Photosmart software When you install the HP Photosmart software, two icons - HP G4050 | User Guide - Page 6
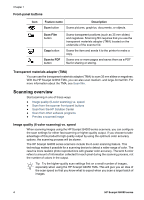
mm slides or negatives. With the HP Scanjet G4050 TMA, you can also scan medium- and large-format film. For more information about the TMA, see Scan film. Scanning overview Start scanning in one of these ways: ● Image quality (6-color scanning) vs. speed ● Scan from the scanner front-panel buttons - HP G4050 | User Guide - Page 7
Solution Center. 2. If you have installed more than one HP device, click the tab for the scanner. The HP Solution Center shows only the functions, settings, and support options that are appropriate for the selected HP device. Scan from other software programs You can scan an image directly into one - HP G4050 | User Guide - Page 8
face down on the scanner glass, as indicated by the reference marks, and then close the lid. 2. Press the Scan button ( ). The What are you scanning? dialog box appears. 3. Under the What are you scanning? heading, click Picture. 4. Select Scan originals from glass. 6 HP Scanjet G4000 series - HP G4050 | User Guide - Page 9
to the HP Photosmart software by default. HP Scanning software Photos from the Basic menu of the HP Scanning software scanner scans an original document to the destination that is selected in the HP HP Solution Center. Also see Preview a scanned image. 1. Place the original face down on the scanner - HP G4050 | User Guide - Page 10
or page. 6. When you are finished with all pages, click Done. After you click Done, the software sends the scanned file to the specified location. Note If Show Preview was selected, you must click the or click No to send the scanned page(s) to the specified location. 8 HP Scanjet G4000 series - HP G4050 | User Guide - Page 11
which model you have? The model number appears on your scanner lid. HP Scanjet G4010 HP Scanjet G4050 Scan positives (such as 35 mm slides) or Scan positives (such as 35 mm slides) or negatives - HP Scanjet G4010 negatives - HP Scanjet G4050 For tips about scanning film, see Tips for scanning - HP G4050 | User Guide - Page 12
Chapter 1 Note Check the model number on the scanner lid. The steps below are for the HP Scanjet G4010. If you are using an HP Scanjet G4050, see Scan positives (such as 35 mm slides) or negatives - HP Scanjet G4050. 1. Open the scanner lid and remove the TMA cover by pulling the cover up. 2. - HP G4050 | User Guide - Page 13
storage, and then replace the TMA cover. Scan positives (such as 35 mm slides) or negatives - HP Scanjet G4050 The transparent materials adapter (TMA) is built into the scanner lid. Slides, negatives, and medium- and large-format film have their own unique media holders called User Guide 11 - HP G4050 | User Guide - Page 14
media for scanning. Note Check the model number on the scanner lid. The steps below are for the HP Scanjet G4050. If you are using an HP Scanjet G4010, see Scan positives (such as 35 mm slides) or negatives - HP Scanjet G4010. 1. Open the scanner lid and remove the TMA cover by releasing the latch - HP G4050 | User Guide - Page 15
If you are scanning negatives, select Scan negatives using the Transparent Materials Adapter (TMA). If you want to preview the scanned picture, select the Show Preview check box on the screen, or begin the scan from HP Solution Center. 9. Click Scan. 10. Follow the instructions on the screen to - HP G4050 | User Guide - Page 16
, and then scan as described in Scan pictures. ● When scanning a 35 mm slide or negative, the scanner software automatically enlarges the image to approximately 10 cm x 15 cm (4 x 6 inches). Medium and large format negatives are also scaled to a larger final size. If you want the final image to be - HP G4050 | User Guide - Page 17
pages, click Done. After you click Done, the software sends the scanned file to the specified location. E-mail a document or picture Follow these instructions to scan pictures or documents from the scanner glass and send the scans to a supported e-mail program as an attachment. 1. Place the original - HP G4050 | User Guide - Page 18
HP Solution Center software from your desktop icon or from the Start menu, click the scanner HP Solution Center and select the device tab. Click Settings, point to Scan Settings, and then select the type of settings you want to view or change. To get help with settings, click Help. 16 HP Scanjet - HP G4050 | User Guide - Page 19
cable to the scanner. Note For instructions about how to clean the underside of the scanner glass, visit www.hp.com/support. Clean the scanner supplies You can purchase maintenance parts online at the scanner support Web site at www.hp.com/buy/parts or from your local HP dealer. User Guide - HP G4050 | User Guide - Page 20
● Scanner operation problems ● Slides, negatives, and TMA issues Scanner initialization or hardware problems This section contains solutions for initialization and hardware problems. ● Reset the scanner ● Test the scanner hardware ● Scanner has stopped working properly ● Additional troubleshooting - HP G4050 | User Guide - Page 21
information about the HP Scanjet G4000 series Photo Scanner hardware as well as information about the HP Photosmart software and HP Scanning software. Also, see Scan troubleshooting in the general Troubleshooting and support section of the Help. Scanner operation problems ● Scanner will not turn - HP G4050 | User Guide - Page 22
Panel, select Scanners and Cameras, and then select your scanner model from the list. - Open Properties, and then click the Events tab. From the Scanner events list, select Scan Document button press. - Ensure that the HP Scanning software option is selected. - Windows 98 and Windows 2000: Ensure - HP G4050 | User Guide - Page 23
Scan with higher bit depths check box and the Scan with optimum color accuracy check boxes. ● The resolution might be set too high. Reset the resolution to a lower level. The scanner software automatically selects the box is displayed. Use the drop-down list to change the resolution. User Guide 21 - HP G4050 | User Guide - Page 24
scanner software might be setting the exposure for the entire area instead of for one slide or negative. Select and drag the handles around the selection area until you see the image area you want to scan. ● If there is unused space in the HP Scanjet G4010 negative negatives with the HP Scanjet G4050 - HP G4050 | User Guide - Page 25
Scan negatives using the Transparent Materials Adapter (TMA) is selected in the What are you scanning? dialog box. 3. The bulb in the TMA might not be working. Click the Scan Film button ( ) and look for illumination. If the bulb is broken, service is required. See the Setup and Support Guide - HP G4050 | User Guide - Page 26
, clean 17 H hardware test 18 Help 2 HP Photosmart settings 16 start 3 HP Solution Center Help 2 quality vs. speed settings 4 scan from 5 start 3 L languages, user guide 2 localized user guides 2 troubleshoot 22 with HP Scanjet G4010 9 with HP Scanjet G4050 11 O OCR troubleshoot 21 onscreen Help - HP G4050 | User Guide - Page 27
or negatives with HP Scanjet G4050 11 troubleshoot 22 troubleshoot buttons 20 fuzzy images 21 negatives 22 power 20 reset scanner 18 scanner 19 slides 22 speed 20, 21 test scanner hardware 18 TMA 22 turn on, troubleshoot 20 TWAIN scan from 5 W Web sites order maintenance supplies 17 User Guide 25 - HP G4050 | User Guide - Page 28
26 HP Scanjet G4000 series
-
 1
1 -
 2
2 -
 3
3 -
 4
4 -
 5
5 -
 6
6 -
 7
7 -
8
-
9
-
10
-
11
-
12
-
13
-
14
-
15
-
16
-
17
-
18
-
19
-
20
-
21
-
22
-
23
-
24
-
25
-
26
-
27
-
28
 |
 |

HP Scanjet G4000 series
User Guide