HP LaserJet 5p/mp Supplement
HP LaserJet 5p/mp Manual
 |
View all HP LaserJet 5p/mp manuals
Add to My Manuals
Save this manual to your list of manuals |
HP LaserJet 5p/mp manual content summary:
- HP LaserJet 5p/mp | Supplement - Page 1
Service Supplement HP LaserJet 5P / 5MP Printer (C3150A / C3155A) - HP LaserJet 5p/mp | Supplement - Page 2
to change without notice. Hewlett-Packard makes no warranty of any kind with regard to this material, including, but not limited to, the implied warranties or merchantability and fitness for a particular purpose. Hewlett-Packard shall not be liable for errors contained herein or for incidental - HP LaserJet 5p/mp | Supplement - Page 3
Conventions This manual uses the following conventions: Color is used to emphasize items which are important to the material under discussion. The names of major printer parts and assemblies are Capitalized. Bold is used for emphasis, particularly in situations where italic type would be confusing. - HP LaserJet 5p/mp | Supplement - Page 4
ii - HP LaserJet 5p/mp | Supplement - Page 5
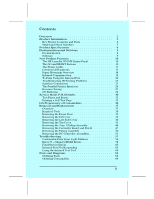
10 The HP LaserJet 5P/5MP Status Panel 10 The GO and RESET Buttons 10 The Status Lights 11 Common LED patterns 12 Paper Movement Overview 16 Infrared Communication 18 To Print Using the Infrared Port 20 Troubleshooting IR Printing Problems 22 Interface Connections 25 The Parallel Printer - HP LaserJet 5p/mp | Supplement - Page 6
Accessories 86 Index 87 iv - HP LaserJet 5p/mp | Supplement - Page 7
HP LaserJet 5P Printer Service Supplement - HP LaserJet 5p/mp | Supplement - Page 8
Overview Overview The HP LaserJet 5P and 5MP printers (HP Product Numbers C3150A and C3155A) have many service and repair processes in common with their predecessors, the HP LaserJet 4L/4ML and 4P/4MP printers. These processes are documented in the Combined Service Manual for the HP LaserJet 4L/4ML - HP LaserJet 5p/mp | Supplement - Page 9
HP LaserJet 5P Printer Service Supplement Product Information Product Information Printer Features Print Speed Features 6 PPM Text & Graphics Resolution 600 dpi; plus Resolution Enhancement Technology (REt) Printer Languages HP LaserJet 5P HP LaserJet 5MP Enhanced PCL 5 PostScript Level 21 - HP LaserJet 5p/mp | Supplement - Page 10
HP LaserJet 5P Printer Service Supplement Product Information Key Printer Locations and Parts. Figure 1 Front View 1. Status Panel 5. Infrared Port and Status Light 2. Top Output Tray 6. Removable Side Panel 3. Tray 1 - MultiPurpose Tray 7. Interface Cable Door 4. Tray 2 - 250-sheet Paper - HP LaserJet 5p/mp | Supplement - Page 11
5P Printer Service Supplement Product Information Model and Serial Numbers The model number and serial numbers are listed on identification labels located on the rear of the printer. The model number is alphanumeric, such as C3150A for the HP LaserJet 5P printer and C3155A for the HP LaserJet 5MP - HP LaserJet 5p/mp | Supplement - Page 12
HP LaserJet 5P Printer Service Supplement Product Specifications Product Specifications Width Depth Height Weight Dimensions 15.79 in. (401 mm) 17.38 in. (441.7mm) 7.92 in. (201.1mm) 15.4 lbs. (7 kg) Figure 4. Location Space Requirements 6 - HP LaserJet 5p/mp | Supplement - Page 13
HP LaserJet 5P Printer Service Supplement Product Specifications Electrical Specifications Power Requirements 100/120V (+/- 10%) 50/60Hz (+/- 2Hz) 220/240V (+/- 10%) 50 Hz (+/- 2Hz) 127 Volts NOM Power Consumption (typical for HP During printing - 165 W (average) LaserJet 5P and HP LaserJet 5MP) - HP LaserJet 5p/mp | Supplement - Page 14
across the printer family supporting PJL and PCL 5. HP LaserJet 5P/5MP Printer User's Manual C3150-90901 HP LaserJet 5MP Macintosh Notes* (included with HPLaserJet 5MP Printer and optional Adobe PostScript Level 2 SIMM) C3155-90901 HP LaserJet Printer Family Paper Specification Guide* 5002 - HP LaserJet 5p/mp | Supplement - Page 15
HP LaserJet 5P Printer Service Supplement Documentation and Software Software The following software driver diskettes are shipped with the C3150A HP LaserJet 5P printer: • The HP LaserJet 5P DOS Utilities and DOS Printer Drivers diskette. The DOS utilities include a Status Monitor and Remote Control - HP LaserJet 5p/mp | Supplement - Page 16
HP LaserJet 5P Printer Service Supplement New Product Features New Product Features The HP LaserJet 5P/5MP Status Panel This HP LaserJet printer has been designed to be controlled mainly by software. However, some simple functions are also available from the status panel. You also receive status - HP LaserJet 5p/mp | Supplement - Page 17
hue. This status light comes on only when the IR port is being used-the Status Panel lights operate the same for the IR port as they do for any other port on the printer. ERROR (amber) Indicates an error condition, such as a paper jam, missing toner cartridge, or the printer's top cover is open - HP LaserJet 5p/mp | Supplement - Page 18
HP LaserJet 5P Printer Service Supplement New Product Features TRAY 1 (amber) Tray 1 (the MP tray) is empty. Add paper to Tray 1. When the Tray 1 light is flashing, the printer is waiting for paper to be manually fed into Tray 1. Once you have inserted the paper, you must press the GO button to feed - HP LaserJet 5p/mp | Supplement - Page 19
HP LaserJet 5P Printer Service Supplement New Product Features Light Pattern Description The printer is in Ready Mode and is ready to print. Press the GO button to print a demo page. Press the GO and RESET buttons to print a self-test page. The printer has received data. If the Ready light is - HP LaserJet 5p/mp | Supplement - Page 20
HP LaserJet 5P Printer Service Supplement New Product Features Light Pattern Description Tray 2 (the Paper Cassette) is empty. Add paper to the tray. A data error has occurred. Press the GO button to continue printing (some data may be lost). For more information, see "Data Error Light Patterns," - HP LaserJet 5p/mp | Supplement - Page 21
HP LaserJet 5P Printer Service Supplement New Product Features Light Pattern Description A fatal error has occurred. Turn the printer off and then back on. If the same light pattern reappears, turn the printer off again and leave it off for about 10 minutes, then turn it back on. If the same light - HP LaserJet 5p/mp | Supplement - Page 22
HP LaserJet 5P Printer Service Supplement New Product Features Paper Movement Overview The paper feed system picks print media automatically from the paper cassette or accepts it from the manual feed slot and delivers it to the image formation system at precisely the right time. The system then - HP LaserJet 5p/mp | Supplement - Page 23
5P Printer Service Supplement New Product Features D C C o ntroller P C A PS 3 Figure 6 HP LaserJet 5P Printer Paper Path PS1 Input Paper Sensor PS2 Tray 2 Paper Out Sensor PS3 Exit Paper Sensor PS4 Winding Paper Sensor PS5 Tray 1 Paper Out Sensor Input Paper Sensor (PS1) Positions: A = Manual - HP LaserJet 5p/mp | Supplement - Page 24
. The HP LaserJet 5P printer has the complete secondary protocol, and any host trying to communicate via the infrared (IR) port must have the complete primary protocol installed. The primary protocol software is the responsibility of the host supplier. It is not provided by Hewlett-Packard Company - HP LaserJet 5p/mp | Supplement - Page 25
HP LaserJet 5P Printer Service Supplement New Product Features (Softw a re ) IR Driv e r P a c k e tiz e s D a t a (SW or FW) Proto c ol Seri a liz er IR C hi p D a t a P a c k e ts & Q u eri es Re c eiver Resp onses HP LaserJet 5P/MP printers Printers section of the Windows Control Panel. 19 - HP LaserJet 5p/mp | Supplement - Page 26
HP LaserJet 5P Printer Service Supplement New Product Features To Print Using the Infrared Port The infrared (IR) port on your HP LaserJet 5P or 5MP printer is located on the lower front left corner of the printer to the instruction manual for your portable equipment for specific instructions on - HP LaserJet 5p/mp | Supplement - Page 27
HP LaserJet 5P Printer Service Supplement New Product Features (1 m) of the IR port on the printer and at an angle of ±15 degrees to ensure printing (Figure 9). 3. Send the print job. The status light above the IR port turns on (printing a complex document or using a software print spooler on your - HP LaserJet 5p/mp | Supplement - Page 28
be compatible with your HP LaserJet 5P/5MP printer. If you continue to have problems printing using the IR port, contact the manufacturer or dealer where you purchased your portable device to verify compatibility with the IrDA standard, and follow the troubleshooting procedure immediately following - HP LaserJet 5p/mp | Supplement - Page 29
HP LaserJet 5P Printer Service Supplement New Product Features If all these elements are properly installed and configured, use the IR test tool to test the IrDA protocol transmission and device operation. This tool for troubleshooting IR communication problems, shown in Figure 10, has been - HP LaserJet 5p/mp | Supplement - Page 30
HP LaserJet 5P Printer Service Supplement New Product Features If the "PASS" LED lights, the test was successful, indicating that communication with the printer's IR port is functioning normally. On HP LaserJet printers, a self-test page will be initiated by the test. If the "TEST" LED goes out and - HP LaserJet 5p/mp | Supplement - Page 31
HP LaserJet 5P Printer Service Supplement New Product Features Interface Connections Your HP LaserJet 5P or 5MP printer supports the following interfaces (see Figure 11): • Two IEEE-1284-compliant parallel ports at the back of the printer Make sure that all power and interface cables on your printer - HP LaserJet 5p/mp | Supplement - Page 32
HP LaserJet 5P Printer Service Supplement New Product Features The Parallel Printer Interfaces These interfaces are compliant with IEEE-1284 specifications for "Compatibility Mode" and "Nibble Mode" or "HP Bi-tronics". To use advanced interface functions, such as bi-directional communication, the - HP LaserJet 5p/mp | Supplement - Page 33
soft fonts and macros are lost. With resource saving, the HP LaserJet 5P/5MP printer can retain these in memory. When the user switches back to PCL from PostScript all of the PCL entities would still be resident in the HP LaserJet 5P/5MP printer. Resource Saving can be changed via software, but can - HP LaserJet 5p/mp | Supplement - Page 34
HP LaserJet 5P Printer Service Supplement New Product Features I/O Buffering I/O buffering allows the user to allocate printer memory to hold the job while it prints, freeing up the host system sooner, like a print spooler. The standard printer has approximately 10 KBytes of memory allocated to I/O - HP LaserJet 5p/mp | Supplement - Page 35
HP LaserJet 5P Printer Service Supplement New Product Features THIS PAGE INTENTIONALLY LEFT BLANK 29 - HP LaserJet 5p/mp | Supplement - Page 36
default paper size to either Letter or A4). • Set the Demo Page=True/False. Used to remove the Demo Page option from the self test menu. • Set the Diagnostic Functions ON or OFF (for software developers use only). Since the HP LaserJet 5P/5MP printer does not have a front control panel, Service - HP LaserJet 5p/mp | Supplement - Page 37
Self-Test page Resets the printer. Other PJL Command examples: @PJL INITIALIZE Sets user environment to factory defaults. @PJL SET ECONOMODE=ON Sets Economode @PJL SET PAGEPROTECT=LEGAL Sets the memory size for page protection to LEGAL paper size. @PJL SET MANUALFEED=ON Sets manual feed - HP LaserJet 5p/mp | Supplement - Page 38
buttons on the HP LaserJet 5P/5MP printer status panel. Table 2 shows how to perform these tests and diagnostic functions. Table 2. Button Functions FUNCTION ACTION RESULT Self Test Continuous Self Test Reset (all I/O) Continue Form Feed Cold Reset NVRAM Initialization Service Error Codes Press - HP LaserJet 5p/mp | Supplement - Page 39
HP LaserJet 5P Printer Service Supplement Service Mode, PJL Defaults Printing a Self-Test Page You can print a self-test page to get information about your printer's current settings, options, and print quality. You can use this page to troubleshoot print quality problems and to view current print - HP LaserJet 5p/mp | Supplement - Page 40
HP LaserJet 5P Printer Service Supplement Service Mode, PJL Defaults Figure 12. HP LaserJet 5P Self-Test Page 34 - HP LaserJet 5p/mp | Supplement - Page 41
HP LaserJet 5P Printer Service Supplement Service Mode, PJL Defaults Key to Figure 12. Self-Test Page Item Explanation 1 Printer Options: Lists printer options you can adjust using your printer software (see Appendix F, "Software Procedures"). 2 Test Pages: Shows test pages you can print from - HP LaserJet 5p/mp | Supplement - Page 42
HP LaserJet 5P Printer Service Supplement Life Expectancy of Consumables Life Expectancy of Consumables Always inspect the components listed in the following table for wear when servicing the printer. Replace these components as needed, based on printer failures or wear, not strictly on usage. - HP LaserJet 5p/mp | Supplement - Page 43
unique to the HP LaserJet 5P for removing: • Power Door • I/O Cover • Left Side Cover • Top Cover • Tray 1 Pickup Assembly • Formatter Board Assembly • Fuser Assembly • DC Controller Assembly WARNING! Unplug the power cord from the power outlet before attempting to service the printer. If this - HP LaserJet 5p/mp | Supplement - Page 44
HP LaserJet 5P Printer Service Supplement Removal and Replacement Note Always remove the toner cartridge and the paper cassette from the printer before removing or replacing printer parts. Required Tools Refer to page 6-3 of the Combined Service Manual. A TORX T-10 head screwdriver is needed to - HP LaserJet 5p/mp | Supplement - Page 45
HP LaserJet 5P Printer Service Supplement Removal and Replacement Removing the Power Door The Power Door is located on the right rear of the printer. 1. Ensure the power to the printer is turned OFF. 2. Grasp the power door by the finger slot directly above the power cord, and swing the rear of the - HP LaserJet 5p/mp | Supplement - Page 46
HP LaserJet 5P Printer Service Supplement Removal and Replacement Removing the Left Side Cover 1. Disconnect all I/O cables. 2. Press the Top Cover Release button on the right side of the printer, and open the top cover. 3. Press the removable side panel release latch shown in Figure 14. 4. Slide - HP LaserJet 5p/mp | Supplement - Page 47
HP LaserJet 5P Printer Service Supplement Removal and Replacement Removing the Top Cover 1. Remove the toner cartridge and paper cassette if they have not already been removed. 2. Remove the (4) self-tapping printer cover screws (Figure 15). Figure 15 Removing the Top Cover Screws 3. Grasp the lower - HP LaserJet 5p/mp | Supplement - Page 48
HP LaserJet 5P Printer Service Supplement Removal and Replacement 6. Lift the rear of the printer slightly. Grasp the lower right back corner. With your thumbs, flex the plastic toward you, release tabs. Figure 16 Releasing the Back Corner of the Top Cover. 7. Lift the printer cover straight up. 42 - HP LaserJet 5p/mp | Supplement - Page 49
HP LaserJet 5P Printer Service Supplement Removal and Replacement Replacement Note When reseating the top cover onto the printer frame, ensure the black paper-out flag in front of Tray 1 is seated in the groove of the Tray 1 lift plate. If not in the groove, it can easily break - HP LaserJet 5p/mp | Supplement - Page 50
HP LaserJet 5P Printer Service Supplement Removal and Replacement Removing the Tray 1 Pickup Assembly 1. attach to the plug and pulling straight back. 3. Route the cables through the right side of the printer chassis and bring them to the front. 4. Remove the 5 screws (callout 1 in Figure 19) from - HP LaserJet 5p/mp | Supplement - Page 51
HP LaserJet 5P Printer Service Supplement Removal and Replacement Figure 19 Tray 1 Pickup Assembly Locations. 5. Press the two release tabs on either side of the pickup assembly (callout 3 in Figure 19) and pull the assembly away from the printer. (The left side release tab is partially hidden from - HP LaserJet 5p/mp | Supplement - Page 52
HP LaserJet 5P Printer Service Supplement Removal and Replacement Figure 20 Replacing the Pickup Roller Replacement Note When replacing the pickup assembly roller, hold the shaft from the left side so that the pickup roller shaft and gears will remain in place. 46 - HP LaserJet 5p/mp | Supplement - Page 53
HP LaserJet 5P Printer Service Supplement Removal and Replacement Removing the Formatter Board and Shield 1. Remove any installed SIMMs. Note There are two TORX screws holding the I/O connector in position (Callout 1 in Figure 21). These are the only two TORX screws in the HP LaserJet 5P printer. - HP LaserJet 5p/mp | Supplement - Page 54
HP LaserJet 5P Printer Service Supplement Removal and Replacement Figure 22 Removing the formatter screws. 2. Remove the (7) screws shown in Figure 22. 3. Pull the formatter board straight from the side - HP LaserJet 5p/mp | Supplement - Page 55
HP LaserJet 5P Printer Service Supplement Removal and Replacement Figure 23 Removing the DC Controller Interconnect. Note RETAIN THE DC CONTROLLER INTERCONNECT when replacing the DC Controller Board. The replacement board part number does not include this interconnect. 49 - HP LaserJet 5p/mp | Supplement - Page 56
HP LaserJet 5P Printer Service Supplement Removal and Replacement Removing the Fusing Assembly 1. Remove the top cover assemblies. 2. Locate the black plastic fuser cover at the back of the printer. Press the release tab (callout 1 in Figure 24). 3. Slide the cover all the way to the right. 4. Pull - HP LaserJet 5p/mp | Supplement - Page 57
HP LaserJet 5P Printer Service Supplement Removal and Replacement Removing the DC Controller Assemblies The DC Controller Assembly is located on the bottom of the printer. The PCA is protected by a metal shield assembly, and is mounted to a plastic base. The Formatter PCA and Fusing Assemblies are - HP LaserJet 5p/mp | Supplement - Page 58
HP LaserJet 5P Printer Service Supplement Removal and Replacement Figure 25 Grounding Spring screw location. 4. On the left side, remove the (2) screws that attach the grounding strap to the Gear Train Assembly (see callout 1 in Figure 6-36 of the Combined Service Manual). Turn the assembly upside- - HP LaserJet 5p/mp | Supplement - Page 59
HP LaserJet 5P Printer Service Supplement Removal and Replacement Note The PS1 Input Sensor Arm may come loose and fall out when you remove the DC Controller Assembly. See Figure 6-51 in the Combined Service Manual for re-installation. 7. Remove the metal backing plate from the DC Controller - HP LaserJet 5p/mp | Supplement - Page 60
HP LaserJet 5P Printer Service Supplement Removal and Replacement Figure 26 Tray 1 Interconnect PCA and Cable 302 54 - HP LaserJet 5p/mp | Supplement - Page 61
process for the HP LaserJet 5P/5MP printer has two key differences from the 4L/4ML printer: • Different error light patterns (5 LEDs instead of 4). • Infrared port troubleshooting. This section provides a list and explanation of the error LED patterns and instructions on troubleshooting the infrared - HP LaserJet 5p/mp | Supplement - Page 62
HP LaserJet 5P Printer Service Supplement Troubleshooting Continuable Data Error Light Patterns Possible data error light patterns are listed in the first column of the following table. If the Error and Data lights on the Status Panel are lit, simultaneously press the GO and RESET buttons on the - HP LaserJet 5p/mp | Supplement - Page 63
HP LaserJet 5P Printer Service Supplement Troubleshooting Data Error Computer Light Pattern Message 40 ERROR Description Recommended Action Indicates an abnormal connection break occurred while transferring data from the computer. Press GO on the printer to clear the error message. 41 ERROR A - HP LaserJet 5p/mp | Supplement - Page 64
HP LaserJet 5P Printer Service Supplement Troubleshooting Error 53 -- Memory/SIMM Errors Error 53 is indicated by a combination of the Error LED and either Tray LED, on and steady. More detail about the error is found by pressing the GO and RESET buttons simultaneously, which causes a secondary - HP LaserJet 5p/mp | Supplement - Page 65
HP LaserJet 5P Printer Service Supplement Troubleshooting Figure -27 Secondary Light Patterns 59 - HP LaserJet 5p/mp | Supplement - Page 66
HP LaserJet 5P Printer Service Supplement Troubleshooting Fatal/Service Errors The following tables show fatal/service errors, which are not continuable; no further operation of the printer will occur until corrective action is taken. Table 5. Fuser Malfunction LED Display ERROR CODE 50 Fuser - HP LaserJet 5p/mp | Supplement - Page 67
HP LaserJet 5P Printer Service Supplement Troubleshooting Table 7. 57/58 Main Motor Failure LED Display ERROR CODE 57/58 Main c. The toner cartridge may not be rotating. Refer to "Drum Rotation Functional Check in the Combined Service Manual. d. Main Motor faulty. Power up the printer and observe - HP LaserJet 5p/mp | Supplement - Page 68
HP LaserJet 5P Printer Service Supplement Troubleshooting Table 8. 61.x/62.x SIMM Parity and Memory Errors LED Display ERROR CODE 61.1 SIMM Slot One Parity Error 62.1 SIMM Slot One Memory Problem Description and Recommendation 1. Power-cycle the printer. 2. Reseat the SIMM. 3. Replace the SIMM. - HP LaserJet 5p/mp | Supplement - Page 69
HP LaserJet 5P Printer Service Supplement Troubleshooting Table 9. 62/63/64 Internal Memory Error LED Display ERROR CODE 62.0 Internal Memory Problem 63 Internal RAM Memory Test Failed 64 Scan Buffer Error Description and Recommendation 1. Power-cycle the printer. 2. Replace the Formatter PCA. - HP LaserJet 5p/mp | Supplement - Page 70
HP LaserJet 5P Printer Service Supplement Troubleshooting Table 10. Video DMA Timeout Error LED Display ERROR CODE 64 ERROR: Video DMA Timeout Description and Recommendation 1. Power-cycle the printer. 2. Replace the Formatter PCA. Table 11. Dynamic RAM Controller Error LED Display ERROR CODE - HP LaserJet 5p/mp | Supplement - Page 71
on your computer includes an IR driver and your application uses a HP LaserJet 5P/5MP compatible printer driver. Make sure you have positioned the device within the range of operation and that no objects, such as a finger, paper, books, or bright light, are interfering with the connection. Also - HP LaserJet 5p/mp | Supplement - Page 72
HP LaserJet 5P Printer Service Supplement Troubleshooting Situation Solution The print job has been properly sent to the printer, but the printer will not print. The IR status light turns off during transmission. If the connection is broken before the entire print job has been transmitted to the - HP LaserJet 5p/mp | Supplement - Page 73
HP LaserJet 5P Printer Service Supplement Troubleshooting AA Tray 1 Inter-connect PCA AA Figure 28 Main Wiring Diagram 67 TO FRONT OF PRINTER Tray 1 Pickup Assembly Tray 1 Paper Out Sensor PS5 Solenoid SL2 J402 High Voltage Power Supply Circuitry J404 J403 J401 Input Paper Sensor PS1 VR301 - HP LaserJet 5p/mp | Supplement - Page 74
that the part number selected is for the correct model of printer. Ordering Parts All standard part numbers listed are stocked and may be ordered from HP's Parts Direct Ordering, or Parts Center Europe (PCE). Hewlett-Packard Co. Support Materials Organization 8050 Foothills Blvd. Roseville, CA 95678 - HP LaserJet 5p/mp | Supplement - Page 75
HP LaserJet 5P Printer Service Supplement Parts and Diagrams Ordering Consumables Consumables and accessories such as those listed on page 8-5, and in Table 4-1, Chapter 4, may be ordered direct from Hewlett-Packard. The phone numbers are: U.S.: 1-800-538-8787 Canada: 1-800-387-3154 (Toronto) 416- - HP LaserJet 5p/mp | Supplement - Page 76
HP LaserJet 5P Printer Service Supplement Parts and Diagrams Figure 29. HP LaserJet 5P Covers and Doors 70 - HP LaserJet 5p/mp | Supplement - Page 77
HP LaserJet 5P Printer Service Supplement Parts and Diagrams Table 12. Covers and Doors REF PART 1 Button, Lock 1 Spring, Compression 1 Guide, Lock Button 1 Paper Feed Tray Assembly 1 Arm, Tray 1 Sensor 1 Nameplate (HP LaserJet 5P) Nameplate (HP LaserJet 5MP) 1 Spring, Torsion 1 Stopper, Hinge, - HP LaserJet 5p/mp | Supplement - Page 78
HP LaserJet 5P Printer Service Supplement Parts and Diagrams Figure 30. HP LaserJet 5P Internal Components (1) 72 - HP LaserJet 5p/mp | Supplement - Page 79
HP LaserJet 5P Printer Service Supplement Parts and Diagrams Table 13. Internal Components (1) REF PART NO. QTY DESCRIPTION 1 RG5-1801-000CN 2 RB1-6006-000CN 3 RB1-6332-000CN 4 RG5-1692-000CN 5 - HP LaserJet 5p/mp | Supplement - Page 80
HP LaserJet 5P Printer Service Supplement Parts and Diagrams Figure 31. HP LaserJet 5P Internal Components (2) 74 - HP LaserJet 5p/mp | Supplement - Page 81
HP LaserJet 5P Printer Service Supplement Parts and Diagrams Table 14. Internal Components (2) REF PART NO. TP 1 Mirror Assembly 1 Roller, Transfer 1 Gear, 17T 1 Transfer Roller Assembly 1 Transfer Guide Assembly 1 Transfer Mount Assy, Right 1 Transfer Mount Assy, Left 1 Switch, Plunger Assembly 1 - HP LaserJet 5p/mp | Supplement - Page 82
HP LaserJet 5P Printer Service Supplement Parts and Diagrams Figure - 32. HP LaserJet 5P Internal Components (3) 76 - HP LaserJet 5p/mp | Supplement - Page 83
HP LaserJet 5P Printer Service Supplement Parts and Diagrams Table 15. Internal Components (3) REF PART 1 Spring, Compression 1 Plate, Cartridge 1 Plate, Cartridge Grounding 1 Plate, MP Grounding, Right 1 Arm, Input Paper Sensor 1 Shield, HVT 1 Feeder Guide Assembly 1 Eliminator, Static Charge 1 - HP LaserJet 5p/mp | Supplement - Page 84
HP LaserJet 5P Printer Service Supplement Parts and Diagrams Figure 33. DC Controller Assembly 78 - HP LaserJet 5p/mp | Supplement - Page 85
HP LaserJet 5P Printer Service Supplement Parts and Diagrams Table 16. DC Controller Assembly REF PART NO. QTY DESCRIPTION 1 RG5-1719-000CN 1 HVT Controller Assembly 2 RH2-5259-000CN 1 Cable, Flat 3 - HP LaserJet 5p/mp | Supplement - Page 86
HP LaserJet 5P Printer Service Supplement Parts and Diagrams Figure 34. Tray 2 Assembly 80 - HP LaserJet 5p/mp | Supplement - Page 87
HP LaserJet 5P Printer Service Supplement Parts and Diagrams Table 17. Tray 2 Assembly REF PART NO. QTY DESCRIPTION R75-4000-000CN 1 Complete Tray 2 Assembly 1 RF5-0673-000CN 1 Plate, Side 2 RS5- - HP LaserJet 5p/mp | Supplement - Page 88
HP LaserJet 5P Printer Service Supplement Parts and Diagrams Figure 35. Tray 1 Assembly 82 - HP LaserJet 5p/mp | Supplement - Page 89
HP LaserJet 5P Printer Service Supplement Parts and Diagrams Table 18. Tray 1 Assembly REF PART NO. QTY DESC RG5-1695-000CN 1 Complete Tray 1 Pickup Assy 1 RG5-1804-000CN 1 Tray 1 Sensor Cable 2 RG5-1694-000CN 1 Paper guide Plate Assy 3 RS5-2415-000CN 1 Spring, Compression 4 RH7- - HP LaserJet 5p/mp | Supplement - Page 90
HP LaserJet 5P Printer Service Supplement Parts and Diagrams Figure 36. HP LaserJet 5P Fusing Assembly 84 - HP LaserJet 5p/mp | Supplement - Page 91
HP LaserJet 5P Printer Service Supplement Parts and Diagrams Table 19. Fusing Assembly REF PART NO. QTY DESCRIPTION RG5-1700-000CN C3150-69003 1 Complete Fuser Assy (100-120V) (new) (exchange) RG5-1701-000CN C3150-69004 1 RB1-5918-000CN 2 RB1-3097-000CN 3 RG5-0681-000CN 4 RG5-1813- - HP LaserJet 5p/mp | Supplement - Page 92
Printer Service Supplement Accessories Accessories Listed below are the accessories and supplies, including supplemental documentation you can order for your HP LaserJet 5P or 5MP printer. Option Toner Cartridge Part Number C3903A Description or Use Replacement toner cartridge. Memory upgrades - HP LaserJet 5p/mp | Supplement - Page 93
, 74, 76 printer parts 4 tray 1 assembly 82 tray 2 assembly 80 wiring 67 DMO 69 documentation 8 -9 drivers 9 E Economode 3 erasing memory with RESET 11 error clearing with RESET 11 continuable 56 data 14 fatal 15, 60 hardware-related 11 infrared 65 IR port 15 light patterns 56 memory 58 recoverable - HP LaserJet 5p/mp | Supplement - Page 94
with RESET 11 error 58, 62 ordering 86 SIMM removal 39 model number 5 monthly usage 3 2 N network, connecting to 26 networks 26 NVRAM 32 O ordering books 8 -9 consumables 69 LocalTalk 86 parts 68 Postscript 86 P pages, self-test 10, 33 panel See status panel paper jams 11 movement, overview - HP LaserJet 5p/mp | Supplement - Page 95
23 toner, ordering 86 tools, required 38 top cover removal and replacement 41 tray empty 13 -14 tray 1 assembly 82 removal and replacement 44 light 12 tray 2 empty indicator 12 assembly 80 light 12 troubleshooting 55 -67 infrared 22 troubleshooting, IR port 22 turning on your printer 4 typefaces - HP LaserJet 5p/mp | Supplement - Page 96
4 - HP LaserJet 5p/mp | Supplement - Page 97
HP C3150A Printer Service Manual Reader's Comment Sheet Please give us your comments concerning this manual. Your constructive criticism will help us create better manuals in the future. Be as specific as possible, giving section and page reference where appropriate. Comments on the writing,
-
 1
1 -
 2
2 -
 3
3 -
 4
4 -
 5
5 -
 6
6 -
 7
7 -
8
-
9
-
10
-
11
-
12
-
13
-
14
-
15
-
16
-
17
-
18
-
19
-
20
-
21
-
22
-
23
-
24
-
25
-
26
-
27
-
28
-
29
-
30
-
31
-
32
-
33
-
34
-
35
-
36
-
37
-
38
-
39
-
40
-
41
-
42
-
43
-
44
-
45
-
46
-
47
-
48
-
49
-
50
-
51
-
52
-
53
-
54
-
55
-
56
-
57
-
58
-
59
-
60
-
61
-
62
-
63
-
64
-
65
-
66
-
67
-
68
-
69
-
70
-
71
-
72
-
73
-
74
-
75
-
76
-
77
-
78
-
79
-
80
-
81
-
82
-
83
-
84
-
85
-
86
-
87
-
88
-
89
-
90
-
91
-
92
-
93
-
94
-
95
-
96
-
97
 |
 |

S
e
r
v
i
c
e
S
u
pp
l
e
m
e
n
t
H
P
L
a
s
e
r
J
e
t
5
P
/
5
M
P
P
r
i
n
t
e
r
(
C
3150
A
/
C
3155
A)