HP LaserJet 9000 HP LaserJet 9000mfp and 9000Lmfp - User Guide
HP LaserJet 9000 Manual
 |
View all HP LaserJet 9000 manuals
Add to My Manuals
Save this manual to your list of manuals |
HP LaserJet 9000 manual content summary:
- HP LaserJet 9000 | HP LaserJet 9000mfp and 9000Lmfp - User Guide - Page 1
1 hp LaserJet 9000mfp hp LaserJet 9000Lmfp use Use of this electronic document indicates that you accept the Copyright and License terms. Copyright Hewlett-Packard Company 2002. - HP LaserJet 9000 | HP LaserJet 9000mfp and 9000Lmfp - User Guide - Page 2
on a network if server-provided access to the electronic copy is limited to PERSONAL, INTERNAL users of the Hewlett-Packard printer associated with this use guide. The information contained in this document is subject to change without notice. Edition 1, 12/2002 Trademark Credits Adobe® Acrobat - HP LaserJet 9000 | HP LaserJet 9000mfp and 9000Lmfp - User Guide - Page 3
software 14 Macintosh software 14 Drivers 16 Software for Windows 18 Software for Macintosh computers 19 Help system 20 "What is this?" Help 20 "Show me how" Help 20 2 The control panel Control panel layout 22 Control panel features 23 Control panel navigation 24 Status bar 24 Cancel - HP LaserJet 9000 | HP LaserJet 9000mfp and 9000Lmfp - User Guide - Page 4
to digital sending 30 Sending documents 31 Using the address book 34 More information 35 4 Walk-up copying Basic copying instructions 37 Copying using the default settings (one-touch copying 37 Copying using user-defined settings 38 Copying using the scanner glass 40 Copying using the ADF - HP LaserJet 9000 | HP LaserJet 9000mfp and 9000Lmfp - User Guide - Page 5
paper 62 Using features in the driver 63 Different first page 64 Blank back page 65 Printing multiple pages on one sheet of paper 65 Customizing Tray 1 held job 78 Printing with the optional HP Fast InfraRed (FIR) Receiver 79 Setting up to print with Windows 9X 79 Printing a job using FIR - HP LaserJet 9000 | HP LaserJet 9000mfp and 9000Lmfp - User Guide - Page 6
areas 97 Clearing jams from the duplex printing accessory (duplexer) . . 101 Clearing jams from the output areas 103 Solving repeated paper jams 116 Understanding product messages 117 Resolving control panel messages 118 Correcting output quality problems 138 Preventing wrinkles on envelopes - HP LaserJet 9000 | HP LaserJet 9000mfp and 9000Lmfp - User Guide - Page 7
172 PCL or PS font list 173 File directory page 174 Jetdirect page 175 Event log page 176 Printing a paper path test 177 A Specifications B Control submenu 216 C Product memory and expansion Determining memory requirements 219 Installing memory 220 Checking memory installation 224 Saving - HP LaserJet 9000 | HP LaserJet 9000mfp and 9000Lmfp - User Guide - Page 8
Combining escape sequences 230 Selecting PCL 5e fonts 231 Common PCL 5e printer commands 232 E Regulatory information Environmental 250 Using control panel menus 251 HP Disk Management Utility 252 Software for networks 253 HP Web JetAdmin software 253 HP Jetdirect Printer Installer for - HP LaserJet 9000 | HP LaserJet 9000mfp and 9000Lmfp - User Guide - Page 9
1 The basics 9 1 The basics Congratulations on your purchase of the HP LaserJet 9000mfp/HP LaserJet 9000Lmfp (multifunction peripheral). If you have not done so, see the start guide provided with the product for setup instructions. Now that the product is set up and ready to use, take a few - HP LaserJet 9000 | HP LaserJet 9000mfp and 9000Lmfp - User Guide - Page 10
product The HP LaserJet 9000mfp/HP LaserJet 9000Lmfp is designed to be shared by a workgroup, and allows users to send black and white or color documents digitally, copy documents, and send print jobs to the product. The product is a standalone device and does not require connection to a computer - HP LaserJet 9000 | HP LaserJet 9000mfp and 9000Lmfp - User Guide - Page 11
printing on custom-size paper. Š Tray 4 (2000-sheet input tray): This tray automatically detects standard paper sizes up to Ledger/A3 and allows printing on custom-size paper. Š Automatic Document Feeder (ADF): Holds up to 100 sheets of paper. Š Duplex printing accessory: Provides two-sided printing - HP LaserJet 9000 | HP LaserJet 9000mfp and 9000Lmfp - User Guide - Page 12
-HP LaserJet 9000mfp only) z High content of recyclable components and materials in the product See "Protecting the environment" on page 238 for more information. Firmware updates Firmware updates provide the ability to upgrade the product firmware. To download the latest firmware, go to www.hp - HP LaserJet 9000 | HP LaserJet 9000mfp and 9000Lmfp - User Guide - Page 13
product, or www.hp.com/support/lj9000 for the addresses of the HP website. Macintosh users Use the HP LaserJet Utility to download fonts and files. See "HP LaserJet Utility (Macintosh)" on page 19 or the HP LaserJet Utility Guide online Help included with your HP LaserJet Utility software for more - HP LaserJet 9000 | HP LaserJet 9000mfp and 9000Lmfp - User Guide - Page 14
Drivers Macintosh software System Administrator z HP Common Installer z HP Disk Image Utility z HP Common Drivers Macintosh Client Client z HP Common Installer z HP Common Drivers Client z PPDs/PDEs z HP LaserJet Utility* z Fonts* z Help Files* (English only) * These products are not supported - HP LaserJet 9000 | HP LaserJet 9000mfp and 9000Lmfp - User Guide - Page 15
guide that came on the CD to obtain the most recent software. Included with the product is a CD containing the HP LaserJet Printing System. On the CD are software components, documentation, and drivers Windows 9X and Windows Me z Microsoft Windows NT 4.0, Windows 2000, and Windows Me z Apple MAC - HP LaserJet 9000 | HP LaserJet 9000mfp and 9000Lmfp - User Guide - Page 16
access to obtain the latest drivers. PCL 5e PCL 6 PSa Windows 9X and Windows Me Windows NT 4.0 and Windows 2000 Macintosh computerb 9 9 9 9 9 9 9 a. PostScript (PS) Level 3 emulation is referred to as PS throughout this user guide. b. Only PostScript Printer Description (PPDs) files are - HP LaserJet 9000 | HP LaserJet 9000mfp and 9000Lmfp - User Guide - Page 17
the specific driver. Printer driver help is separate from the software application help. Additional drivers You can obtain the following additional drivers by downloading them from the Internet, or by requesting them from an HP-authorized service or support provider. See www.hp.com/support/lj9000 - HP LaserJet 9000 | HP LaserJet 9000mfp and 9000Lmfp - User Guide - Page 18
list of supported host systems, visit HP Customer Care Online at www.hp.com/go/webjetadmin. To gain access to the Windows driver To configure the driver, gain access to it in one of the following ways: Operating system Windows 9X and Windows Me Windows NT 4.0 and Windows 2000 Temporarily change - HP LaserJet 9000 | HP LaserJet 9000mfp and 9000Lmfp - User Guide - Page 19
computer easier than ever. Use the HP LaserJet Utility to do the following: z customize the product control panel messages z name the product, assign it to a zone on the network, download files and fonts, and change most of the product settings z set a password for the product z from the computer - HP LaserJet 9000 | HP LaserJet 9000mfp and 9000Lmfp - User Guide - Page 20
topic. 3 Touch OK. Show me how also appears on a What is this? pop-up dialog box if the item you chose is a function that includes instructions. For example, if you touch What is this? Help, and then touch Enhance, you see a Show me how button in the pop-up dialog box - HP LaserJet 9000 | HP LaserJet 9000mfp and 9000Lmfp - User Guide - Page 21
example, you can describe the original document as an A4-sized, duplexed, text document, then apply scaling or contrast changes you want in control panel topics: z Control panel layout z Control panel navigation z Control panel default touch screen z Interpreting control panel lights Specific control - HP LaserJet 9000 | HP LaserJet 9000mfp and 9000Lmfp - User Guide - Page 22
2 The control panel 22 Control panel layout The control panel includes a touch screen graphical display, three job-control buttons, a numeric keypad, and three light-emitting diode (LED) indicator lights. Touch-screen graphical display Numeric keypad Ready light Data light Attention light - HP LaserJet 9000 | HP LaserJet 9000mfp and 9000Lmfp - User Guide - Page 23
via e-mail. Reduces or enlarges the size of the copy. Contrast Control Increases or decreases the brightness. Allows you to gain access to " contains enhancement features. Resets the job settings to factory or user-defined default values. Cancels the active job. Begins a copy job, starts digital - HP LaserJet 9000 | HP LaserJet 9000mfp and 9000Lmfp - User Guide - Page 24
control panel using the touch-screen graphical display. Status message Menu Help Ready 24 Number of copies selected Status bar Status bar The status bar is located at the top of the default of copies selected. The factory default setting is 1. User-attention error messages are displayed in a pop - HP LaserJet 9000 | HP LaserJet 9000mfp and 9000Lmfp - User Guide - Page 25
2 The control panel 25 Cancel button Each lower-level screen (any screen below the main screen) on the touch screen displays a Cancel button. Touching touch screen displays an OK button. Touching the OK button accepts any changes you made, and takes you to the next screen. Control panel navigation - HP LaserJet 9000 | HP LaserJet 9000mfp and 9000Lmfp - User Guide - Page 26
2 The control panel 26 Control panel default touch screen The touch screen of the graphical display is divided into four sections: original, can describe the original document. z Original page icon: Displays the current settings in a graphical representation. Control panel default touch screen - HP LaserJet 9000 | HP LaserJet 9000mfp and 9000Lmfp - User Guide - Page 27
control modification You can adjust the contrast using the Contrast control, and reduce or enlarge the image using the are available only to customers who purchase the HP Digital Sender Module software. The send options the original section and the Contrast Control bar still appear. The copy and - HP LaserJet 9000 | HP LaserJet 9000mfp and 9000Lmfp - User Guide - Page 28
panel 28 Interpreting control panel lights The control panel contains three indicator lights: z Ready z Data z Attention Light Ready Data Attention Off On Blinking Off On Blinking Off On Blinking Indication The product is offline or has an error. The product is ready to print. The product - HP LaserJet 9000 | HP LaserJet 9000mfp and 9000Lmfp - User Guide - Page 29
. Using the control panel, you can scan black-and-white or color documents and send them to an e-mail address as an e-mail attachment. To use digital sending, the product must be connected to a local area network (LAN). The product connects directly to your LAN (see the start guide for more - HP LaserJet 9000 | HP LaserJet 9000mfp and 9000Lmfp - User Guide - Page 30
properly delivered. With digital sending, documents are scanned into the product memory and sent to an e-mail address or multiple addresses as an e- to meet their specific needs. Documents arrive in near-original quality, and then can be printed, stored, or forwarded. The HP Digital Sender Module - HP LaserJet 9000 | HP LaserJet 9000mfp and 9000Lmfp - User Guide - Page 31
the scanner glass or ADF Use the following instructions to scan and send letter-size originals using the product default settings. 1 Place the document face down on . 8 Touch OK. 9 Press START. The control panel status bar displays the following: Processing Digital Send Job. Digital-sending basics - HP LaserJet 9000 | HP LaserJet 9000mfp and 9000Lmfp - User Guide - Page 32
, TIFF, MTIFF, or JPG. Files can be transmitted to an e-mail address in any of these file formats: Š PDF: The PDF file format is the default setting, and it offers the best overall text and graphics quality. However, the recipient must have an Adobe Acrobat viewer installed to read PDF files - HP LaserJet 9000 | HP LaserJet 9000mfp and 9000Lmfp - User Guide - Page 33
3 Digital sending 33 8 Touch Subject: and then type the subject of your e-mail. 9 Touch OK. 10 Press START. Using the auto-complete function When you enter the To, CC, or From screens in the Send to E-mail feature, the auto-complete function is invoked. As you type the required address or name at - HP LaserJet 9000 | HP LaserJet 9000mfp and 9000Lmfp - User Guide - Page 34
, if necessary. You can check the list of recipients by touching the down arrow in the To: text line. 11 Touch OK. 12 Follow the instructions on the status bar of the graphical display. Using the address book - HP LaserJet 9000 | HP LaserJet 9000mfp and 9000Lmfp - User Guide - Page 35
3 Digital sending 35 More information For information about finding the IP addresses of the SMTP and LDAP servers, and about configuring the product for digital sending, see "Digital sending configuration applet" on page 248. More information - HP LaserJet 9000 | HP LaserJet 9000mfp and 9000Lmfp - User Guide - Page 36
make black and white copies and how to change copy settings.The topics in this section include: z Basic copying instructions z Selecting the output bin z Altering the image It is helpful to review the chapter about basic control-panel operation before using the product copying functions. Overview - HP LaserJet 9000 | HP LaserJet 9000mfp and 9000Lmfp - User Guide - Page 37
instructions for copying. The paper size is automatically detected when the document is placed on the scanner glass or in the ADF. You can override the auto-detect feature by specifying the required input (Describe Original) and output (Copy Settings) at the control panel. Copying using the default - HP LaserJet 9000 | HP LaserJet 9000mfp and 9000Lmfp - User Guide - Page 38
settings for your copies. Note To make copies using settings other than the default settings 1 Place the original face down on the scanner glass or in the adjustments to the contrast and reduction or enlargement using the Contrast Control bar and the Reduce/Enlarge button in the image modification - HP LaserJet 9000 | HP LaserJet 9000mfp and 9000Lmfp - User Guide - Page 39
: Select Normal or Flip (applies when 2-sided copying is chosen), Š Pages per sheet: Select 1, 2, 4, or Booklet. If 4 pages per sheet is chosen, "Z" or "N" ordering is tailored to the page orientation, and the option , select the number of copies, and then press START. Basic copying instructions - HP LaserJet 9000 | HP LaserJet 9000mfp and 9000Lmfp - User Guide - Page 40
documents. The scanner glass is also used to copy books, magazines, and manuals. 1 Place the document face down on the scanner glass. 2 Make any can make as many as 999 copies of a document that has as many as 50 pages (depending on the thickness of the pages). 1 Load the document face instructions - HP LaserJet 9000 | HP LaserJet 9000mfp and 9000Lmfp - User Guide - Page 41
the Job Name. 6 Type the PIN, if required. 7 Touch OK. See "Printing a stored job" on page 72 for information on printing a stored job. Basic copying instructions - HP LaserJet 9000 | HP LaserJet 9000mfp and 9000Lmfp - User Guide - Page 42
stapler/stacker. This bin holds up to 125 sheets of paper in face-up order as they exit the printer. A sensor causes the product to stop when bin also provides stapling for up to 50 sheets of paper per document. The Stacker bin is the default output bin when the multifunction finisher is attached - HP LaserJet 9000 | HP LaserJet 9000mfp and 9000Lmfp - User Guide - Page 43
4 Walk-up copying 43 Selecting an output location You can select an output location at the control panel. To select an output location from the control panel On the touch screen of the graphical display: 1 Touch the Copy Settings box. 2 Touch Advanced. 3 Touch Bin 1 or Bin 2 in the Output Bin box. - HP LaserJet 9000 | HP LaserJet 9000mfp and 9000Lmfp - User Guide - Page 44
percentage of reduction or enlargement. Adjust the contrast You can adjust the contrast by touching the arrows on the Contrast Control bar in the image modification area of the default touch screen. The slider moves to the lighter or darker area of the contrast bar. Enhance the document Touch the - HP LaserJet 9000 | HP LaserJet 9000mfp and 9000Lmfp - User Guide - Page 45
graphics are reproduced more sharply. Adjust the amount of sharpness by touching the arrows on the Sharpness Control bar. Density Like the Contrast Control on the main touch screen, the Density Control on the enhancement screen allows you to determine the contrast of your copy. Touch the arrows on - HP LaserJet 9000 | HP LaserJet 9000mfp and 9000Lmfp - User Guide - Page 46
Printing This section presents printing tasks, such as: z Orienting media z Basic printing instructions z Selecting the output bin z Printing envelopes z Printing special paper z Using features in the driver z Different first page z Blank back page z Customizing Tray 1 operation z Printing by type - HP LaserJet 9000 | HP LaserJet 9000mfp and 9000Lmfp - User Guide - Page 47
types and sizes according to the tray from which the media will print and according to whether the media will be duplexed (printed on both sides). Type of media Tray Duplexed Orient media like this Letter or A4, including 1 No letterhead (weights up to 216 g/m2) (58 lb bond) Long edge - HP LaserJet 9000 | HP LaserJet 9000mfp and 9000Lmfp - User Guide - Page 48
5 Printing Type of media Letter or A4, including letterhead (weights up to 199 g/m2) (53 lb bond) Tray 2, 3, or 4 Duplexed No 48 Orient media like this Long edge toward feed direction; side to be printed facing down. Letter or A4, including 2, 3, or 4 Yes letterhead (weights - HP LaserJet 9000 | HP LaserJet 9000mfp and 9000Lmfp - User Guide - Page 49
5 Printing Type of media Other standard sizes and custom sizes (weights up to 216 g/m2) (58 lb bond) Tray 1 Duplexed No 49 Orient media like this Long edge (up to 312 mm) toward feed direction; side to be printed facing up. For media with long edge greater - HP LaserJet 9000 | HP LaserJet 9000mfp and 9000Lmfp - User Guide - Page 50
5 Printing Type of media Other standard sizes and custom sizes (weights up to 199 g/m2) (53 lb bond) Tray 2, 3, or 4 Duplexed No 50 Orient media like this Long edge (up to 297 mm) toward feed direction; side to be printed facing down. For media with long edge greater - HP LaserJet 9000 | HP LaserJet 9000mfp and 9000Lmfp - User Guide - Page 51
5 Printing Type of media Prepunched Letter or A4 (weights up to 216 g/m2) (58 lb bond) Tray 1 Duplexed No 51 Orient media like this Long edge with holes toward feed direction; side to be printed facing up. Prepunched Letter or A4 1 Yes (weights - HP LaserJet 9000 | HP LaserJet 9000mfp and 9000Lmfp - User Guide - Page 52
5 Printing Prepunched Letter or A4 2, 3, or 4 No (weights up to 199 g/m2) (53 lb bond) 52 Long edge with holes toward feed direction; side to be printed facing down. Prepunched Letter or A4 2, 3, or 4 Yes (weights up to 199 g/m2) (53 lb bond) Long edge without holes toward feed direction - HP LaserJet 9000 | HP LaserJet 9000mfp and 9000Lmfp - User Guide - Page 53
of media Labels, Letter, A4 size sheets, or transparencies Tray Tray 1 only Duplexed No (Never duplex) 53 Orient media like this Long edge toward feed direction; side to be printed facing up. Type of media Envelopes Tray Tray 1 only Duplexed No (Never duplex) Orient media like this Short edge - HP LaserJet 9000 | HP LaserJet 9000mfp and 9000Lmfp - User Guide - Page 54
not available in the program or driver, you must set it at the product control panel. To print 1 Make sure paper is loaded in the product. See the introduce guide on the product CD, or at www.hp.com/support/lj9000 and "Orienting media" on page 47 for instructions. 2 If you loaded a custom size media - HP LaserJet 9000 | HP LaserJet 9000mfp and 9000Lmfp - User Guide - Page 55
on page 67. 8 Select any other settings you want, such as duplexing, watermarks, or different first page. For more information about these settings, see the tasks in this section. 9 The standard output bin is the default output location. Use this location for output of most types of media, - HP LaserJet 9000 | HP LaserJet 9000mfp and 9000Lmfp - User Guide - Page 56
the program or driver, set the default product output location from the product control panel. To select an output location from the control panel 1 Touch specifications, see the introduce guide on the product CD, or go to www.hp.com/support/lj9000. CAUTION Envelopes with clasps, snaps, windows - HP LaserJet 9000 | HP LaserJet 9000mfp and 9000Lmfp - User Guide - Page 57
5 Printing 57 To load envelopes in Tray 1 1 Open Tray 1, but do not pull out the extension. (Most envelopes into the product as far as they will go without forcing them. 3 Adjust the guides to touch the envelope stack without bending the envelopes. Make sure the envelopes fit under the tabs on the - HP LaserJet 9000 | HP LaserJet 9000mfp and 9000Lmfp - User Guide - Page 58
5 Printing 58 To change the fuser levers 1 Move the output device from the product to gain access to the left HOT. 3 Locate and lift up the two blue "T" shaped levers. 4 Return the fuser levers to the down position after printing an envelope. 2 5 Close the left door. 4 5 Printing envelopes - HP LaserJet 9000 | HP LaserJet 9000mfp and 9000Lmfp - User Guide - Page 59
Tray 1. 2 In your program or in the driver, specify Tray 1 or Automatic. Or, select the paper source. 3 Set the appropriate envelope size and type. For envelope specifications, see the introduce guide on the product CD, or go to www.hp.com/support/lj9000. 4 If your program does not automatically - HP LaserJet 9000 | HP LaserJet 9000mfp and 9000Lmfp - User Guide - Page 60
of up to 50 sheets of labels from Tray 1. z Use only labels recommended for laser printers. Make sure the labels meet the correct specifications. (See the introduce guide on the product CD, or go to www.hp.com/support/lj9000.) CAUTION Failure to follow these instructions can damage the product - HP LaserJet 9000 | HP LaserJet 9000mfp and 9000Lmfp - User Guide - Page 61
sheet exposed. (Labels must cover the entire backing sheet with no exposed spaces.) z Do not feed a sheet transparencies recommended for use in laser printers. z Use the standard output bin 1. For paper specifications, see the introduce guide on the product CD, or go to www.hp.com/support/lj9000. z If - HP LaserJet 9000 | HP LaserJet 9000mfp and 9000Lmfp - User Guide - Page 62
5 Printing 62 z If you are printing from Tray 4, the edge of the paper feeding into the product must be at least 182 mm (7.2 inches) wide to allow rollers inside the product to grab the paper, and a maximum of 297 mm (11.7 inches). Measuring from the leading edge to the trailing edge of the paper, - HP LaserJet 9000 | HP LaserJet 9000mfp and 9000Lmfp - User Guide - Page 63
the product settings you use most often as the default settings. For example, the driver might be set to print on letter-size paper, portrait orientation, with automatic tray selection (from the first available tray). Windows PCL 6 and PCL 5e drivers allow you to save product settings for multiple - HP LaserJet 9000 | HP LaserJet 9000mfp and 9000Lmfp - User Guide - Page 64
5 Printing 64 Different first page To print a different first page Follow these instructions for printing a first page that is different from other pages in the print job. 1 1 For Windows, select "Use different paper for first page" in your driver. Choose Tray 1 (or manual feed) for the first - HP LaserJet 9000 | HP LaserJet 9000mfp and 9000Lmfp - User Guide - Page 65
end of a print job. For Windows, select Use different paper for first page in the Paper tab of your driver, and then choose Back Page. You multiple pages on one sheet of paper You can print more than one page on a single sheet of paper. This feature is available in some drivers and provides a cost- - HP LaserJet 9000 | HP LaserJet 9000mfp and 9000Lmfp - User Guide - Page 66
. z Only when the type of paper loaded is specifically requested. Tray 1 Mode must be set to Cassette. not, set the type and size from the product control panel. (See "Printing by type and size of of the custom-size media. Manually feeding paper from Tray 1 The manual feed feature is another way of - HP LaserJet 9000 | HP LaserJet 9000mfp and 9000Lmfp - User Guide - Page 67
of paper. For supported types of paper, see the introduce guide on the product CD , or go to w w w. h p. c o m / s u p p o r t / l j 9 0 0 0 . Note The type and size settings can also be configured from the HP Web JetAdmin software for networked products. See the driver - HP LaserJet 9000 | HP LaserJet 9000mfp and 9000Lmfp - User Guide - Page 68
and size of paper Settings in the driver and software application override control panel settings. (Software application settings generally override driver settings.) 1 Load and adjust the trays. (See the introduce guide on the product CD, or at www.hp.com/support/lj9000.) 2 On the touch screen of - HP LaserJet 9000 | HP LaserJet 9000mfp and 9000Lmfp - User Guide - Page 69
Proof and hold jobs. Follow the instructions below to gain access to the job retention features at the computer. Then, see the specific section for the type of job newer drivers: Select Job Retention from the pull-down menu in the print dialog box. In older drivers, select Printer Specific Options - HP LaserJet 9000 | HP LaserJet 9000mfp and 9000Lmfp - User Guide - Page 70
a user specify that a job is not printed until that user releases it using a 4-digit personal identification number (PIN) through the product control panel. The user specifies the PIN in the driver, and the PIN is sent to the product as part of the print job. To create private jobs To specify that - HP LaserJet 9000 | HP LaserJet 9000mfp and 9000Lmfp - User Guide - Page 71
5 Printing 71 Deleting a private job A private job is automatically deleted from the product hard disk accessory after the user releases it for printing. If you want to delete the job without printing it, use this procedure. To delete private jobs 1 Touch Menu. 2 Touch Retrieve Job. 3 Scroll to - HP LaserJet 9000 | HP LaserJet 9000mfp and 9000Lmfp - User Guide - Page 72
want to download a personnel form, calendar, time sheet, or accounting form that other users can access and print. To store a print job on the hard disk accessory, select the Stored Job option in the driver when printing from the product. Note The stored job feature uses available RAM memory on - HP LaserJet 9000 | HP LaserJet 9000mfp and 9000Lmfp - User Guide - Page 73
5 Printing 73 Deleting a stored job Jobs stored on the product hard disk accessory can be deleted from the control panel. To delete a stored job 1 Touch Menu. 2 Touch to Retrieve Job. 3 Touch User Name to see a list of jobs. 4 Scroll to your job, and then - HP LaserJet 9000 | HP LaserJet 9000mfp and 9000Lmfp - User Guide - Page 74
of the job can be printed later. This feature can be turned off from the driver. The default number of different QuickCopy jobs that can be stored on the product is 32. From the control panel, you can set a different default number. See "JOB STORAGE LIMIT=32" on page 205. To create QuickCopy jobs - HP LaserJet 9000 | HP LaserJet 9000mfp and 9000Lmfp - User Guide - Page 75
stored on the product hard disk accessory from the control panel. To print more copies of a QuickCopy Scroll to your job and touch OK. 5 To print the default number of copies, go to the next step. Otherwise, do to be printed appears at the top of the window. b To change the number, use the numeric - HP LaserJet 9000 | HP LaserJet 9000mfp and 9000Lmfp - User Guide - Page 76
product will automatically delete other stored QuickCopy jobs, starting with the oldest job. Note Stored QuickCopy jobs can be deleted from the control panel or from HP Web JetAdmin. To delete a QuickCopy job 1 Touch Menu. 2 Touch Retrieve Job. 3 Touch USER NAME to see a list of jobs. 4 Scroll to - HP LaserJet 9000 | HP LaserJet 9000mfp and 9000Lmfp - User Guide - Page 77
is needed for something else, select the Stored Job option in the driver. To create a proof and hold job CAUTION If the product needs print the remaining copies of a job held on the product hard disk accessory from the control panel. To print a proof and hold job 1 Touch Menu. 2 Touch Retrieve Job - HP LaserJet 9000 | HP LaserJet 9000mfp and 9000Lmfp - User Guide - Page 78
5 Printing 78 Deleting a held job When a user sends a proof and hold job, the product automatically deletes that user's previous proof and hold job. If there is not a proof and hold job already for that job name and the product needs additional space, the product might delete other proof and hold - HP LaserJet 9000 | HP LaserJet 9000mfp and 9000Lmfp - User Guide - Page 79
user guide for the HP Fast InfraRed Connect. Setting up to print with Windows 9X Before launching the Fast InfraRed driver, complete the following steps: 1 Click Start, click Settings, and then click Printers. 2 Select the HP LaserJet 9000mfp or HP LaserJet 9000Lmfp as your default printer. 3 While - HP LaserJet 9000 | HP LaserJet 9000mfp and 9000Lmfp - User Guide - Page 80
to the parallel port. To print a job 1 Align your laptop computer (or other portable device equipped with an IrDA-compliant FIR window) within one meter (three feet) maximum of the HP FIR Connect. The FIR window must be at an angle of +/- 15 degrees relative to the product to ensure an effective - HP LaserJet 9000 | HP LaserJet 9000mfp and 9000Lmfp - User Guide - Page 81
printing the current job when it reaches the end of the job it is printing. The product then prints the job sent over the FIR connection. When the product is done printing that job, it resumes printing the original job where it left off. Interrupting and resuming printing - HP LaserJet 9000 | HP LaserJet 9000mfp and 9000Lmfp - User Guide - Page 82
, such as desktop publishing programs. Refer to the user guide that came with your program for information on making booklets. If you are using a program that does not support booklet making, you can create booklets using your HP drivers. Note HP recommends that you use your program to prepare and - HP LaserJet 9000 | HP LaserJet 9000mfp and 9000Lmfp - User Guide - Page 83
6 Product maintenance 83 6 Product maintenance Overview This section explains basic product maintenance: z Cleaning the product z Managing the print cartridge z Print cartridge conditions Overview - HP LaserJet 9000 | HP LaserJet 9000mfp and 9000Lmfp - User Guide - Page 84
6 Product maintenance 84 Cleaning the product Cleaning the ADF delivery system Clean the ADF only if it is visibly marked or dirty, or if you are experiencing a - HP LaserJet 9000 | HP LaserJet 9000mfp and 9000Lmfp - User Guide - Page 85
6 Product maintenance 85 5 Locate the white, vinyl calibration strips. 6 Clean the ADF backing and the calibration strips by wiping them with a clean, 5 damp, lint-free cloth. Use an ammonia-based surface cleaner to dampen the cloth. 7 Close the ADF. 7 Cleaning the product - HP LaserJet 9000 | HP LaserJet 9000mfp and 9000Lmfp - User Guide - Page 86
6 Product maintenance 86 To clean the top ADF glass strip If you are still experiencing poor copy quality, you might need to clean the top ADF glass - HP LaserJet 9000 | HP LaserJet 9000mfp and 9000Lmfp - User Guide - Page 87
6 Product maintenance 87 To clean the ADF rollers You should clean the rollers in the ADF if you are experiencing misfeeds or if your originals show marks - HP LaserJet 9000 | HP LaserJet 9000mfp and 9000Lmfp - User Guide - Page 88
6 Product maintenance 88 5 Open the ADF cover. 6 Locate the rollers. 5 7 Wipe the rollers with a clean, water-dampened, lint-free cloth. CAUTION Do not pour water directly onto the rollers. Doing so might damage the product. 8 Close the ADF cover. 9 Close the delivery guide and wipe its - HP LaserJet 9000 | HP LaserJet 9000mfp and 9000Lmfp - User Guide - Page 89
6 Product maintenance 89 Cleaning the scanner glass z Clean the scanner glass only if dirt is visible, or if you see poor copy quality (such as streaking). z Clean - HP LaserJet 9000 | HP LaserJet 9000mfp and 9000Lmfp - User Guide - Page 90
printed z other supplies information Non-HP print cartridge Hewlett-Packard Company cannot recommend the use of non-HP print cartridges, either new or remanufactured. Because they are not HP products, HP cannot influence their design or control their quality. Service or repairs required as a result - HP LaserJet 9000 | HP LaserJet 9000mfp and 9000Lmfp - User Guide - Page 91
maintenance 91 Checking the toner level You can check the toner level using the product control panel, the product software, the embedded Web access server (see "Checking the toner level using the embedded Web access server" on page 244), or HP Web JetAdmin (see "Checking the toner level using HP - HP LaserJet 9000 | HP LaserJet 9000mfp and 9000Lmfp - User Guide - Page 92
6 Product maintenance 92 Print cartridge conditions Print cartridge is low When the print cartridge is low, the product control panel displays the CARTRIDGE LOW message. If the CARTRIDGE LOW message appears, but the product continues printing, CARTRIDGE LOW is set to CONTINUE (the default setting - HP LaserJet 9000 | HP LaserJet 9000mfp and 9000Lmfp - User Guide - Page 93
. If the cleaning page is frequently needed, try a different type of paper. If toner specks appear on the front or back side of your print jobs, follow the procedure below. From the product control panel: 1 Touch Menu. 1 Touch Configure Device. 2 Touch Print Quality. 3 Scroll to Create Cleaning - HP LaserJet 9000 | HP LaserJet 9000mfp and 9000Lmfp - User Guide - Page 94
, or if paper is wrinkled or curled, use this section to troubleshoot and solve the print quality problem. "Determining product problems" on page 146 Before you can eliminate a product problem, you must understand the location of the problem. Use the tables in this section to determine the product - HP LaserJet 9000 | HP LaserJet 9000mfp and 9000Lmfp - User Guide - Page 95
7 Problem solving 95 Clearing jams If the control panel displays a paper jam message, look for it could cause additional jams. If jams are a recurring problem, see "Solving repeated paper jams" on page 116. Note Loose toner might remain in the product after a paper jam and cause output quality - HP LaserJet 9000 | HP LaserJet 9000mfp and 9000Lmfp - User Guide - Page 96
Problem solving 96 Jam locations Bin 1 Front door and print cartridge area Bin 2 ADF Tray 1 Output device Duplexer (inside the printer) Left door (behind the output device) Right door Vertical transfer door Tray 2 and Tray 3 Tray 4 HP LaserJet 9000mfp/HP LaserJet 9000Lmfp with the 3000-sheet - HP LaserJet 9000 | HP LaserJet 9000mfp and 9000Lmfp - User Guide - Page 97
7 Problem solving 97 Clearing jams from the input tray areas To clear jams in Tray 1 1 Check for paper in the Tray 1 area, and remove any paper - HP LaserJet 9000 | HP LaserJet 9000mfp and 9000Lmfp - User Guide - Page 98
7 Problem solving 98 To clear jams inside the right door 1 Open the right door. 2 Check for paper in the right door area, and remove any paper - HP LaserJet 9000 | HP LaserJet 9000mfp and 9000Lmfp - User Guide - Page 99
7 Problem solving 99 To clear jams in Trays 2 and 3 1 Open the tray until it stops. 2 Check for paper in the tray area, and remove any paper - HP LaserJet 9000 | HP LaserJet 9000mfp and 9000Lmfp - User Guide - Page 100
7 Problem solving 100 To clear jams in Tray 4 1 Open Tray 4. 2 Check for paper in the tray area, and remove any paper from this area. Carefully 1 check to be sure you have removed all pieces of torn paper. 3 Close Tray 4. 4 Open and close the right door to reset the product. 3 4 Clearing jams - HP LaserJet 9000 | HP LaserJet 9000mfp and 9000Lmfp - User Guide - Page 101
7 Problem solving 101 Clearing jams from the duplex printing accessory (duplexer) To clear jams in the duplex printing WARNING! Avoid touching the adjacent fusing area. It can be HOT. 3 Remove the duplex printing accessory by pressing the green lever and pulling the unit out until it stops - HP LaserJet 9000 | HP LaserJet 9000mfp and 9000Lmfp - User Guide - Page 102
7 Problem solving 102 6 Check for paper in the duplex printing accessory area, and remove any paper by pulling it out of the product. Be careful not to tear the paper. 6 7 Reinstall the duplex printing accessory by sliding it back into the slot until it locks into place. 8 Close all open - HP LaserJet 9000 | HP LaserJet 9000mfp and 9000Lmfp - User Guide - Page 103
7 Problem solving 103 Clearing jams from the output areas Note To clear jams in the stacker or stapler/stacker 1 If the jam extends into the output - HP LaserJet 9000 | HP LaserJet 9000mfp and 9000Lmfp - User Guide - Page 104
7 Problem solving 104 5 Carefully pull out any paper from the flipper area. 5 WARNING! Avoid touching the flipper area. It can be HOT. 6 Locate the green handle - HP LaserJet 9000 | HP LaserJet 9000mfp and 9000Lmfp - User Guide - Page 105
7 Problem solving 105 To clear jams in the multifunction finisher 1 Open the finisher cover. 1 2 Slowly and carefully pull the paper straight out of the finisher so that it does not tear. 3 Close the finisher cover. 4 Move the finisher away from the product. 2 3 4 Clearing jams - HP LaserJet 9000 | HP LaserJet 9000mfp and 9000Lmfp - User Guide - Page 106
7 Problem solving 106 5 Carefully remove any paper from the printer output area. 5 6 Carefully remove any paper from the finisher input area. 7 Open the stapler-unit door. 8 To clear a booklet jam, turn the bottom green knob clockwise to remove the booklet. 6 7 8 Clearing jams - HP LaserJet 9000 | HP LaserJet 9000mfp and 9000Lmfp - User Guide - Page 107
7 Problem solving 9 Close the stapler-unit door. 10 Reattach the finisher. 107 9 10 Clearing jams - HP LaserJet 9000 | HP LaserJet 9000mfp and 9000Lmfp - User Guide - Page 108
7 Problem solving 108 To clear jams in the left door (fuser area) 1 Move the output device away from the product to gain access to the left door. 2 Open the left door. 1 WARNING! Avoid touching the adjacent - HP LaserJet 9000 | HP LaserJet 9000mfp and 9000Lmfp - User Guide - Page 109
7 Problem solving 109 To clear a staple jam from the stapler/stacker Note 1 The message JAM INSIDE STAPLER displays on the control panel. 1 Move the stapler/stacker away from the product. 2 Open the stapler unit door. 3 Pull the cartridge out. 4 Pull up on the lever labeled with a - HP LaserJet 9000 | HP LaserJet 9000mfp and 9000Lmfp - User Guide - Page 110
7 Problem solving 5 Remove the damaged staple. 6 Press down on the lever labeled with a green dot. 7 Reinstall the staple cartridge. 8 Close the stapler unit door. 110 75 6 7 8 Clearing jams - HP LaserJet 9000 | HP LaserJet 9000mfp and 9000Lmfp - User Guide - Page 111
7 Problem solving 111 Note 9 Reattach the stapler/stacker to the product. 79 The stapler needs to reload after clearing a staple jam, so the first few documents ( - HP LaserJet 9000 | HP LaserJet 9000mfp and 9000Lmfp - User Guide - Page 112
7 Problem solving 112 To clear a staple jam from the multifunction finisher 1 Open the stapler-unit door. 2 Slide the stapler-unit toward you. 1 3 Turn the large green knob until the blue dot appears in the window of the stapler unit. 4 Turn the small green knob at the top of the stapler unit - HP LaserJet 9000 | HP LaserJet 9000mfp and 9000Lmfp - User Guide - Page 113
7 Problem solving 5 Remove the staple cartridge. 6 Pull up on the lever labeled with a green dot. 7 Remove the damaged staple. 8 Press down on the lever labeled with a green dot. 113 5 6 7 8 Clearing jams - HP LaserJet 9000 | HP LaserJet 9000mfp and 9000Lmfp - User Guide - Page 114
7 Problem solving 9 Reinstall the staple cartridge. 10 Slide the stapler unit into the finisher. 11 Close the stapler-unit door. 114 9 10 11 Clearing jams - HP LaserJet 9000 | HP LaserJet 9000mfp and 9000Lmfp - User Guide - Page 115
7 Problem solving 115 In rare instances, a staple jam might occur in the upper half of the stapler head. 1 Follow steps 1 through 4 for clearing a staple jam from - HP LaserJet 9000 | HP LaserJet 9000mfp and 9000Lmfp - User Guide - Page 116
on the product CD, or got to www.hp.com/support/lj9000.) If paper is outside of the recommended specifications, problems can occur. 6. Product might be dirty. Clean the product as described in the introduce guide on the product CD, or go to www.hp.com/support/lj9000. 7. Check that all damaged or - HP LaserJet 9000 | HP LaserJet 9000mfp and 9000Lmfp - User Guide - Page 117
is still in the product memory) allow you to touch Continue to print, or to press STOP to clear the job and eliminate the message. z If a message persists after performing all of the recommended actions, contact an HP-authorized service or support provider. (See the introduce guide on the product CD - HP LaserJet 9000 | HP LaserJet 9000mfp and 9000Lmfp - User Guide - Page 118
dialog box. ADF SKEW ERROR Make sure that the paper guides are aligned on the sides of the originals, and that all originals are the same size. Follow the instructions on the pop-up dialog box. BAD DUPLEXER CONNECTION The duplex printing accessory is not connected properly to the product. Follow - HP LaserJet 9000 | HP LaserJet 9000mfp and 9000Lmfp - User Guide - Page 119
NOT AVAILABLE alternates with READY A print job requested a printer language (personality) that does is not available with this product. The job will not print and will be cleared from memory. Print the job using a driver for a different printer language, or add the requested language to the - HP LaserJet 9000 | HP LaserJet 9000mfp and 9000Lmfp - User Guide - Page 120
7 Problem solving 120 Message Explanation or recommended action CLEARING PAPER FROM PRINTER The product jammed or was turned on and paper is detected in a wrong location. The product is automatically attempting to eject the pages. If possible, - HP LaserJet 9000 | HP LaserJet 9000mfp and 9000Lmfp - User Guide - Page 121
Problem download a file to a nonexistent directory. Delete files from the EIO hard disk and then try again. HP instructions on the pop-up dialog box. The EIO hard disk in slot x is spinning up its platter. The user is attempting to view an empty event log by selecting SHOW EVENT LOG from the control - HP LaserJet 9000 | HP LaserJet 9000mfp and 9000Lmfp - User Guide - Page 122
7 Problem solving 122 Message Explanation or recommended action FLASH DEVICE FAILURE FILE SYSTEM IS FULL alternates with READY Delete files from the flash DIMM. Use HP LaserJet Resource Manager to download or delete files and fonts. (See the software help for more information.) FLASH - HP LaserJet 9000 | HP LaserJet 9000mfp and 9000Lmfp - User Guide - Page 123
use another tray touch Continue. A job is sent that requires a specific type and size that is not available. Load the requested paper into Tray 1. Touch Continue to use a type and size that is available in another tray. MANUALLY FEED [TYPE] [SIZE] alternates with Continue Load the requested paper - HP LaserJet 9000 | HP LaserJet 9000mfp and 9000Lmfp - User Guide - Page 124
. This usually occurs after removing memory from the product, adding a duplex printing accessory, or adding a printer language. You might want to change memory settings for I/O buffering and resource saving (although default settings are usually best), or add more memory to the product (See "Product - HP LaserJet 9000 | HP LaserJet 9000mfp and 9000Lmfp - User Guide - Page 125
procedures. To ensure optimum print quality, the product prompts you to perform routine maintenance every 350,000 pages. To order a Printer Maintenance Kit, see the introduce guide on the product CD, or go to www.hp.com/support/lj9000. The RAM disk had a critical failure and can no longer be used - HP LaserJet 9000 | HP LaserJet 9000mfp and 9000Lmfp - User Guide - Page 126
on the device. (Delete files using HP LaserJet Resource Manager or another software utility. See the software help for more information.) If the message persists, increase the size of the ROM disk. Change the ROM disk size from the Configuration menu in the control panel (See "System setup submenu - HP LaserJet 9000 | HP LaserJet 9000mfp and 9000Lmfp - User Guide - Page 127
7 Problem solving 127 Message Explanation or recommended action ROTATE PAPER IN that is longer or shorter in the feed direction than the size configured for the tray. Follow the instructions on the pop-up dialog box. STAPLE AREA SAFETY PROTECTION ACTIVATED A staple safety alert has occurred. - HP LaserJet 9000 | HP LaserJet 9000mfp and 9000Lmfp - User Guide - Page 128
the use guide that came with the output device for more information. TYPE MISMATCH TRAY x=[TYPE] The system detected an overhead transparency in the paper path coming from the tray (xx). UNABLE TO MOPY JOB A mopy job cannot be mopied because of a memory, disk, or configuration problem. Only one - HP LaserJet 9000 | HP LaserJet 9000mfp and 9000Lmfp - User Guide - Page 129
been cleared, a sensor might be stuck or broken. Contact an HP-authorized service or support provider (see the introduce guide on the product CD, or go to www.hp.com/support/lj9000). The product received more data than can fit in its available memory. You might have tried to transfer too many macros - HP LaserJet 9000 | HP LaserJet 9000mfp and 9000Lmfp - User Guide - Page 130
DEFAULTS HP-authorized service or support provider. (see the introduce guide guide on the product CD, or go to www.hp.com/support/lj9000). (Some non-HP parallel cables might be missing pin connections or might otherwise not conform to the IEEE-1284 specification.) This error can occur if the driver - HP LaserJet 9000 | HP LaserJet 9000mfp and 9000Lmfp - User Guide - Page 131
, then turn the product on. If this message persists, contact an HP-authorized service or support provider (see the introduce guide on the product CD, or www.hp.com/support/lj9000). 40 BAD SERIAL TRANSMISSION A serial data error (parity, framing, or line overrun) occurred during the reception of - HP LaserJet 9000 | HP LaserJet 9000mfp and 9000Lmfp - User Guide - Page 132
, or go to www.hp.com/support/lj9000). 49.xxxxx A critical firmware error has occurred. If this message persists, contact an HP-authorized service or support provider (see the introduce guide on the product CD, or go to www.hp.com/support/lj9000). 50.x FUSER ERROR A fuser error has occurred. If - HP LaserJet 9000 | HP LaserJet 9000mfp and 9000Lmfp - User Guide - Page 133
turn the product on. If this message persists, contact an HP-authorized service or support provider (see the introduce guide on the product CD, or www.hp.com/support/lj9000). There is a problem with the product memory. The DIMM that caused the error will not be used. Values of x, y, and zz are as - HP LaserJet 9000 | HP LaserJet 9000mfp and 9000Lmfp - User Guide - Page 134
alternates with To continue cycle power 60.x PRINTER ERROR Explanation or recommended action A temporary printing error occurred. Turn the product off, then turn the product on. If this message persists, contact an HP-authorized service or support provider (see the introduce guide on the product CD - HP LaserJet 9000 | HP LaserJet 9000mfp and 9000Lmfp - User Guide - Page 135
touch Continue. If this message persists, contact an HP-authorized service or support provider (see the introduce guide on the product CD, or go to www.hp.com/support/lj9000). 64 PRINTER ERROR alternates with To continue cycle power A scan buffer error occurred. Turn the product off, and then turn - HP LaserJet 9000 | HP LaserJet 9000mfp and 9000Lmfp - User Guide - Page 136
the message. If this message persists, contact an HP-authorized service or support provider (see the introduce guide on the product CD, or go to www.hp.com/support/lj9000). A temporary printing error occurred. Turn the product off, reseat the duplex printing accessory, and then turn the product on - HP LaserJet 9000 | HP LaserJet 9000mfp and 9000Lmfp - User Guide - Page 137
7 Problem solving 137 Message 81 SERVICE (xxx) Explanation or recommended action This message is used when errors occur while testing the product at the manufacturing site. Understanding product messages - HP LaserJet 9000 | HP LaserJet 9000mfp and 9000Lmfp - User Guide - Page 138
is present only when printing, use the examples in the image defect table to determine which print quality problem you are experiencing, then see the corresponding reference pages to troubleshoot. Note The examples below depict letter-size paper that has passed through the product long-edge first - HP LaserJet 9000 | HP LaserJet 9000mfp and 9000Lmfp - User Guide - Page 139
background" on page 141 See "Toner smear" on page 141 See "Loose toner" on page 141 See "Repeating defects" on page 142 See "Misformed characters" on page 142 See "Page skew" on page 142 See "Curl or wave" on page 143 See "Wrinkles or creases" on page 143 Correcting output quality problems - HP LaserJet 9000 | HP LaserJet 9000mfp and 9000Lmfp - User Guide - Page 140
the printer maintenance kit. (See the introduce guide on the product CD, or go to www.hp.com/support/lj9000.) z The print cartridge might be almost empty. Replace the print cartridge. Specks Specks might appear on a page after a jam has been cleared. z Print a few more pages to see if the problem - HP LaserJet 9000 | HP LaserJet 9000mfp and 9000Lmfp - User Guide - Page 141
is due, order and install the printer maintenance kit. (See the introduce guide on the product CD, or go to www.hp.com/support/lj9000.) z Replace the print cartridge. Loose toner Loose toner, in this context, is defined as toner that can be rubbed off the page. Correcting output quality problems - HP LaserJet 9000 | HP LaserJet 9000mfp and 9000Lmfp - User Guide - Page 142
is due, order and install the printer maintenance kit. (See the introduce guide on the product CD, or go to www.hp.com/support/lj9000.) Misformed characters z Print a few more pages to see if the problem corrects itself. z Make sure that the environmental specifications for the product are being met - HP LaserJet 9000 | HP LaserJet 9000mfp and 9000Lmfp - User Guide - Page 143
fusing process. At the control panel, use CONFIGURE FUSER MODE MENU on the Paper handling menu to do this (see "Paper handling menu" on page 189). Wrinkles or creases z Print a few more pages to see if the problem corrects itself. z Make sure that the environmental specifications for the product are - HP LaserJet 9000 | HP LaserJet 9000mfp and 9000Lmfp - User Guide - Page 144
Problem solving 144 Preventing wrinkles on envelopes If envelopes are wrinkled when printed, first ensure that you are using supported types of envelopes. Then, use the following procedure to move the fuser finished printing the envelopes, return the fuser levers to the down position for standard - HP LaserJet 9000 | HP LaserJet 9000mfp and 9000Lmfp - User Guide - Page 145
solving 145 Detecting product problems Note Troubleshooting checklist z Print job on custom paper does not fit correctly z Problems with the stapler/stacker z Problems with the multifunction finisher For more information about the HP output devices, see the use guide that came with the device - HP LaserJet 9000 | HP LaserJet 9000mfp and 9000Lmfp - User Guide - Page 146
guides are set correctly. Display is blank, and internal fans Make sure that the product power is on. Press all the keys to see if one is stuck; are not running. contact your HP-authorized service . Product is not turned on. Press the product control button to turn the product on (button in). - HP LaserJet 9000 | HP LaserJet 9000mfp and 9000Lmfp - User Guide - Page 147
If you are using a power strip and its voltage is not within specification, plug the product directly into the power receptacle. Product voltage is SMTP server is running. Error executing Digital Send job. Job failed. The product experienced an error while executing the digital sending problems - HP LaserJet 9000 | HP LaserJet 9000mfp and 9000Lmfp - User Guide - Page 148
a time. Network connection required for digital sending. The product cannot find a network connection. The administrator should check to see if the product is connected to the network. LDAP gateway address. Digital send communication error. Try to send again. Correcting output quality problems - HP LaserJet 9000 | HP LaserJet 9000mfp and 9000Lmfp - User Guide - Page 149
control panel PERSONALITY=AUTO setting might have been confused by a nonstandard PS code. Check the PERSONALITY setting to see if it is set to PS or PCL. If it is set to PCL the HP Resource Manager or the Macintosh-based HP LaserJet utility to download the font. Correcting output quality problems - HP LaserJet 9000 | HP LaserJet 9000mfp and 9000Lmfp - User Guide - Page 150
(See the introduce guide on the product CD, or go to www.hp.com/support/lj9000.) Computer software problem. Check that your computer is working correctly by printing from a program you know works, or by printing a plain text file to see if the problem is with your program or with your driver. (For - HP LaserJet 9000 | HP LaserJet 9000mfp and 9000Lmfp - User Guide - Page 151
device, or see the computer user guide for IRDA specifications. z Make sure that the operating system on your computer includes a FIR driver and that your program uses a compatible driver. (Note that complex pages take longer to print.) z Position the HP Fast InfraRed Receiver within the range of - HP LaserJet 9000 | HP LaserJet 9000mfp and 9000Lmfp - User Guide - Page 152
a high-quality cable. (See the introduce guide on the product CD, or go to www.hp.com/support/lj9000 for an HP cable part number.) z Check your network connection. Data light is flashing, but nothing prints. z Make sure that you are using the correct driver. z A complex print job might still be - HP LaserJet 9000 | HP LaserJet 9000mfp and 9000Lmfp - User Guide - Page 153
is properly configured in on both sides of the paper. the driver. Duplex printing accessory jams. Make sure that you are using the supported paper weights and sizes. (See the introduce guide on the product CD, or go to www.hp.com/support/lj9000.) FIR port status indicator does not light up - HP LaserJet 9000 | HP LaserJet 9000mfp and 9000Lmfp - User Guide - Page 154
problems. General repeated stapler jam problems. Job has been properly sent, but the product will not print. Job has incorrect fonts. Job is not sent to the desired printer If the connection is broken downloading the fonts contained in the .EPS file to the printer before printing. Use the HP LaserJet - HP LaserJet 9000 | HP LaserJet 9000mfp and 9000Lmfp - User Guide - Page 155
default font) instead of the font you requested. z The requested typeface is not available in the product or is not present on the disk. Use a font download utility to download the required font. z Fonts downloaded to memory the introduce guide on the product CD, or go to www.hp.com/support/lj9000.) - HP LaserJet 9000 | HP LaserJet 9000mfp and 9000Lmfp - User Guide - Page 156
was used for the job. z More than 50 pages were sent to the stapler, exceeding its capacity connected properly. The wrong size or type of paper was used for the job. (See the introduce guide on the product CD, or go to www.hp.com/support/lj9000.) z Make sure that you are using the correct driver - HP LaserJet 9000 | HP LaserJet 9000mfp and 9000Lmfp - User Guide - Page 157
selected in the driver. For more information about changing driver settings, see the online help. z The paper does not meet the specifications for the output bin (See the introduce guide on the product CD, or go to www.hp.com/support/lj9000). Paper jams and paper-feeding problems. z See "To clear - HP LaserJet 9000 | HP LaserJet 9000mfp and 9000Lmfp - User Guide - Page 158
guide on the product CD, or go to www.hp.com/support/lj9000. z Print a configuration page to ensure that the duplex z Make sure you selected Tray 4 in the driver (See "Helpful software for increased flexibility" on HP service provider. Check the cable to the stapler. Make sure it is properly connected - HP LaserJet 9000 | HP LaserJet 9000mfp and 9000Lmfp - User Guide - Page 159
does not recognize it and draws paper from the next default tray source. Turn the product off, then back on, and the product will recognize the tray. Product interface problems. Print a configuration page from the control panel to verify that the interface configurations shown on the printout - HP LaserJet 9000 | HP LaserJet 9000mfp and 9000Lmfp - User Guide - Page 160
your software application is set up, which driver you are using, and how much traffic is on the network. See the start guide for configuration information. z You might need to add more memory (See "Installing memory" on page 220). Product port problem. Check that your computer port is configured - HP LaserJet 9000 | HP LaserJet 9000mfp and 9000Lmfp - User Guide - Page 161
correctly configured and that there is not a network problem (see your system administrator). z Check the line voltage to make sure that it is steady and within product specifications. (See the introduce guide on the product CD, or go to www.hp.com/support/lj9000.) Turn the product off and then back - HP LaserJet 9000 | HP LaserJet 9000mfp and 9000Lmfp - User Guide - Page 162
it is not present anywhere on your system, you can obtain the driver from your Macintosh OS system software CD, from Apple Computer, Inc., or see the introduce guide on the product CD, or go to www.hp.com/support/lj9000. Type has been specified as labels, transparencies, or envelopes. z Make sure - HP LaserJet 9000 | HP LaserJet 9000mfp and 9000Lmfp - User Guide - Page 163
7 Problem solving 163 Cabling configurations Correcting output quality problems - HP LaserJet 9000 | HP LaserJet 9000mfp and 9000Lmfp - User Guide - Page 164
If you manually select a PPD, an icon might not appear next to the selected printer in the Select a PostScript Printer box. In the Chooser, click Setup, click Printer Info, and the Printer Name feature in the HP LaserJet Utility settings to rename the product. Correcting output quality problems - HP LaserJet 9000 | HP LaserJet 9000mfp and 9000Lmfp - User Guide - Page 165
, and you cannot communicate with the printer over the network, verify the operation of the print server. Check the Jetdirect Configuration Page for the message I/O CARD READY. For troubleshooting information, see the HP Jetdirect administrator's guide. HP Jetdirect 610N 10/100TX Print Server If - HP LaserJet 9000 | HP LaserJet 9000mfp and 9000Lmfp - User Guide - Page 166
7 Problem solving 166 2 Turn the product off and back on and check the print server operation. If the print server fails to link, try a different network cable. Correcting output quality problems - HP LaserJet 9000 | HP LaserJet 9000mfp and 9000Lmfp - User Guide - Page 167
7 Problem solving 167 Checking the product configuration From the control panel, you can print pages that give details about the product and its current configuration. The following information pages are described here: z Menu map z Configuration page z Supplies status page z Usage page z PCL or - HP LaserJet 9000 | HP LaserJet 9000mfp and 9000Lmfp - User Guide - Page 168
7 Problem solving 168 Menu map To see the current settings for the menus and items available in the control panel, print a control panel menu map: 1 Touch Menu. 2 Touch Information. 3 Touch Menu. 4 Touch Print Menu Map. 5 Touch OK. Many of these values can be overridden from the driver or program. - HP LaserJet 9000 | HP LaserJet 9000mfp and 9000Lmfp - User Guide - Page 169
page to view current product settings, to help troubleshoot printer problems, or to verify installation of optional accessories, such as memory (DIMMs), paper trays, and product languages. Note If an HP Jetdirect print server is installed, an HP Jetdirect configuration page will print out as well - HP LaserJet 9000 | HP LaserJet 9000mfp and 9000Lmfp - User Guide - Page 170
panel password, and disk drive. 6 Paper Trays and Options lists the size settings for all trays and lists paper-handling accessories that are installed. Numbers in the sample printout match the numbers in the product messages. (See the introduce guide on the product CD, or go to www.hp.com/support - HP LaserJet 9000 | HP LaserJet 9000mfp and 9000Lmfp - User Guide - Page 171
pages remaining for the amount of toner left in the cartridge, total number of pages and jobs processed, print cartridge manufacture date and serial number, and how to recycle HP print cartridges. 3 Other Supplies Information indicates the percentage of the maintenance kit has been used and the - HP LaserJet 9000 | HP LaserJet 9000mfp and 9000Lmfp - User Guide - Page 172
information: 1 2 3 1 Product Name and Printer Name indicate the series of HP LaserJet printer in use. 2 Usage Totals indicates types of pages that have been printed, copied, and scanned; the number of single-sided pages printed, copied and scanned; the number of duplexed pages printed, copied and - HP LaserJet 9000 | HP LaserJet 9000mfp and 9000Lmfp - User Guide - Page 173
of the font list page.) Note For step-by-step instructions about using printer commands to select a font with MS-DOS programs, see "Common PCL 5e printer commands" on page 232. z Font # is the number used to select fonts from the control panel (not the software application). Do not confuse the - HP LaserJet 9000 | HP LaserJet 9000mfp and 9000Lmfp - User Guide - Page 174
7 Problem solving 174 File directory page The file directory page contains the following information: 1 2 3 1 Disk Information indicates the disk model number, serial number, capacity, available free - HP LaserJet 9000 | HP LaserJet 9000mfp and 9000Lmfp - User Guide - Page 175
, model number, hardware firmware version, port select, port configuration, auto negotiation, manufacturing identification, and manufactured date. 2 Network Status indicates the total packets received, unicast packets received, bad packets received, framing errors received, total packets transmitted - HP LaserJet 9000 | HP LaserJet 9000mfp and 9000Lmfp - User Guide - Page 176
3 Error indicates the internal error code for each error. 4 Page Count indicates the number of pages printed from the product when the error occurred. 5 Serial Number indicates the serial number of the product. 6 Description or Personality indicates whether the error occurred due to a problem within - HP LaserJet 9000 | HP LaserJet 9000mfp and 9000Lmfp - User Guide - Page 177
or to troubleshoot problems with tray configuration. To print a paper path test 1 Touch Menu. 2 Scroll to Configure Device. 3 Scroll to Diagnostics. 4 Scroll to Set Paper Path Test and touch OK. 5 Scroll to select the input tray you want to test, the output bin, the duplex - HP LaserJet 9000 | HP LaserJet 9000mfp and 9000Lmfp - User Guide - Page 178
A Specifications 178 A Specifications Overview This section presents some of the product specifications. Overview - HP LaserJet 9000 | HP LaserJet 9000mfp and 9000Lmfp - User Guide - Page 179
determine approximate equivalent basis weight in weight specifications other than U.S. bond weight. For example 50 U.S. Bristol Weight (lb) 29 34 36 38 41 45 49 55 58 62 U.S. Index Weight (lb) 35 42 44 46 50 55 58 67 71 75 U.S. Tag Weight (lb) 39 46 49 51 55 61 65 74 79 83 Metric Weight (g/m2) 64 - HP LaserJet 9000 | HP LaserJet 9000mfp and 9000Lmfp - User Guide - Page 180
A Specifications 180 U.S. Bond Weight (lb) 39 42 43 47 53 58 U.S. Text/ Book Weight (lb) U.S. Cover Weight (lb) 100 55 107 58 110 60 119 65 - HP LaserJet 9000 | HP LaserJet 9000mfp and 9000Lmfp - User Guide - Page 181
A Specifications 181 Printing supplies Item Print cartridge 30,000 pages HP LaserJet Monochrome Transparencies Letter (8.5 by 11 in), 50 sheets/box A4 (210 by 297 mm), 50 sheets/box HP LaserJet Soft Gloss Paper Letter (8.5 by 11 in), 50 sheets/box A4 (210 by 297 mm), 50 sheets/box Part number - HP LaserJet 9000 | HP LaserJet 9000mfp and 9000Lmfp - User Guide - Page 182
A Specifications Printing supplies Item HP LaserJet Paper Letter (8.5 by 11 in), 500 sheets/ream, 10-ream carton Letter (8.5 by 11 in), 3-hole, 500 sheets/ream, 10-ream carton Legal (8.5 by 14 in), 500 sheets/ream, 10-ream carton A4 (210 by 297 mm), 500 sheets/ream, 5-ream carton Tabloid (11 by 17 - HP LaserJet 9000 | HP LaserJet 9000mfp and 9000Lmfp - User Guide - Page 183
A Specifications Printing supplies Item HP Office Paper Letter (8.5 by 11 in), 500 sheets/ream, 10-ream carton Letter (8.5 by 11 in), 3-hole, 500 sheets/ream, 10-ream carton Legal (8.5 by 14 in), 500 sheets/ream, 10-ream carton A4 (210 by 297 mm), 500 sheets/ream, 5-ream carton Tabloid (11 by 17 in - HP LaserJet 9000 | HP LaserJet 9000mfp and 9000Lmfp - User Guide - Page 184
A Specifications 184 Envelope margins The following table gives typical address margins for a Commercial #10 or DL envelope. Type of address Return address Delivery address Top margin - HP LaserJet 9000 | HP LaserJet 9000mfp and 9000Lmfp - User Guide - Page 185
can appear in the control panel, depending on the options currently installed in the product. This appendix lists all the items and possible values for the product. (Default values are listed in the "Item" column.) For more information about the HP output devices, see the use guide that came with - HP LaserJet 9000 | HP LaserJet 9000mfp and 9000Lmfp - User Guide - Page 186
B Control panel menus 186 This appendix includes: z Retrieve job menu shows jobs (and size if not detected) for each product tray. z Configure device menu allows administrators to set defaults, I/O ports, diagnostics, and resets. Š Printing submenu Š Print quality submenu Š System setup submenu - HP LaserJet 9000 | HP LaserJet 9000mfp and 9000Lmfp - User Guide - Page 187
B Control panel menus 187 Retrieve job menu Note If there are no private, stored, quick copy, or proof-and-hold jobs on the product hard disk or RAM memory, the message NO STORED JOB is displayed when the menu is selected. 1 The user is presented a list of user names. 2 The user selects a user - HP LaserJet 9000 | HP LaserJet 9000mfp and 9000Lmfp - User Guide - Page 188
MAP Generates a menu map that shows layout and current settings of the control menu items. The product will back up one screen to SET FRONT TO online Ready state when the page is completed. PRINT PCL FONT LIST Generates a typeface list of all PCL fonts available on the product. The product will - HP LaserJet 9000 | HP LaserJet 9000mfp and 9000Lmfp - User Guide - Page 189
" on page 67. Some items in this menu (such as duplex and manual feed) are accessible from a software application, or from the driver (if the appropriate driver is installed). Driver and software application settings override control panel settings. For more information, see "Using features in the - HP LaserJet 9000 | HP LaserJet 9000mfp and 9000Lmfp - User Guide - Page 190
fuser mode can only be changed from this menu option in the control panel. AUTO: Utilizes the optimum mode for that media type. NORMAL: Normal temperature, prints at 50 pages per minute (ppm) (40 ppm for the HP LaserJet 9000Lmfp). LOW: Low temperature, prints at 50 ppm (40 ppm for the HP LaserJet - HP LaserJet 9000 | HP LaserJet 9000mfp and 9000Lmfp - User Guide - Page 191
B Control panel menus 191 Configure device menu This menu contains all administrative size of the original document. If paper is not detect, the user can select from a list of supported paper sizes. Indicates whether one side or both sides of the original document are scanned. The product prompts - HP LaserJet 9000 | HP LaserJet 9000mfp and 9000Lmfp - User Guide - Page 192
B Control panel menus 192 Item Values ORIENTATION= PORTRAIT PORTRAIT LANDSCAPE PAGE CONTENT=MIXED MIXED TEXT GRAPHICS TEXT/GRAPHICS 0-8 PRIORITY=4 DENSITY=4 0-8 HEAVY PAPER=OFF ON OFF Explanation - HP LaserJet 9000 | HP LaserJet 9000mfp and 9000Lmfp - User Guide - Page 193
B Control panel menus 193 Copying submenu Item Values Explanation SIDES=1 1 2 Indicates whether images should be printed on one side or both sides of the copy. COLLATE= - HP LaserJet 9000 | HP LaserJet 9000mfp and 9000Lmfp - User Guide - Page 194
B Control panel menus 194 Item STAPLES=NONE Values Explanation Values vary depending on the output device attached If stapling is requested, indicates where the staple is - HP LaserJet 9000 | HP LaserJet 9000mfp and 9000Lmfp - User Guide - Page 195
Values 0-8 0-6 0-8 Explanation Specifies contrast and brightness of the image. 0=lightest 8=darkest Specifies the sharpness setting. 0=minimum sharpness 6=maximum sharpness Controls the amount of background material from the original that is eliminated on the copy. Background removal is useful when - HP LaserJet 9000 | HP LaserJet 9000mfp and 9000Lmfp - User Guide - Page 196
B Control panel menus 196 Sending submenu Item SCAN PREFERENCE=COLOR FILE TYPE=PDF Values COLOR BLACK AND WHITE PDF TIFF MTIFF JPEG Explanation Determines whether the document is scanned in color or black and white. Specifies the file format of the e-mail attachment. Configure device menu - HP LaserJet 9000 | HP LaserJet 9000mfp and 9000Lmfp - User Guide - Page 197
to select the number of copies. Note It is best to set the number of copies from the driver or software application. (Driver and software settings override control panel settings.) Set the default image size for paper and envelopes. (The item name will change from paper to envelope as you scroll - HP LaserJet 9000 | HP LaserJet 9000mfp and 9000Lmfp - User Guide - Page 198
appear on the menu. Set the value to ON to print on both sides (duplex) or OFF to print on one side (simplex) of a sheet of paper. For more information, see the introduce guide on the product CD, or go to www.hp.com/cposupport/. Allows the user to change the binding edge for - HP LaserJet 9000 | HP LaserJet 9000mfp and 9000Lmfp - User Guide - Page 199
B Control panel menus Item Values COURIER FONT=REGULAR REGULAR DARK WIDE A4=NO YES NO PRINT PS ERRORS=OFF ON OFF 199 Explanation Select the version of Courier font to use: REGULAR: The internal Courier font available on the HP LaserJet 4 Series printers. DARK: The internal Courier font - HP LaserJet 9000 | HP LaserJet 9000mfp and 9000Lmfp - User Guide - Page 200
the value using the numeric keypad. Allows the user to select default page orientation. Note It is best to set the page orientation from the driver or software application. (Driver and software settings override control panel settings.) INTERNAL: Internal fonts. SOFT: Permanent soft fonts. SLOT - HP LaserJet 9000 | HP LaserJet 9000mfp and 9000Lmfp - User Guide - Page 201
YES to append a carriage return to each line feed encountered in backward-compatible PCL jobs (pure text, no job control). Some environments, such as UNIX, indicate a new line using only the line feed control code. This option allows the user to append the required carriage return to each line - HP LaserJet 9000 | HP LaserJet 9000mfp and 9000Lmfp - User Guide - Page 202
(comparable to 1,200 dpi) at maximum product speed (50 ppm for the HP LaserJet 9000mfp and 40 ppm for the HP LaserJet 9000Lmfp). Note It is best to change the resolution from the driver or software application. (Driver and software settings override control panel settings.) Configure device menu - HP LaserJet 9000 | HP LaserJet 9000mfp and 9000Lmfp - User Guide - Page 203
. The settings range from 1 (light) to 5 (dark), but the default setting of 3 usually produces the best results. Note It is best to change the toner density from the driver or software application. (Driver and software settings override control panel settings.) SMALL PAPER MODE No value to select - HP LaserJet 9000 | HP LaserJet 9000mfp and 9000Lmfp - User Guide - Page 204
to select. Touch Continue to print a cleaning page (for cleaning excess toner from the paper path). In order for the cleaning page to work properly, print the page on copier grade paper (not bond or rough paper). Follow the instructions on the cleaning page. The progress bar shows how long before - HP LaserJet 9000 | HP LaserJet 9000mfp and 9000Lmfp - User Guide - Page 205
product when it is idle. z Reduces wear on the product electronic components (Turns off the display backlight). z When you send a print job, press a control panel key, open a paper tray, or open the top cover, the product automatically exits PowerSave mode. Note PowerSave turns off the backlight on - HP LaserJet 9000 | HP LaserJet 9000mfp and 9000Lmfp - User Guide - Page 206
B Control panel menus 206 Item PERSONALITY=AUTO Values AUTO PCL POSTSCRIPT CLEARABLE WARNINGS= ON JOB JOB AUTO CONTINUE=ON ON OFF Explanation Select the default product language (personality). Possible values are determined by which valid languages are installed in the product. Normally - HP LaserJet 9000 | HP LaserJet 9000mfp and 9000Lmfp - User Guide - Page 207
Control panel menus 207 Item CARTRIDGE LOW= CONTINUE Values CONTINUE STOP JAM RECOVERY= AUTO AUTO ON OFF RAM DISK=AUTO AUTO OFF LANGUAGE=ENGLISH Configure device menu Explanation Determine how the product functions when toner is the default setting. ON megabytes (MB) of memory. OFF: The RAM - HP LaserJet 9000 | HP LaserJet 9000mfp and 9000Lmfp - User Guide - Page 208
208 Item Values RESET COPY TIMEOUT=60 ANY SECONDS Explanation Defines the amount of time until the copy settings return to the default settings after any control panel activity is completed. The administrator can set the value. Item Values RESET SEND ANY TIMEOUT=60 SECONDS HOLD OFF PRINT - HP LaserJet 9000 | HP LaserJet 9000mfp and 9000Lmfp - User Guide - Page 209
B Control panel menus 209 Item AUTO JOB INTERRUPT=OFF COPY JOB INTERRUPT=OFF Values OFF ON OFF ON EDGE-TO-EDGE OFF COPIES=OFF ON AUDIBLE - HP LaserJet 9000 | HP LaserJet 9000mfp and 9000Lmfp - User Guide - Page 210
B Control panel menus 210 I/O submenu Items in the I/O (input/output) menu affect the communication between the product and the computer. Item I/O TIMEOUT=15 Values 5 to 300 - HP LaserJet 9000 | HP LaserJet 9000mfp and 9000Lmfp - User Guide - Page 211
B Control panel menus 211 Parallel input submenu Item HIGH SPEED ADVANCED FUNCTIONS=ON Values YES NO ON OFF Explanation Accepts faster parallel communications used for connections with newer computers. Turn the bidirectional parallel communication on or off. The default is set for a - HP LaserJet 9000 | HP LaserJet 9000mfp and 9000Lmfp - User Guide - Page 212
B Control panel menus 212 EIO submenu The EIO (enhanced input/output) submenu appears only when an EIO device is installed in an EIO slot on the product (such as an HP Jetdirect print server). The items in the menu depend on the particular accessory product installed. If the product contains an HP - HP LaserJet 9000 | HP LaserJet 9000mfp and 9000Lmfp - User Guide - Page 213
DHCP (Dynamic Host Configuration Protocol), or manually from the EIO submenu. MANUAL SETTINGS IP ADDRESS n.n.n.n Provides access to parameters that can manually configured from the product control panel. For manual configuration, CONFIG METHOD must be set to MANUAL. The unique IP address of the - HP LaserJet 9000 | HP LaserJet 9000mfp and 9000Lmfp - User Guide - Page 214
B Control panel menus 214 Item IPX/SPX APPLETALK DLC/LLC Options ENABLE OFF). AUTO EN_8023 EN_II EN_8022 EN_SNAP TR_8022 TR_SNAP Selects the frame type setting for your network AUTO (default) automatically sets and limits the frame type to the first one detected. For an Ethernet network only - HP LaserJet 9000 | HP LaserJet 9000mfp and 9000Lmfp - User Guide - Page 215
only, sets the network link speed and communication mode of the HP Jetdirect 10/100TX print server. The default setting is AUTO, where the product automatically configures itself to match the network link speed (10 or 100 Mbps) and communication mode (half or full duplex). Configure device menu - HP LaserJet 9000 | HP LaserJet 9000mfp and 9000Lmfp - User Guide - Page 216
stored on the HP Jetdirect print server (if installed). This item appears only after the PERFORM PRINTER MAINTENANCE message displays. OFF: The PERFORM PRINTER MAINTENANCE message will be cleared. If you do not replace the printer maintenance kit, the PERFORM PRINTER MAINTENANCE message will be - HP LaserJet 9000 | HP LaserJet 9000mfp and 9000Lmfp - User Guide - Page 217
B Control panel menus 217 Item POWERSAVE LOCK CARRIAGE CLEAR ADDRESS BOOK Explanation This and no asterisk will appear next to any item when the user enters the POWERSAVE TIME menu item. The default value for POWERSAVE is ON. This item allows you to lock the scan head in place when you transport - HP LaserJet 9000 | HP LaserJet 9000mfp and 9000Lmfp - User Guide - Page 218
add more memory to the product if you often print complex graphics or PS documents, print with the duplex printing accessory, use many downloaded fonts, or print large paper sizes (such as A3, B4, or 11 by 17). For ordering information, see the HP Customer Care section in the introduce guide on the - HP LaserJet 9000 | HP LaserJet 9000mfp and 9000Lmfp - User Guide - Page 219
engine can print most text and graphics at 1,200 dpi FastRes without additional memory. Add memory to your product if you: z commonly print complex graphics. z use many temporarily downloaded fonts. z print complex documents. z print two-sided documents. z use advanced functions. z print PostScript - HP LaserJet 9000 | HP LaserJet 9000mfp and 9000Lmfp - User Guide - Page 220
is installed in the product before adding more memory. The table lists the maximum amount of memory allowed for each DIMM slot. Slot label on the Configuration page Slot 1 Slot 2 Slot 3 Slot 4 Total Slot label on the Formatter board Description J1 Flash firmware J2 128 MB J3 128 MB J4 - HP LaserJet 9000 | HP LaserJet 9000mfp and 9000Lmfp - User Guide - Page 221
on the product. To install DIMMs 1 If you have not already done so, print the configuration to find out how much memory is installed in the product before adding more memory. 2 2 Turn the product off. Disconnect the power cord and any cables. 3 Loosen the two captive thumb screws on the back - HP LaserJet 9000 | HP LaserJet 9000mfp and 9000Lmfp - User Guide - Page 222
C Product memory and expansion 222 4 Grasp the screws and pull the formatter board out of the product. Place it on a each side of the DIMM slot are open, or outward.) See "Installing memory" on page 220 for the maximum amount of memory for each DIMM slot. 6 Press the DIMM straight into the slot - HP LaserJet 9000 | HP LaserJet 9000mfp and 9000Lmfp - User Guide - Page 223
C Product memory and expansion 223 7 Slide the formatter board back into the product and tighten the two screws. 8 Plug in the power cord and connect all cables. Turn the product on. 7 8 Installing memory - HP LaserJet 9000 | HP LaserJet 9000mfp and 9000Lmfp - User Guide - Page 224
that DIMMs are installed correctly: 1 Check that the product control panel displays READY when the product is turned on. If an error message appears, a DIMM might have been incorrectly installed. 2 Print the configuration. 3 Check the memory section on the configuration page and compare it to the - HP LaserJet 9000 | HP LaserJet 9000mfp and 9000Lmfp - User Guide - Page 225
might want to change the amount of memory allocated to each language when downloading an unusually large number of fonts, or if the product is in a shared environment. The minimum amount of memory that can be allocated to resource saving is 400 KB each for PCL and PS. Saving resources (permanent - HP LaserJet 9000 | HP LaserJet 9000mfp and 9000Lmfp - User Guide - Page 226
Product memory and expansion 226 Installing EIO cards/mass storage Hewlett-Packard constantly introduces new software tools for use with your product and accessories. These tools are available from the Internet free of charge. (See the introduce guide on the product CD, or go to www.hp.com/support - HP LaserJet 9000 | HP LaserJet 9000mfp and 9000Lmfp - User Guide - Page 227
method for entering printer commands, if needed. This appendix includes: z Understanding PCL 5e printer command syntax z Selecting PCL 5e fonts z Common PCL 5e printer commands The table at the end of this appendix contains commonly used PCL 5e commands (see "Common PCL 5e printer commands" on page - HP LaserJet 9000 | HP LaserJet 9000mfp and 9000Lmfp - User Guide - Page 228
requires that the product leave PCL 5e language and enter HP-GL/2 mode, which can be done by sending the product PCL 5e code. Some software applications change languages through their drivers. PJL HP Printer Job Language (PJL) provides control above PCL 5e and other printer languages. The four major - HP LaserJet 9000 | HP LaserJet 9000mfp and 9000Lmfp - User Guide - Page 229
characters may not appear on your screen as shown here. You must use the exact character and case specified for PCL 5e printer commands. Escape character (begins escape sequence) Value field (contains both alphabetic and numeric characters) Parameterized character Group character Termination - HP LaserJet 9000 | HP LaserJet 9000mfp and 9000Lmfp - User Guide - Page 230
Printer commands 230 Combining escape sequences Escape sequences can be combined into one escape sequence string. There are three important rules to follow when combining code same printer commands by combining them into a shorter sequence: Ec&l3a1o8D Understanding PCL 5e printer command syntax - HP LaserJet 9000 | HP LaserJet 9000mfp and 9000Lmfp - User Guide - Page 231
Selecting PCL 5e fonts Print a PCL font list to view the command for each internal font (see "PCL or PS font list" on page 173). A sample section is shown below. Notice the two variable boxes for symbol set and point size. Note These variables must be filled in, or the product will use defaults - HP LaserJet 9000 | HP LaserJet 9000mfp and 9000Lmfp - User Guide - Page 232
5e printer commands Function Job control commands Reset Number of copies 2-sided/1-sided printing Command Options (#) ?E Ec&l#X Ec&l#S n/a 1 to 32,000 0 = simplex (1-sided) printing 1 = duplex (2-sided) with long-edge binding 2 = duplex (2-sided) with short-edge binding Common PCL 5e printer - HP LaserJet 9000 | HP LaserJet 9000mfp and 9000Lmfp - User Guide - Page 233
D Printer commands 233 Function Page control commands Paper source Paper size Command Options (#) Ecl#H Ecl#A 0 = prints or ejects current page 1 = Tray 2 2 = manual feed, paper 3 = manual feed, envelope 4 = Tray 1 = DL 91 = International C5 100 = B5 101 = Custom Common PCL 5e printer commands - HP LaserJet 9000 | HP LaserJet 9000mfp and 9000Lmfp - User Guide - Page 234
D Printer commands 234 Function Paper type Orientation Top margin Text length (bottom margin) Left margin Right inch increments (compresses print vertically) # = lines per inch (1, 2, 3, 4, 5, 6, 12, 16, 24, 48) 0 = disable 1 = enable Ec&s#C 0 = Enable 1 = Disable Common PCL 5e printer commands - HP LaserJet 9000 | HP LaserJet 9000mfp and 9000Lmfp - User Guide - Page 235
position 1 = Use current PCL cursor position Ec(# Ec(s#P Ec(s#H Ec&k#S Ec(s#V Ec(s#S 8U = HP Roman-8 Symbol Set 10U = IBM Layout (PC-8) (code page 437) Default Symbol Set 12U = IBM Layout for Europe (PC-850) (code page 850) 8M = Math-8 19U = Windows 3.1 Latin 1 9E = Windows 3.1 Latin 2 (commonly - HP LaserJet 9000 | HP LaserJet 9000mfp and 9000Lmfp - User Guide - Page 236
the "#" with the number of characters in the name plus 1. b. Order the PCL 5/PJL Technical Reference Documentation Package for symbol set charts, or for more information see www.hp.com/support/lj9000. c. The preferred method is to use the primary pitch command. Common PCL 5e printer commands - HP LaserJet 9000 | HP LaserJet 9000mfp and 9000Lmfp - User Guide - Page 237
E Regulatory information 237 E Regulatory information Overview This section provides information on HP programs that protect the environment. z Environmental product stewardship program Overview - HP LaserJet 9000 | HP LaserJet 9000mfp and 9000Lmfp - User Guide - Page 238
stewardship program Protecting the environment Hewlett-Packard Company is committed to providing quality products in an environmentally sound manner. This product has been designed with several attributes to minimize impacts on our environment. The HP LaserJet product eliminates: Ozone production - HP LaserJet 9000 | HP LaserJet 9000mfp and 9000Lmfp - User Guide - Page 239
(HP LaserJet 9000mfp Hewlett-Packard Company has determined this product meets ENERGY STAR® Guidelines for energy efficiency. For more information, see www/energystar.gov/. EconoMode//Toner Miser uses significantly less toner, which might extend the life of the printer cartridge. The product manual - HP LaserJet 9000 | HP LaserJet 9000mfp and 9000Lmfp - User Guide - Page 240
, toner cartridge, drum, fuser) can be returned to HP through the HP Printing Supplies Returns and Recycling Program. An easy-to-use and free takeback program is available in over 48 countries/regions. Multi-lingual program information and instructions are included in every new HP LaserJet printer - HP LaserJet 9000 | HP LaserJet 9000mfp and 9000Lmfp - User Guide - Page 241
information, you can contact www.hp.com/go/recycle or contact your local authorities or the Electronics Industries Alliance: www.eiae.org. Material Safety Data Sheets (MSDS) can be obtained by contacting the HP LaserJet Supplies website at www.hp.com/go/msds. Environmental product stewardship - HP LaserJet 9000 | HP LaserJet 9000mfp and 9000Lmfp - User Guide - Page 242
maintenance covers a three-year period from date of the HP product purchase. The customer must purchase HP SupportPack within 90 days of the HP product purchase. For more information, see the HP Customer Care section in the introduce guide on the product CD, or go to www.hp.com/support/lj9000 - HP LaserJet 9000 | HP LaserJet 9000mfp and 9000Lmfp - User Guide - Page 243
F Administration tasks 243 F Administration tasks Overview This section presents some of the system administrator tasks. Overview - HP LaserJet 9000 | HP LaserJet 9000mfp and 9000Lmfp - User Guide - Page 244
support URLs. z set up a password to control who can remotely access the networking pages. z view general network status information, including network statistics stored on the print server. For more information, see the online hp embedded web server for hp LaserJet printers users guide, available - HP LaserJet 9000 | HP LaserJet 9000mfp and 9000Lmfp - User Guide - Page 245
be assigned and configured on an HP Jetdirect print server using several options: z HP Web JetAdmin z HP JetAdmin for Windows z embedded Web server TCP/IP assignment The system administrator or primary user is responsible for determining the TCP/IP address for a specific print server. If you are - HP LaserJet 9000 | HP LaserJet 9000mfp and 9000Lmfp - User Guide - Page 246
you have to change the product TCP/IP address for any reason. HP Web JetAdmin Open HP Web JetAdmin. Enter the TCP/IP address in the Quick Device Search and click Open Device. 5 From the sub-menu at the top of the HP Web JetAdmin screen, click Configuration. 6 Click the network link located on the - HP LaserJet 9000 | HP LaserJet 9000mfp and 9000Lmfp - User Guide - Page 247
must have an IP address already configured. On a network, this is done automatically during initial product installation. 1 Using a supported Web browser, type the current IP address of the HP Jetdirect print server as the URL. The Device Status page of the embedded Web server displays. 2 Click - HP LaserJet 9000 | HP LaserJet 9000mfp and 9000Lmfp - User Guide - Page 248
. Through this page, you can: z enable and disable the digital sending service and establish a maximum file size. z set the SMTP address for digital sending z set the default Subject field. z use advanced features: Š establish fixed default Message Text. Š establish default document settings. z - HP LaserJet 9000 | HP LaserJet 9000mfp and 9000Lmfp - User Guide - Page 249
settings: z set default scanner settings: Š default document size. Š default document type: text, graphics, or both. Š two-sided page. z set administrator contact information to allow notification of errors that require your attention. Note See http://www.hp.com/support/lj900mfp for more - HP LaserJet 9000 | HP LaserJet 9000mfp and 9000Lmfp - User Guide - Page 250
example, in Microsoft Outlook, you can find the hostname by clicking Tools, selecting Services, highlighting the server, and then clicking Properties. In many cases, the SMTP Web access server, HP Web JetAdmin, or the control panel can be used to do this. Digital sending configuration applet - HP LaserJet 9000 | HP LaserJet 9000mfp and 9000Lmfp - User Guide - Page 251
and touch it to select it. An asterisk (*) appears next to the selection in the display, indicating that it is now the default. 5 Touch OK to exit the menu. Settings in the driver and software override control panel settings. (Software settings override driver settings.) Using control panel menus - HP LaserJet 9000 | HP LaserJet 9000mfp and 9000Lmfp - User Guide - Page 252
you to control the hard disk and flash memory features that are not found in the drivers. Bidirectional communication is required. Note HP Disk Management Utility is not available for the Macintosh. If you are using a Macintosh, these features are available in the HP LaserJet Utility (version - HP LaserJet 9000 | HP LaserJet 9000mfp and 9000Lmfp - User Guide - Page 253
that are connected to a network with an HP Jetdirect print server. z Manage and troubleshoot network products from any location. Checking the toner level using HP Web JetAdmin In HP Web JetAdmin, select the product device. The device status page shows toner level information. HP Jetdirect Printer - HP LaserJet 9000 | HP LaserJet 9000mfp and 9000Lmfp - User Guide - Page 254
isolate parts, and to troubleshoot jam and quality issues. Item PRINT EVENT LOG Values SHOW EVENT LOG SET PAPER PATH TEST SERVICE TEST SCANNER TESTS CONTROL PANEL Explanation Generates a localized LIFO (last in, first out) list of the 50 most recent entries in the error log. The printed event - HP LaserJet 9000 | HP LaserJet 9000mfp and 9000Lmfp - User Guide - Page 255
labels fuser mode 190 loading 53 PCL commands 234 printing 60 adjusting. See changing 2 administrator software 14, 15 tasks 243 agreements, service 242 alignment, troubleshooting 142 allocating memory 225 alternate PPD, selecting 164 Apple LaserWriter printer driver 16, 19 Apple Mac operating - HP LaserJet 9000 | HP LaserJet 9000mfp and 9000Lmfp - User Guide - Page 256
locations 96 locating 56 printing paper path test 177 selecting 43, 56 specifications 11 troubleshooting 157 black dots, troubleshooting 93, 140 blank pages adding 65 troubleshooting 150 bleeds, printing 62 blinking control panel lights 28 booklet bin 42 printing 63 booklets creating 82 imposition - HP LaserJet 9000 | HP LaserJet 9000mfp and 9000Lmfp - User Guide - Page 257
See jams maintenance messages 216 staple jams. See staple jams client software 14 clipped margins, troubleshooting 149 coated paper, HP LaserJet Soft Gloss 181 collation features 63 commands common 232 escape sequences 230 font list 231 job control 232 printer 227 syntax 229 Common Drivers Macintosh - HP LaserJet 9000 | HP LaserJet 9000mfp and 9000Lmfp - User Guide - Page 258
, printing 62 curl, troubleshooting 143 Current Page Count 176 custom media loading 49, 50 PCL commands 234 printing 61 tray selection 68 tray settings 54, 197 customer support website 242 cut-off pages, troubleshooting 153 D dark setting, toner density 203 Data light on control panel 28 description - HP LaserJet 9000 | HP LaserJet 9000mfp and 9000Lmfp - User Guide - Page 259
website 16 Windows 16 Windows defaults 18 dropouts, troubleshooting 140 duplex printing accessory clearing jams 101 jam locations 96 messages 118 not recognized 158 troubleshooting 153, 155 duplexer. See duplex printing accessory duplexing custom media 49, 50 letter or A4 paper 47, 48 PCL commands - HP LaserJet 9000 | HP LaserJet 9000mfp and 9000Lmfp - User Guide - Page 260
on control panel 23 enlarging copies 23 copy image 44 260 envelopes default image size setting 197 loading 53, 57 margins 59, 184 printing 56 wrinkles, troubleshooting 144 environmental specifications 12 stewardship 238 EPS files, troubleshooting 154 equivalence table for paper 179 error messages - HP LaserJet 9000 | HP LaserJet 9000mfp and 9000Lmfp - User Guide - Page 261
fuser mode 190 HP LaserJet 181 loading 53 PCL commands 234 printing 61 finisher, multifunction booklets, creating 82 FIR (Fast InfraRed) Receiver. See HP Fast InfraRed (FIR) Receiver firmware messages 126, 132 updates 12 First mode 68 first page different paper for 64 speed, troubleshooting - HP LaserJet 9000 | HP LaserJet 9000mfp and 9000Lmfp - User Guide - Page 262
252 specification 12 hard disk accessory file directory, printing 174, 188 installing 226 job retention 205 messages 120, 121 not recognized 158 troubleshooting 152 hardware maintenance agreements 242 heavy paper PCL commands 234 printing 61 help control panel 23, 117 drivers 17 files on CD 14 HP - HP LaserJet 9000 | HP LaserJet 9000mfp and 9000Lmfp - User Guide - Page 263
220 insufficient memory 129 interface problems, troubleshooting 159 internal fonts defined 173 PCL symbol set commands 231 settings 200 Internet Installer 14 interpreting 28 interrupting printing 80, 81 IP address for HP JetSend devices 169 IPX/SPX settings 214 IrDA-compliant devices printing - HP LaserJet 9000 | HP LaserJet 9000mfp and 9000Lmfp - User Guide - Page 264
22 kits, maintenance clearing messages 216 gauge 171 ordering 125 L labels fuser mode 190 loading 53 PCL commands 234 printing 60 landscape orientation driver settings 54 PCL commands 234 setting as default 200 language control panel 146, 207 support 14 languages, printer default setting 206 HP-GL - HP LaserJet 9000 | HP LaserJet 9000mfp and 9000Lmfp - User Guide - Page 265
252 HP LaserJet Utility 19 renaming printer 164 selecting alternate PPD 164 software 14, 19 support 13 troubleshooting communications 162 maintenance agreements 242 procedures 83 maintenance kits clearing messages 216 gauge 171 ordering 125 265 manual feed control panel settings 198 first page 64 - HP LaserJet 9000 | HP LaserJet 9000mfp and 9000Lmfp - User Guide - Page 266
82 clearing jams 105 clearing staple jams 112 specifications 11 multipage file format for digital sending 32 multiple original prints (mopying) features 63 troubleshooting 128 multiple pages per sheet 65 MultiPurpose Paper, HP 182 N naming printer from Macintosh Chooser 164 narrow media settings 203 - HP LaserJet 9000 | HP LaserJet 9000mfp and 9000Lmfp - User Guide - Page 267
165 software 253 troubleshooting 157 No back page 65 non-HP print cartridges 90 nonvolatile memory errors 135 Novell NetWare operating system 15 Source Routing parameters 214 number of copies PCL command 232 QuickCopy jobs 75 setting default 197 stored jobs 72 numeric keypad on control panel 22, 23 - HP LaserJet 9000 | HP LaserJet 9000mfp and 9000Lmfp - User Guide - Page 268
, networking 214 part numbers for supplies 181 partial pages, troubleshooting 153 password for controlling remote access 244 path test, printing 177 pausing printing 81 PCL 5e driver 16 fonts 231 printer commands 228 PCL 6 driver 16 268 PCL commands common 232 escape sequences 230 font list 231 - HP LaserJet 9000 | HP LaserJet 9000mfp and 9000Lmfp - User Guide - Page 269
page 93 settings 202 troubleshooting 138 Print quality menu 202 print servers, troubleshooting 165 printer commands common 232 description 227 escape sequences 230 syntax 229 printer drivers. See drivers Printer Job Language (PJL) commands 228 printer maintenance kit clearing message 216 gauge - HP LaserJet 9000 | HP LaserJet 9000mfp and 9000Lmfp - User Guide - Page 270
187 deleting 71 printing 70 timeout settings 205 problems. See troubleshooting proof and hold jobs control panel settings 187 creating 77 deleting 78 printing 77 timeout settings 205 proportional fonts 231 protecting the environment 238 PS driver 16 PS error pages 149, 199 PS font list, printing 173 - HP LaserJet 9000 | HP LaserJet 9000mfp and 9000Lmfp - User Guide - Page 271
write protected 126 S saving memory resources 225 product settings 63 Scale to Fit 63 271 scaling copies 23 scan buffer errors 135 Scan Preferences options 174 printer 169 servers, troubleshooting 165 service agreements 242 settings carriage return 201 changing at control panel 23 changing control - HP LaserJet 9000 | HP LaserJet 9000mfp and 9000Lmfp - User Guide - Page 272
network 253 new tools 13 troubleshooting 150 using to check toner level 91 Windows 14, 18 Solaris network installation 253 sources, paper PCL commands 233 selecting by type or size 68 Tray 1 settings 66 special media, printing on 60 specifications 11 connectivity 12 input and output paper handling - HP LaserJet 9000 | HP LaserJet 9000mfp and 9000Lmfp - User Guide - Page 273
settings 203 loose, troubleshooting 141 smear, troubleshooting 141 specks 93 specks, troubleshooting 93, 140 usage information 172 using embedded Web server to check 244 using HP Web JetAdmin software to check 253 transparencies fuser mode 190 HP LaserJet 181 loading 53 PCL commands 234 printing 61 - HP LaserJet 9000 | HP LaserJet 9000mfp and 9000Lmfp - User Guide - Page 274
47 bad connection 118 clearing jams 97 custom media, loading 49 envelopes, loading 53 feeding modes, setting 66 first page, different paper for 64 heavy paper, printing 61 jam locations 96 labels, loading 53 letter paper, loading 47 loading envelopes 57 manual feed messages 157 manual feed mode - HP LaserJet 9000 | HP LaserJet 9000mfp and 9000Lmfp - User Guide - Page 275
Star 239 firmware updates 12 HP Customer Care 242 HP Jetdirect Printer Installer 253 HP Web JetAdmin software 12 material safety data sheet (MSDS) 241 recycling 240 weight equivalence table, paper 179 What is this? Help 20, 23 Wide A4 setting 199 Windows configuring driver 18 default settings 18 - HP LaserJet 9000 | HP LaserJet 9000mfp and 9000Lmfp - User Guide - Page 276
276 - HP LaserJet 9000 | HP LaserJet 9000mfp and 9000Lmfp - User Guide - Page 277
277 - HP LaserJet 9000 | HP LaserJet 9000mfp and 9000Lmfp - User Guide - Page 278
278
-
 1
1 -
 2
2 -
 3
3 -
 4
4 -
 5
5 -
 6
6 -
 7
7 -
8
-
9
-
10
-
11
-
12
-
13
-
14
-
15
-
16
-
17
-
18
-
19
-
20
-
21
-
22
-
23
-
24
-
25
-
26
-
27
-
28
-
29
-
30
-
31
-
32
-
33
-
34
-
35
-
36
-
37
-
38
-
39
-
40
-
41
-
42
-
43
-
44
-
45
-
46
-
47
-
48
-
49
-
50
-
51
-
52
-
53
-
54
-
55
-
56
-
57
-
58
-
59
-
60
-
61
-
62
-
63
-
64
-
65
-
66
-
67
-
68
-
69
-
70
-
71
-
72
-
73
-
74
-
75
-
76
-
77
-
78
-
79
-
80
-
81
-
82
-
83
-
84
-
85
-
86
-
87
-
88
-
89
-
90
-
91
-
92
-
93
-
94
-
95
-
96
-
97
-
98
-
99
-
100
-
101
-
102
-
103
-
104
-
105
-
106
-
107
-
108
-
109
-
110
-
111
-
112
-
113
-
114
-
115
-
116
-
117
-
118
-
119
-
120
-
121
-
122
-
123
-
124
-
125
-
126
-
127
-
128
-
129
-
130
-
131
-
132
-
133
-
134
-
135
-
136
-
137
-
138
-
139
-
140
-
141
-
142
-
143
-
144
-
145
-
146
-
147
-
148
-
149
-
150
-
151
-
152
-
153
-
154
-
155
-
156
-
157
-
158
-
159
-
160
-
161
-
162
-
163
-
164
-
165
-
166
-
167
-
168
-
169
-
170
-
171
-
172
-
173
-
174
-
175
-
176
-
177
-
178
-
179
-
180
-
181
-
182
-
183
-
184
-
185
-
186
-
187
-
188
-
189
-
190
-
191
-
192
-
193
-
194
-
195
-
196
-
197
-
198
-
199
-
200
-
201
-
202
-
203
-
204
-
205
-
206
-
207
-
208
-
209
-
210
-
211
-
212
-
213
-
214
-
215
-
216
-
217
-
218
-
219
-
220
-
221
-
222
-
223
-
224
-
225
-
226
-
227
-
228
-
229
-
230
-
231
-
232
-
233
-
234
-
235
-
236
-
237
-
238
-
239
-
240
-
241
-
242
-
243
-
244
-
245
-
246
-
247
-
248
-
249
-
250
-
251
-
252
-
253
-
254
-
255
-
256
-
257
-
258
-
259
-
260
-
261
-
262
-
263
-
264
-
265
-
266
-
267
-
268
-
269
-
270
-
271
-
272
-
273
-
274
-
275
-
276
-
277
-
278
 |
 |
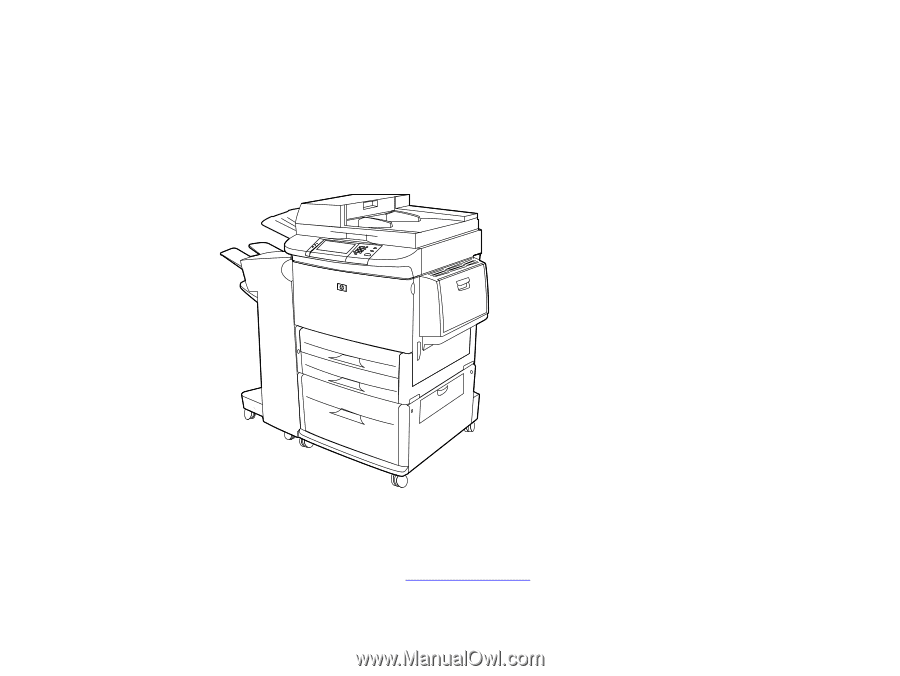
1
hp LaserJet 9000mfp
hp LaserJet 9000Lmfp
use
Use of this electronic document indicates that you accept the
Copyright and License
terms.
Copyright
Hewlett-Packard Company 2002.