HP OMEN X 35 User Guide
HP OMEN X 35 Manual
 |
View all HP OMEN X 35 manuals
Add to My Manuals
Save this manual to your list of manuals |
HP OMEN X 35 manual content summary:
- HP OMEN X 35 | User Guide - Page 1
User Guide - HP OMEN X 35 | User Guide - Page 2
HP products and services are set forth in the express warranty statements accompanying such products and services. Nothing herein should be construed as constituting an additional warranty. HP guide, go to http://www.hp.com/support. Select Find your product, and then follow the on-screen instructions - HP OMEN X 35 | User Guide - Page 3
About This Guide This guide provides information on monitor features, setting up the monitor, using the software and technical specifications. WARNING! Indicates a hazardous situation that, if not avoided, could result in death or serious injury. CAUTION: Indicates a hazardous situation - HP OMEN X 35 | User Guide - Page 4
iv About This Guide - HP OMEN X 35 | User Guide - Page 5
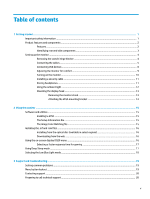
16 Using the on-screen display (OSD) menu ...16 Selecting a faster response time for gaming 17 Using Deep Sleep mode ...17 Selecting the Low Blue Light mode ...18 3 Support and troubleshooting ...19 Solving common problems ...19 Menu button lockout ...19 Contacting support ...20 Preparing to call - HP OMEN X 35 | User Guide - Page 6
guidelines ...21 Cleaning the monitor ...21 Shipping the monitor ...21 Appendix A Technical specifications ...22 Preset display resolutions ...23 Entering user modes ...23 Power adapter ...24 Energy saver feature ...24 Appendix B Accessibility ...25 Supported assistive technologies ...25 Contacting - HP OMEN X 35 | User Guide - Page 7
risk of serious injury, read the Safety & Comfort Guide. It describes proper workstation setup, and proper posture, health, and work habits and correctly sized furniture designed to properly support your HP LCD monitor. WARNING! LCD monitors that are inappropriately situated on dressers, bookcases - HP OMEN X 35 | User Guide - Page 8
, if supported by your operating system ● On-screen display (OSD) adjustments in several languages for easy setup and screen optimization ● Software and documentation disc that includes monitor drivers and product documentation ● VESA mounting bracket for attaching the monitor to a wall-mount device - HP OMEN X 35 | User Guide - Page 9
Connects the DisplayPort cable to the source device. (7) Service port Used by qualified HP service technicians only. (8) Power connector Connects an AC adapter. (9) Security cable slot Attaches an optional security cable to the monitor. (10) USB 3.0 Type-B port Connects the USB hub - HP OMEN X 35 | User Guide - Page 10
the stand's hinge blocker The monitor is shipped with a hinge blocker that locks the display head in the lowest height position on the stand. You must remove the hinge blocker to adjust the height of the display head. To remove the hinge blocker, gently press down the display head (1) and pull the - HP OMEN X 35 | User Guide - Page 11
inputs can also be selected by pressing the Menu button on the side of the monitor and selecting Input Control. ● Connect one end of an HDMI cable to the HDMI port on the rear of the monitor and the other end to the HDMI port on the source device. ● Connect one end - HP OMEN X 35 | User Guide - Page 12
Mini DisplayPort cable to the DisplayPort port on the rear of the monitor and the other end to the Mini DisplayPort port on the source upstream cable to the USB upstream port on the rear of the monitor. Then connect the cable's Type-A connector to the USB downstream port on the source device. - HP OMEN X 35 | User Guide - Page 13
end of the power cord to the AC adapter (1) and the other end to a grounded electrical outlet (2), and then connect the AC adapter to the monitor (3). WARNING! To reduce the risk of electric shock or damage to the equipment: Do not disable the power cord grounding plug. The grounding plug is - HP OMEN X 35 | User Guide - Page 14
Connecting USB devices The rear of the monitor provides one USB Type-B upstream port and three USB Type-A downstream ports. NOTE: You must connect the USB upstream cable from the source device to the monitor to enable the USB downstream ports on the monitor. 8 Chapter 1 Getting started - HP OMEN X 35 | User Guide - Page 15
Adjusting the monitor for comfort Tilt the display head forward or backward to set it to a comfortable eye level. Adjust the display head up or down to set it to a comfortable eye level. Setting up the monitor 9 - HP OMEN X 35 | User Guide - Page 16
under the HP warranty. NOTE: You can disable the power light in the OSD menu. Press the Menu button on the side of the monitor, and then select Power Control > Power LED > Off. The monitor automatically scans the signal inputs for an active input and uses that input for the display. 10 Chapter - HP OMEN X 35 | User Guide - Page 17
Installing a security cable You can secure the monitor to a fixed object with an optional security cable available from HP. Storing headphones The monitor features a headphone hook at the top of the stand for convenient headphones storage. Setting up the monitor 11 - HP OMEN X 35 | User Guide - Page 18
an ambient light to illuminate a desk top or wall and enhance the gaming experience. You can adjust the light or turn it off in the OSD. Press the Menu button on the side of the monitor, and then select Power Control > Ambient Lighting. You can change the color of the ambient lighting - HP OMEN X 35 | User Guide - Page 19
VESA mount, four 4 mm, 0.7 pitch, and 10 mm long screws are required. Longer screws must not be used because they may damage the monitor. It is important to verify that the manufacturer's mounting solution is compliant with the VESA standard and is rated to support the weight of the monitor display - HP OMEN X 35 | User Guide - Page 20
3. To attach the display head to a swing arm or other mounting device, insert four mounting screws through the holes on the mounting device and into the screw holes on the VESA mounting bracket. IMPORTANT: Follow the mounting device manufacturer's instructions when mounting the monitor to a wall or - HP OMEN X 35 | User Guide - Page 21
the files from http://www.hp.com/support. ● .Inf (Information) file ● .Icm (Image Color Matching) files (one for each calibrated color space) Enabling G-SYNC To enable the monitor for G-SYNC: 1. Right click on the Windows® Desktop and select NVIDIA Control Panel. 2. Select Display from the links on - HP OMEN X 35 | User Guide - Page 22
and .icm files from the HP monitors support website. 1. Go to http://www.hp.com/support. 2. Select Get software and drivers. 3. Follow the on-screen instructions to select your monitor and download the software. Using the on-screen display (OSD) menu Use the on-screen display (OSD) menu to adjust - HP OMEN X 35 | User Guide - Page 23
SYNC gaming purposes. The response time can be adjusted to as low as 3 ms in the display menu. All performance specifications represent the typical specifications provided by HP's component manufacturers; actual performance may vary either higher or lower. Using Deep Sleep mode The monitor supports - HP OMEN X 35 | User Guide - Page 24
Selecting the Low Blue Light mode Decreasing the blue light emitted by the display reduces the blue light exposure to your eyes. HP monitors provide settings to reduce the blue light output and create a more relaxing and less stimulating image while viewing content on the screen. To adjust your - HP OMEN X 35 | User Guide - Page 25
3 Support and troubleshooting Solving common problems The following table lists possible problems, the possible cause of each problem, and the recommended solutions. Problem Possible Cause Solution Screen is blank or video is flashing. Power cord is disconnected. Connect the monitor power - HP OMEN X 35 | User Guide - Page 26
about your product, including links to discussion forums and instructions on troubleshooting. You can also find information on how to contact HP and open a support case. Preparing to call technical support If you can not solve a problem using the troubleshooting tips in this section, you may need to - HP OMEN X 35 | User Guide - Page 27
this product yourself. Adjust only those controls that are covered in the operating instructions. If the monitor is not operating properly or has been dropped or damaged, contact an authorized HP dealer, reseller, or service provider. ● Use only a power source and connection appropriate for this - HP OMEN X 35 | User Guide - Page 28
The default response time setting is optimized for G-SYNC gaming purposes. The response time can be adjusted to as low as 3 ms in the display menu. All performance specifications represent the typical specifications provided by HP's component manufacturers; actual performance may vary either higher - HP OMEN X 35 | User Guide - Page 29
and one DisplayPort port 0 ft to 16,400 ft 0 ft to 40,000 ft Preset display resolutions The display resolutions listed below are the most commonly used modes and are set as defaults. The monitor automatically recognizes these preset modes, and they will appear properly sized and centered on the - HP OMEN X 35 | User Guide - Page 30
W Energy saver feature The monitor supports a reduced power state. The reduced power state will be entered into if the monitor detects the absence of either -up period before the monitor will return to its normal operating state. Refer to the computer manual for instructions on setting the energy - HP OMEN X 35 | User Guide - Page 31
to the monitor to locate more information about assistive features. NOTE: For additional information about a particular assistive technology product, contact customer support for that product. Contacting support We are constantly refining the accessibility of our products and services and welcome
-
 1
1 -
 2
2 -
 3
3 -
 4
4 -
 5
5 -
 6
6 -
 7
7 -
8
-
9
-
10
-
11
-
12
-
13
-
14
-
15
-
16
-
17
-
18
-
19
-
20
-
21
-
22
-
23
-
24
-
25
-
26
-
27
-
28
-
29
-
30
-
31
 |
 |

User Guide