HP Omni 27-1054 Wall Mounting Guide
HP Omni 27-1054 Manual
 |
View all HP Omni 27-1054 manuals
Add to My Manuals
Save this manual to your list of manuals |
HP Omni 27-1054 manual content summary:
- HP Omni 27-1054 | Wall Mounting Guide - Page 1
- HP Omni 27-1054 | Wall Mounting Guide - Page 2
services. Nothing herein should be construed as constituting an additional warranty. HP shall not be liable for technical or editorial errors or omissions contained herein. HP in the United States and/or other countries/ regions. HP supports lawful use of technology and does not endorse or encourage - HP Omni 27-1054 | Wall Mounting Guide - Page 3
Table of contents 1 Preparing the computer for wall-mounting 1 What you need ...1 Safety information ...1 Preparing to remove the computer stand 2 Removing the computer stand ...2 2 Reinstalling the stand on the computer 9 What you need ...9 Safety information ...9 Removing the wall-mounting - HP Omni 27-1054 | Wall Mounting Guide - Page 4
iv - HP Omni 27-1054 | Wall Mounting Guide - Page 5
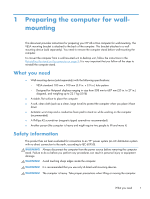
computer for wallmounting This document provides instructions for preparing your HP All-in-One computer for wall- hole pattern ◦ Designed for flat-panel displays ranging in size from 508 mm to 687 mm (20 in. to 27 in.) diagonal, and weighing up to 22.7 kg (50 lb) ● A stable, flat surface to place the - HP Omni 27-1054 | Wall Mounting Guide - Page 6
WARNING! Please read "Additional Safety Information" in the Limited Warranty and Support Guide before installing and connecting your system to the electrical power system. Preparing to remove the computer stand To avoid injury and equipment damage when opening - HP Omni 27-1054 | Wall Mounting Guide - Page 7
NOTE: Save the VESA cover, the computer stand, and the six screws, so that you can convert the computer back to a desktop unit in the future. To reinstall the stand, follow all the steps in Reinstalling the stand on the computer on page 9. 1. Place the computer facedown on a stable, flat surface - HP Omni 27-1054 | Wall Mounting Guide - Page 8
3. Loosen the two screws at the bottom that secure the back cover to the computer. Keep turning the screwdriver until you hear five clicks. These clicks indicate that the screw is sufficiently loosened. Do not attempt to remove the screw from the hole. If present, loosen the screw (1) at the center - HP Omni 27-1054 | Wall Mounting Guide - Page 9
5. Remove the six screws that attach the stand to the computer. There are three screws each at the bottom left and right of the computer. Save the screws. 6. Lift the stand slightly (1) and then disengage it from the hook on the left side (2). Remove the stand from the computer. Save the stand. - HP Omni 27-1054 | Wall Mounting Guide - Page 10
7. Remove the ring covers (1,2) from the lower center back of the computer. 8. Snap the ring covers into place on the lower corners of the computer. 6 Chapter 1 Preparing the computer for wall-mounting - HP Omni 27-1054 | Wall Mounting Guide - Page 11
9. To replace the back cover, align the side and rear I/O openings on the back cover with the corresponding connectors on the computer. Press the cover so it snaps into place, and ensure that there are no gaps between the computer and the cover. 10. Tighten the two screws at the bottom of the - HP Omni 27-1054 | Wall Mounting Guide - Page 12
11. Attach the wall-mounting hardware (purchased separately) according to the manufacturer's instructions to the back of the computer, using the 100 mm x 100 mm (3.9 in. x 3.9 in.) screw holes. CAUTION: The computer is heavy and might require two - HP Omni 27-1054 | Wall Mounting Guide - Page 13
. WARNING! The computer is heavy. Take proper precautions when lifting or moving the computer. WARNING! Please read "Additional Safety Information" in the Limited Warranty and Support Guide before installing and connecting your system to the electrical power system. What you need 9 - HP Omni 27-1054 | Wall Mounting Guide - Page 14
surface covered with a clean soft cloth. CAUTION: The computer is heavy and may require two people to remove it from the wall. 6. Following the manufacturer's instructions, remove the wall-mounting hardware from the back of the computer. 10 Chapter 2 Reinstalling the stand on the computer - HP Omni 27-1054 | Wall Mounting Guide - Page 15
Replacing the computer stand To replace the computer stand, perform the following steps: 1. Loosen the two screws at the bottom that secure the back cover to the computer. Keep turning the screwdriver until you hear five clicks. These clicks indicate that the screw is sufficiently loosened. If - HP Omni 27-1054 | Wall Mounting Guide - Page 16
3. Remove the ring covers from the left and right side of the computer. 4. Place the ring covers (1,2) back into their storage location at the center back of the computer. 12 Chapter 2 Reinstalling the stand on the computer - HP Omni 27-1054 | Wall Mounting Guide - Page 17
5. Engage the hook at the lower left on the computer with the slot on the stand (1), and place the stand back on the computer (2), aligning the screw holes on the stand with the screw holes on the computer. 6. Install the three screws on both the left and right side to secure the stand to the - HP Omni 27-1054 | Wall Mounting Guide - Page 18
7. To replace the back cover, align the side and rear I/O openings on the back cover with the corresponding connectors on the computer. Press the cover so it snaps into place, and ensure that there are no gaps between the computer and the cover. 8. Tighten the two screws at the bottom of the - HP Omni 27-1054 | Wall Mounting Guide - Page 19
9. Replace the VESA cover on the back of the computer. Be sure to align the tabs on the VESA cover with the slots on the back of the computer and snap the cover into place. 10. Place the computer in an upright position. 11. Connect the power cord. 12. Connect any cables that were previously
-
 1
1 -
 2
2 -
 3
3 -
 4
4 -
 5
5 -
 6
6 -
 7
7 -
8
-
9
-
10
-
11
-
12
-
13
-
14
-
15
-
16
-
17
-
18
-
19
 |
 |