HP PageWide XL 4700 Assembly Instructions 2
HP PageWide XL 4700 Manual
 |
View all HP PageWide XL 4700 manuals
Add to My Manuals
Save this manual to your list of manuals |
HP PageWide XL 4700 manual content summary:
- HP PageWide XL 4700 | Assembly Instructions 2 - Page 1
EN HP PageWide XL Dryer Assembly Instructions JA HP PageWide XL ZHCN HP PageWide XL KO HP PageWide XL Dryer EN Number 2 ックス 3 KO 번호 기술 1 2 건조기 E 박스 3 © Copyright 2021 HP Development Company, L.P. Large Format Division Camí de Can Graells 1-21 · 08174 - HP PageWide XL 4700 | Assembly Instructions 2 - Page 2
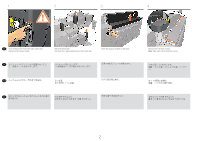
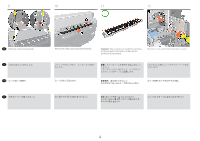
1 2 3 4 EN Turn off the printer from the main switch and disconnect the power cable. Remove the basket. Remove the 1 upper lateral cover from each side. Open the output module on the back. JA 1 ZHCN 1 KO 1 Remove the 10 black screws. Note: Take care not to - HP PageWide XL 4700 | Assembly Instructions 2 - Page 3
5 6 7 8 EN Remove the 5 black screws. Note: Take care not to drop the screws. Remove the upper then the lower output module covers. Unplug 2 cables, JA 5 2 ZHCN 卸下 5 拔下 2 KO 5 2 Unroute the cables. Note: You may have to cut the cable ties. 3 - HP PageWide XL 4700 | Assembly Instructions 2 - Page 4
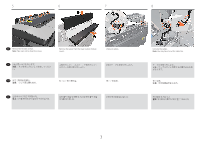
9 10 11 12 EN Remove 4 screws from each side. JA 両側の4 ZHCN 4 KO 4 Remove the media output pinchwheel assembly. Important: Take care when you handle the starwheels. Put the pinchwheel assembly on a table with the starwheels facing upwards. Remove 2 screws and the left-hand switch - HP PageWide XL 4700 | Assembly Instructions 2 - Page 5
13 14 15 16 EN Remove 2 screws and the right-hand switch activator. Remove 3 screws and the lateral cover. JA 2 3 ZHCN 卸下 2 卸下 3 KO 나사 2 나사 3 Remove the rear right-hand cover Open the top door 5 - HP PageWide XL 4700 | Assembly Instructions 2 - Page 6
17 18 19 20 EN Remove 2 screws. JA 2 ZHCN 卸下 2 KO 나사 2 Remove the top right-hand exterior cover. Remove 3 screws. 3 卸下 3 나사 3 Remove the top left-hand exterior cover 6 - HP PageWide XL 4700 | Assembly Instructions 2 - Page 7
21 22 23 24 EN Remove 2 screws from the right-hand top cover shaft support. Remove 3 screws from the left-hand top cover shaft support. Remove 2 cable screws. JA 2 3 2 ZHCN 2 3 卸下 2 KO 2 3 2 Remove 1 screw from the top cover cylinder, then remove the top - HP PageWide XL 4700 | Assembly Instructions 2 - Page 8
25 26 27 28 EN Remove 6 screws, JA 6 ZHCN 卸下 6 KO 나사 6 Remove the diverter cover. Remove 2 screws. 2 卸下 2 나사 2 Remove the cover 8 - HP PageWide XL 4700 | Assembly Instructions 2 - Page 9
29 30 31 32 EN Disconnect the cables. JA ZHCN KO Remove 8 screws. 8 8 8 Remove the diverter Open the media output door, use a flat screwdriver to remove the circlip from both sides, then release the crank. Note: Use a flat screwdriver. 9 - HP PageWide XL 4700 | Assembly Instructions 2 - Page 10
33 34 35 36 EN Remove the screws from the gas spring (1 each side). Remove the gas spring from the axis. JA 1 ZHCN 1 颗)。 Cover the printzone with some some cardboard or plastic to protect it. Use 2 people to carefully place the output door in the bottom position. 2 - HP PageWide XL 4700 | Assembly Instructions 2 - Page 11
37 38 39 40 EN Remove 3 screws. JA 3 ZHCN 卸下 3 KO 나사 3 Remove the cover Use a flat screwdriver to unclip the printhead bezels 1and 8, then remove them. Remove the screws from the media output door (1 each side). 1と8 1 1 和 8 1 个)。 1번과 8 1 개씩). 11 - HP PageWide XL 4700 | Assembly Instructions 2 - Page 12
41 42 43 EN Remove the media bushing from the front left-hand side. Save the part to reinstall later. JA ZHCN KO Lift and remove the media output door Important: Read through steps 44, 45, 46, 47 and 48 before you proceed . Organize the work area in order to ease installation. Open the - HP PageWide XL 4700 | Assembly Instructions 2 - Page 13
. Align the media output bushing pin with the small hole in the printer (turn the pin downwards). Check the position of the gas spring and guides as they must be accessible after fixing the dryer module to the printer. Caution: Take care with the dryer foam in the media output area - HP PageWide XL 4700 | Assembly Instructions 2 - Page 14
JA 1 1 T25 ZHCN 1 T25 螺钉。 Insert the screw at the right-hand side. Important: Confirm the position of the gas spring and the media output door guides as they need to be accessible after the dryer module is fixed to the printer. Open the media output door. Caution: Be careful not to - HP PageWide XL 4700 | Assembly Instructions 2 - Page 15
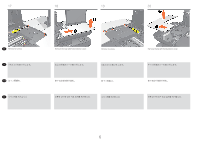
51 52 53 54 EN At both sides, install the dryer module guides and place the clips to retain them. Reassemble the printhead bezels. Remove 4 screws . JA 4 ZHCN 卸下 4 KO 나사 4 Remove the rear bottom left-hand side panel 15 - HP PageWide XL 4700 | Assembly Instructions 2 - Page 16
卸下 4 KO 나사 4 Remove the rear bottom right-hand side panel. Remove the E-box support and the clamps from the box. Place the 2 clamps over the support. Fix the support to the printer with 4 screws (2 at each side). 2 4 2 E-Box 2 使用 4 2 E 2 나사 4 2개씩). 16 - HP PageWide XL 4700 | Assembly Instructions 2 - Page 17
59 60 61 62 EN Install the dryer E-box through the slot and onto hooks. Fix with 4 small screws. JA 4 ZHCN E-Box。 使用 4 KO 건조기 E 4 Route the cable through the clips and connect it at the bottom. Connect the cable at the top. 17 - HP PageWide XL 4700 | Assembly Instructions 2 - Page 18
63 64 65 66 EN Route the grounding cable from dryer. If it is easily detached, or in the wrong position, then replace the cable ties. Fix the cable with a thick screw. JA ZHCN Fix the other cable with a thick screw. Locate the dryer cable. KO - HP PageWide XL 4700 | Assembly Instructions 2 - Page 19
67 68 69 70 EN Connect the dryer cable to the E-box. Route the cable to the left-hand side. JA ZHCN E-Box。 KO E Push the cable into the clips. Push the cable into the clip. 19 - HP PageWide XL 4700 | Assembly Instructions 2 - Page 20
71 72 73 74 EN Push the cable through the hole. JA ZHCN KO Route the cable where shown. Connect the cable to the E-box. Secure the cable with a screw and 2 washers. Install the connector. 2 E-Box。 2 E 2 20 - HP PageWide XL 4700 | Assembly Instructions 2 - Page 21
. Connect the connector to the E-box. Secure the cable with a screw and 2 washers. Open the media output door and place the pinchwheels beam over the supports. JA 2 ZHCN E-Box。 2 KO E 2 21 - HP PageWide XL 4700 | Assembly Instructions 2 - Page 22
79 80 81 Do not tighten EN Loosely insert 4 screws at each side to adjust the beam position. Do not tighten them. Loosen screws Check the lateral screws are loose at both sides. Loosen them at both ends of the beam. JA 各側に4 ZHCN 4 KO 4 Loosen screws Place the left-hand - HP PageWide XL 4700 | Assembly Instructions 2 - Page 23
82 83 84 85 EN Place the left-hand side pinchwheels beam adjustment tool. JA ZHCN 1 person close the media output door slowly, while another person corrects the position of the pinchwheel beam to fit the pins on the pinchwheel beam tools. Note: You must match the pins on the tools with the - HP PageWide XL 4700 | Assembly Instructions 2 - Page 24
Open the media output door and remove the tools. Do not tighten Assemble the left-hand side switch activator. Note: Locate it manually in order to align it in the sensor window. Assemble the right-hand side switch activator. Connect the pinchwheel cables. JA ZHCN KO - HP PageWide XL 4700 | Assembly Instructions 2 - Page 25
90 91 92 93 EN Push the media output door down so the switch activator touches the bottom of the gap, simultaneously push the bushing structure down inside media output door to touch the reference point. Tighten screws Tighten the switch activator screws. Tighten the bushing structure - HP PageWide XL 4700 | Assembly Instructions 2 - Page 26
94 95 96 97 EN Open the media output door and tighten the 3rd screw. Reassemble the diverter. JA 3 ZHCN 3 KO 3 Reassemble the diverter cover. Reassemble the bottom rear cover. 26 - HP PageWide XL 4700 | Assembly Instructions 2 - Page 27
98 99 100 101 EN Reassemble the top covers. JA ZHCN KO Reassemble the lateral covers Reassemble the media output door covers. Switch on the printer. 27 - HP PageWide XL 4700 | Assembly Instructions 2 - Page 28
ZHCN USB 端口。 KO USB 28 EN Legal notices © Copyright 2021 HP Development Company, L.P. The information contained herein is subject to change without notice. The only warranties for HP products and services are set forth in the express warranty statements accompanying such products
-
 1
1 -
 2
2 -
 3
3 -
 4
4 -
 5
5 -
 6
6 -
 7
7 -
8
-
9
-
10
-
11
-
12
-
13
-
14
-
15
-
16
-
17
-
18
-
19
-
20
-
21
-
22
-
23
-
24
-
25
-
26
-
27
-
28
 |
 |
1
© Copyright 2021 HP Development Company, L.P.
Large Format Division
Camí de Can Graells 1-21 · 08174
Sant Cugat del Vallès
Barcelona · Spain
All rights reserved
Printed in XXX
HP PageWide XL Dryer
Assembly Instructions
HP PageWide XL ドライ
ヤー
組み立ておよびセットア
ップ手順
HP PageWide XL 烘干器
组装说明
HP PageWide XL
Dryer
조립 지침
EN
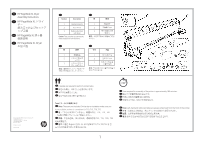
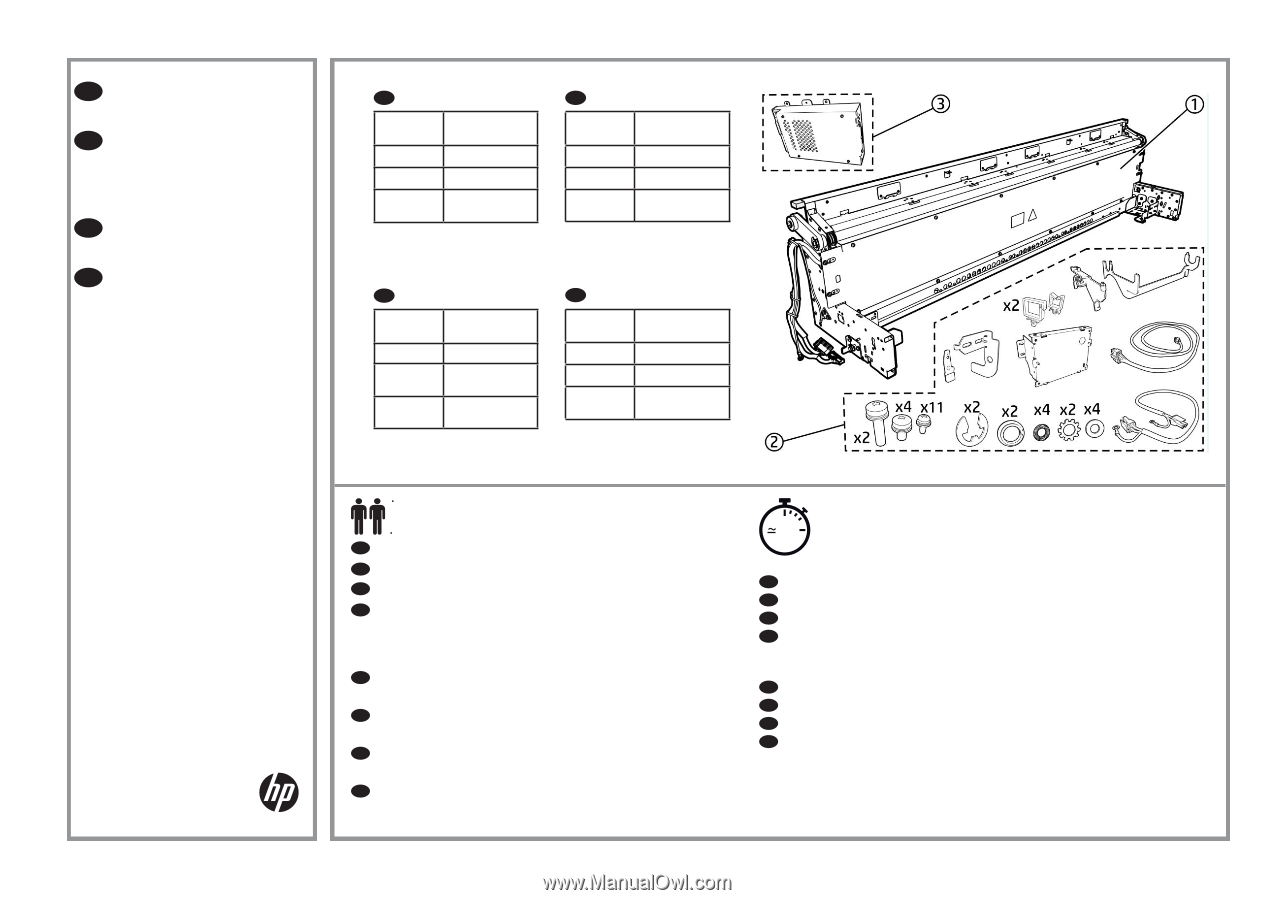
2 people are required to perform certain tasks.
JA
特定の作業は、2名で行う必要があります。
ZHCN
某些任务需要 2 人完成。
KO
일부 작업의 경우 2명이 필요합니다.
Tools /
ツール /
工具类 /
도구
EN
Note:
These are not included. On the day on instalaton make sure you
have available an electric screwdriver for T10, T15, T20, T25.
JA
注:
これらは含まれていません。 設置当日は、T10、T15、T20
、T25用の電動ドライバーをご用意ください。
ZHCN
注意:
不包括这些。 在安装当天,请确保您有 T10,T15,T20,T25
的电动螺丝刀。
KO
참고 :
이들은 포함되지 않습니다. 설치 당일에 T10, T15, T20, T25 용 전
동 드라이버를 준비했는지 확인하십시오.
EN
Number
Description
1
Mechanical parts
2
Dryer E-box
3
Media output door
with dryer
Caution:
Take care when you remove the
media output door from the foams.
JA
数
説明
1
機械部品
2
ドライヤ電子ボ
ックス
3
ドライヤ付きメ
ディア出力ドア
注意:
緩衝材からメディア出力ドア
を取り外す際は注意してください。
ZHCN
数
描述
1
机械部件
2
干燥器 E-box
3
带干燥器的介质
输出门
警示:
从泡沫中取出介质输出门时务
必小心 。
KO
번호
기술
1
메커니컬 부품
2
건조기 E 박스
3
건조기가 있는 용
지 출력 덮개
주의:
포장재에서 용지 출력 덮개를 꺼
낼 때 주의하십시오.
180’
EN
Time required for assembly of the printer is approximately 180 minutes .
JA
組み立て所要時間は約180分です。
ZHCN
组装打印机大约需要180分钟时间。
KO
조립에 소요되는 시간은 약180분입니다.
EN
Note:
Left-hand and right-hand sides are always referenced from the front of the printer.
JA
メモ:
左側および右側は、常にプリンタの前側から参照できます。
ZHCN
注意:
左手和右手侧始终以打印机的正面为准。
KO
참고:
왼쪽 및 오른쪽은 항상 프린터 전면을 기준으로 합니다.
ZHCN
EN
JA
KO