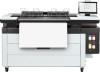
HP PageWide XL 4700 Assembly Instructions 2 - Page 14
重要提示:, 注意:, 警示
 |
View all HP PageWide XL 4700 manuals
Add to My Manuals
Save this manual to your list of manuals |
Page 14 highlights
47 48 49 50 EN Align the left side: Insert the media bushing. Note: Use 1 person to hold the dryer, and another person to align the bushing pin with the hole in the printer. Insert the T25 screw at the left. JA 1 1 T25 ZHCN 1 T25 螺钉。 Insert the screw at the right-hand side. Important: Confirm the position of the gas spring and the media output door guides as they need to be accessible after the dryer module is fixed to the printer. Open the media output door. Caution: Be careful not to damage the media output door foam. At both sides, align the gas spring with the dryer module and fix it. Be sure to place the crank like in the picture, and to not block it for later when you install the gas spring. KO T25 14
-
 1
1 -
2
-
3
-
4
-
5
-
6
-
7
-
8
-
 9
9 -
 10
10 -
 11
11 -
 12
12 -
 13
13 -
 14
14 -
 15
15 -
 16
16 -
 17
17 -
 18
18 -
 19
19 -
20
-
21
-
22
-
23
-
24
-
25
-
26
-
27
-
28
 |
 |

14
ZHCN
EN
JA
KO
At both sides, align the gas spring with the dryer
module and fix it.
Be sure to place the crank like in the picture, and to not
block it for later when you install the gas spring.
両側で、ガススプリングとドライヤモジュール
の位置を合わせて、固定します。
図のようにクランクを配置して、ガススプリン
グを取り付けるときに邪魔にならないようにし
ます。
在两侧均需将气压弹簧与干燥器模块对齐,然后
将其固定。
务必如图所示放置曲柄,并且不要挡住它,以便
安装气压弹簧。
양쪽에서 가스 스프링을 건조기 모듈에 정렬한 후
고정합니다.
그림과 같이 크랭크를 배치하고 가스 스프링을
설치할 때 가리지 않도록 합니다.
Insert the screw at the right-hand side.
Important:
Confirm the position of the gas spring
and the media output door guides as they need to
be accessible after the dryer module is fixed to the
printer.
右側にネジを差し込みます。
重要:
ドライヤモジュールをプリンタに固定し
た後に、ガススプリングとメディア出力ドアガ
イドに手が届く必要があるため、その位置を確
認します。
在右侧插入螺钉。
重要提示:
在将干燥器模块固定到打印机后,确
认气压弹簧和介质输出门导轨的位置,确保它们
触手可及。
오른쪽에 나사를 끼웁니다.
중요:
건조기 모듈을 프린터에 고정한 후 가스
스프링과 용지 출력 덮개 안내선에 접근할 수 있어야
하므로 해당 위치를 확인합니다.
Align the left side: Insert the media bushing.
Note:
Use 1 person to hold the dryer, and another
person to align the bushing pin with the hole in the
printer.
Insert the T25 screw at the left.
左側の位置を調整します。 メディアブッシュを
挿入します。
メモ:
1名がドライヤを保持し、もう1名がブッ
シュピンの位置をプリンタの穴に合わせます。
左側にT25ネジを差し込みます。
对齐左侧:插入介质衬套。
注意:
安排 1 个人抬起干燥器,另一个人将衬套
销与打印机上的孔对齐。
在左侧插入 T25 螺钉。
왼쪽을 정렬합니다.
용지 부싱을 삽입합니다.
참고:
한 사람은 건조기를 잡고 다른 한 사람은
프린터의 구멍에 부싱 핀을 맞춥니다.
왼쪽에 T25 나사를 끼웁니다.
Open the media output door.
Caution:
Be careful not to damage the media output
door foam.
メディア出力ドアを開きます。
注意:
メディア出力ドアの緩衝材を損傷しない
ように注意してください。
打开介质输出门。
警示
:注意不要损坏介质输出门泡沫。
용지 출력 덮개를 엽니다.
주의:
용지 출력 덮개 포장재를 손상시키지 않도록
주의하십시오.
49
50
48
47