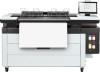
HP PageWide XL 4700 Assembly Instructions 2 - Page 12
쉽게 설치할 수 있도록 작업 영역을 준비합니다.
 |
View all HP PageWide XL 4700 manuals
Add to My Manuals
Save this manual to your list of manuals |
Page 12 highlights
41 42 43 EN Remove the media bushing from the front left-hand side. Save the part to reinstall later. JA ZHCN KO Lift and remove the media output door Important: Read through steps 44, 45, 46, 47 and 48 before you proceed . Organize the work area in order to ease installation. Open the box ( remove the sleeve): - Use 2 people to move the dryer module. Take great care when removing the foams that the dryer module does not fall. - Avoid pressing the dryer foam in the media output area. 44、45、46、47、および48 2 44、45、46、47 和 48 2 44, 45, 46, 47 및 48 2 12
-
 1
1 -
2
-
3
-
4
-
5
-
6
-
 7
7 -
 8
8 -
 9
9 -
 10
10 -
 11
11 -
 12
12 -
 13
13 -
 14
14 -
 15
15 -
 16
16 -
 17
17 -
18
-
19
-
20
-
21
-
22
-
23
-
24
-
25
-
26
-
27
-
28
 |
 |

12
41
ZHCN
EN
JA
KO
Important:
Read through steps 44, 45, 46, 47 and 48 before you proceed . Organize the work area in order to ease
installation.
Open the box ( remove the sleeve):
- Use 2 people to move the dryer module. Take great care when removing the foams that the dryer module does
not fall.
- Avoid pressing the dryer foam in the media output area.
重要:
続行する前に、手順44、45、46、47、および48をお読みください。
インストール手順を円滑に進めるために、作業領域を整理してください。
ボックスを開けます(スリーブを取り外します)。
- ドライヤモジュールの移動作業は、2人で行ってください。緩衝材を取り外す際は、ドライヤモジュ
ールが落下しないように注意してください。
- メディア出力領域では、ドライヤの緩衝材を押さないようにしてください。
重要提示:
在继续操作之前,请先阅读步骤 44、45、46、47 和 48。
整理工作区,以便于安装。
打开箱子(卸下封套)。
- 安排 2 人移动干燥器模块。在去掉泡沫时请格外小心,以免干燥器模块跌落。
- 避免将干燥器泡沫塞入介质输出区域。
중요:
계속하기 전에 44, 45, 46, 47 및 48단계를 확인하십시오.
쉽게 설치할 수 있도록 작업 영역을 준비합니다.
상자를 엽니다(슬리브 제거).
- 2명이 함께 건조기 모듈을 옮깁니다. 포장재를 제거할 때 건조기 모듈이 떨어지지 않도록 주의하십시오.
- 용지 출력 영역의 건조기 포장재를 누르지 않도록 합니다.
Lift and remove the media output door.
メディア出力ドアを持ち上げて取り外します。
提起并取下介质输出门。
용지 출력 덮개를 들어 올려 제거합니다.
Remove the media bushing from the front left-hand
side. Save the part to reinstall later.
左側前方からメディアのブッシュを取り外しま
す。
卸下正面左侧的介质衬套。
전면 왼쪽에서 용지 부싱을 제거합니다.
43
42