HP Presario CQ20-100 Compaq Presario CQ20 Notebook PC - Maintenance and Servic - Page 50
Remove the two Torx T8M2.0×6.0 screws, to release it. Move the top cover backward
 |
View all HP Presario CQ20-100 manuals
Add to My Manuals
Save this manual to your list of manuals |
Page 50 highlights
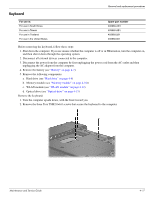
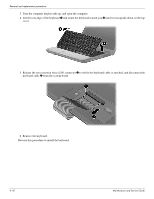
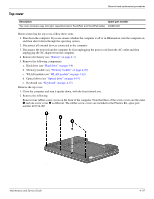
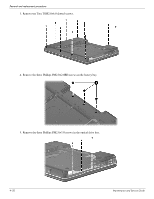
Removal and replacement procedures 6. Turn the computer right-side up, with the front toward you. 7. Open the LED board cable ZIF connector 1, and then disconnect the cable. 8. Open the TouchPad cable ZIF connector 2, and then disconnect the cable. 9. Remove the two Torx T8M2.0×6.0 screws 3 that attach the top cover to the base enclosure. 10. Lift the rear edge and sides of the top cover 1 to release it. Move the top cover backward 2 and place it on the base enclosure. Reverse this procedure to install the top cover. Maintenance and Service Guide 4-21
-
 1
1 -
2
-
3
-
4
-
5
-
6
-
7
-
8
-
9
-
10
-
11
-
12
-
13
-
14
-
15
-
16
-
17
-
18
-
19
-
20
-
21
-
22
-
23
-
24
-
25
-
26
-
27
-
28
-
29
-
30
-
31
-
32
-
33
-
34
-
35
-
36
-
37
-
38
-
39
-
40
-
41
-
42
-
43
-
44
-
 45
45 -
 46
46 -
 47
47 -
 48
48 -
 49
49 -
 50
50 -
 51
51 -
 52
52 -
 53
53 -
 54
54 -
 55
55 -
56
-
57
-
58
-
59
-
60
-
61
-
62
-
63
-
64
-
65
-
66
-
67
-
68
-
69
-
70
-
71
-
72
-
73
-
74
-
75
-
76
-
77
-
78
-
79
-
80
-
81
-
82
-
83
-
84
-
85
-
86
-
87
-
88
-
89
-
90
-
91
-
92
-
93
-
94
-
95
-
96
-
97
-
98
-
99
-
100
-
101
-
102
-
103
-
104
-
105
-
106
-
107
-
108
-
109
-
110
-
111
-
112
-
113
-
114
-
115
-
116
-
117
-
118
-
119
-
120
 |
 |
Removal and replacement procedures
Maintenance and Service Guide
4–21
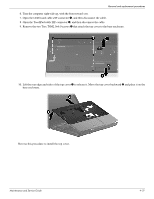
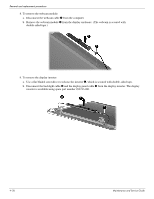
6. Turn the computer right-side up, with the front toward you.
7. Open the LED board cable ZIF connector
1
, and then disconnect the cable.
8. Open the TouchPad cable ZIF connector
2
, and then disconnect the cable.
9. Remove the two Torx T8M2.0×6.0 screws
3
that attach the top cover to the base enclosure.
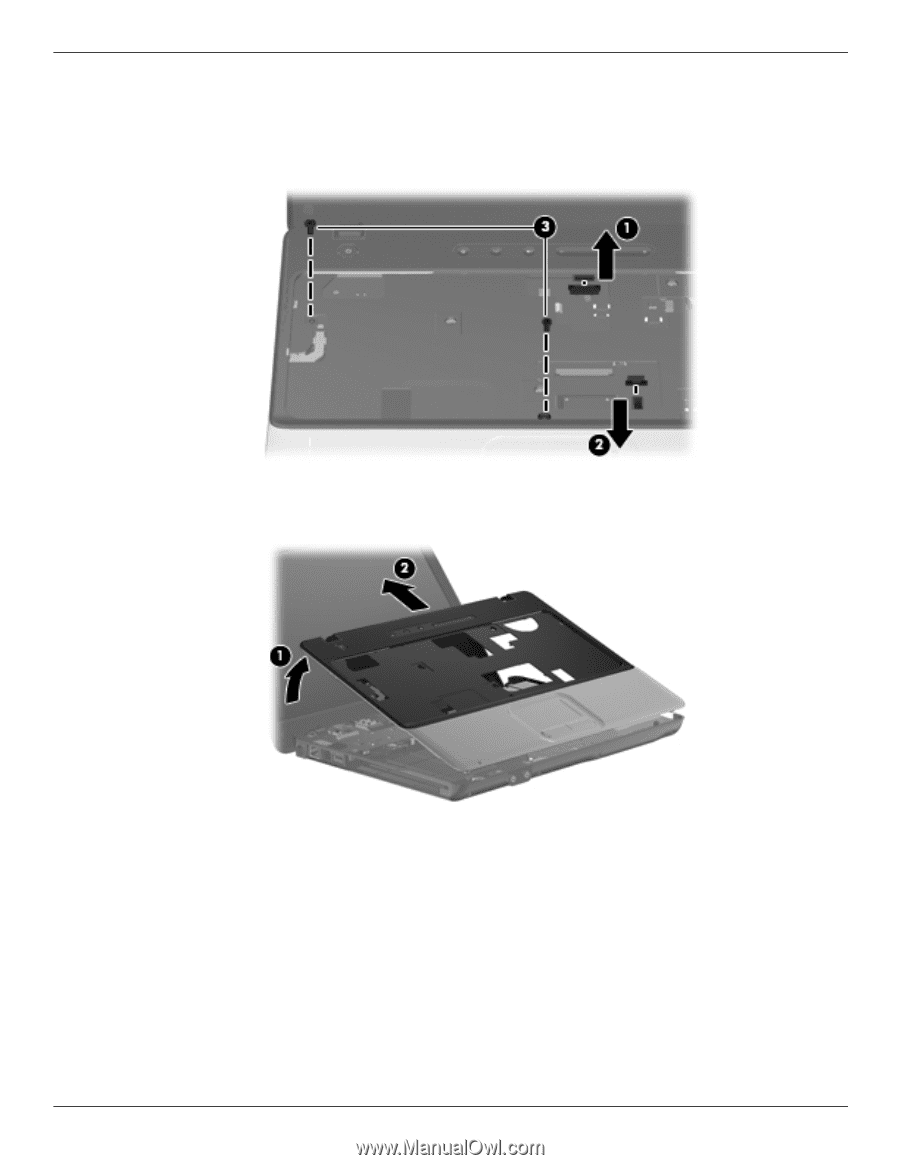
10. Lift the rear edge and sides of the top cover
1
to release it. Move the top cover backward
2
and place it on the
base enclosure.
Reverse this procedure to install the top cover.