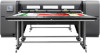
HP Scitex FB750 User Guide
HP Scitex FB750 Manual
 |
View all HP Scitex FB750 manuals
Add to My Manuals
Save this manual to your list of manuals |
HP Scitex FB750 manual content summary:
- HP Scitex FB750 | User Guide - Page 1
Scitex FB550 and FB750 Printers User's Guide - HP Scitex FB750 | User Guide - Page 2
to change without notice. The only warranties for HP products and services are set forth in the express warranty statements accompanying such products and services. Nothing herein should be construed as constituting an additional warranty. HP shall not be liable for technical or editorial errors - HP Scitex FB750 | User Guide - Page 3
- HP Scitex FB750 | User Guide - Page 4
Table of contents 1 Introduction ...1 Operating requirements ...2 Important operating notes ...3 Safety warnings ...4 Quick tour ...5 Special features ...7 Use the HP Embedded Web Server ...8 2 Configure and load media ...10 Configure media ...11 Work with the rigid media tables ...13 Load rigid - HP Scitex FB750 | User Guide - Page 5
tree ...45 7 Calibrate the printer ...49 When to calibrate ...50 AutoJet ...50 Automatic calibrations ...51 Manual calibrations ...51 Unfixed Jets Report 78 Clean the printheads ...79 Clean the carriage home sensor ...81 Clean the service-station wiper rails ...82 Clean the service-station wiper ... - HP Scitex FB750 | User Guide - Page 6
...104 Physical specifications ...105 Power specifications ...105 Environmental specifications ...107 Appendix B Troubleshooting ...108 Troubleshooting checklist ...109 Warranty claims ...110 CallMe@hp ...110 HP Customer Care ...111 Appendix C Image quality tips ...113 Startup and check jet - HP Scitex FB750 | User Guide - Page 7
vi ENWW - HP Scitex FB750 | User Guide - Page 8
1 Introduction ● Operating requirements ● Important operating notes ● Safety warnings ● Quick tour ● Special features ● Use the HP Embedded Web Server ENWW 1 - HP Scitex FB750 | User Guide - Page 9
could damage the printer. ● To maintain vacuum to the printheads during printer power-down down the printer for service. See Appendix A, Technical Specifications, for details. ● Connect printer to its the printer to flames or dust. RIP The printer receives print jobs from a supported raster - HP Scitex FB750 | User Guide - Page 10
via the printer software. NOTE: A customer-supplied UPS will not support the manual purging may be necessary to restore the printheads to working condition (see Startup and check jet health on page 114). If all power is lost to the printer, ink will drip from the printheads due to loss of printhead - HP Scitex FB750 | User Guide - Page 11
printer must be operated with all safety shielding installed to protect the operator from eye and skin damage. When operated according to manufacturer's instructions INCORRECTLY REPLACED. The battery must be replaced only by authorized service providers, and must be replaced only with the same or - HP Scitex FB750 | User Guide - Page 12
Quick tour Figure 1-1 Input side 1. Touch-screen control panel 2. UV-filtered observation windows 3. Exhaust vents 4. Rigid media alignment pins 5. Electronics box (inside enclosure) 6. Data ports 7. Main power switch 8. Main power, takeup system power inlet ports, serial number and regulatory - HP Scitex FB750 | User Guide - Page 13
connections 17. Vacuum system auxiliary power inlet 18. Vacuum adjustment knob (factory adjustment, do not change) Figure 1-3 Output side 19. Service station and printhead carriage access door 20. Printhead maintenance vacuum (inside enclosure) 21. Waste ink spigot 6 Chapter 1 Introduction ENWW - HP Scitex FB750 | User Guide - Page 14
. ● Onboard vacuum system - Provides vacuum to maintain negative printhead pressure. ● Patented automated printhead service station - Fully maintains the health of the printheads while idle or in service, without operator intervention. ● HP White Ink Homogenizer - Part of the optional white ink - HP Scitex FB750 | User Guide - Page 15
the user, reducing training and troubleshooting time. ● HP Embedded Web Server - By entering the printer's IP address into the address bar of any web browser on your local area network, you can view printer status, change certain settings, upgrade the printer firmware, and download system log files - HP Scitex FB750 | User Guide - Page 16
HP occasionally issues new versions of the embedded software (printer firmware). After obtaining an update file, you can use the Embedded Web Server to install it onto the printer. From the Embedded Web Server, select the Update Printer Software option from the menu. Follow the onscreen instructions - HP Scitex FB750 | User Guide - Page 17
2 Configure and load media ● Configure media ● Work with the rigid media tables ● Load rigid media ● Load roll-fed media with table-top roll holder 10 Chapter 2 Configure and load media ENWW - HP Scitex FB750 | User Guide - Page 18
type, then a list of settings appears for you to review and change if necessary.Media Wizard on page 11 for When you create a custom media type on the printer, in order to print on the new media . Refer to the documentation for your RIP for instructions. Media Wizard To view or delete settings for an - HP Scitex FB750 | User Guide - Page 19
be just above the surface of the media. When set to No, the rollers will move to their highest point and remain there. ● Detectable to Printer - If Yes, the media sensor and image sensor will be used. If No, the media sensor and image sensor will not be used (with clear - HP Scitex FB750 | User Guide - Page 20
from synthetic media. The tabletop can be pivoted to a near-vertical position to save space during storage. After detaching the tables from the printer, release the tabletop latches by pulling the release cable, see (2) Figure 2-2 Table latches and release cable on page 13, under the tabletop. To - HP Scitex FB750 | User Guide - Page 21
attached to the printer as described in these instructions. When not again. If sheet-fed media feed problems occur, make sure the accessory tables over the fixed support assembly first, then over the folding support, and adjust media alignment bar (under the printhead carriage rail), then left along - HP Scitex FB750 | User Guide - Page 22
- For two or more sheets of different sizes loaded at once across the width of the printer 8. Select the media length from the list, or enter a length manually, then press Proceed. The printer measures the media, and the control panel displays a summary screen of the settings you specified. 9. Press - HP Scitex FB750 | User Guide - Page 23
width once, estimates skew by locating the leading edge near the user and service sides on subsequent loads. ● One Edge - On first load, measures both been printed. Press Proceed to dismiss this message and return to the printer options menu. Quick Load After printing is complete, you can reload - HP Scitex FB750 | User Guide - Page 24
the built-in media alignment pins for quick positioning of the sheets across the printer's width. Align the left side of each sheet with one of the pins, and have the number of sheets you intend to print across the width of the printer in position to be loaded. Sheets must not be more than 7.6 cm (3 - HP Scitex FB750 | User Guide - Page 25
Table 2-1 Supported sheet configurations Single image Multi-image Single sheet Yes (N copies) but all jobs must have the same color set and resolution. Once the first job is selected, the printer displays jobs with a color set or resolution mismatch with a red border. If a different print mode - HP Scitex FB750 | User Guide - Page 26
on roll-fed media in the following way. NOTE: See Table A-2 Media sizes on page 104 for a list of supported media sizes. 1. If installed, detach the rigid media output table from the printer, and set it aside. 2. Install the table-top roll holders into the holes on the input table, allowing the - HP Scitex FB750 | User Guide - Page 27
choose between two levels of precision for finding the left (user end), and right (service end) edges of the media. 1. On the Printing page, press Options. 2. edges of the media before each print. This enables the printer to compensate for any "drifting" of the media, and print the image at the - HP Scitex FB750 | User Guide - Page 28
3 Load inks ● Load inks ● Order ink supplies NOTE: UV inks have a limited shelf life. The Warranty Ends date listed on the ink box label should be taken into account when ordering inks, rotating ink in inventory, and planning print jobs. Printing with an ink supply after this date may result in - HP Scitex FB750 | User Guide - Page 29
procedure. Figure 3-1 Ink boxes (both styles of connectors can be used with the printer) Unload an empty ink box 1. Remove the profiler. 2. Lift the box is pointing up. 3. Grasp the metal connector where the ink tube enters the printer, and push it up to release the ink supply tube. 4. Remove and - HP Scitex FB750 | User Guide - Page 30
white ink box has a split "Y" supply line that connects the box to two ink ports on the printer (Light Cyan/White and Light Magenta/White). 5. Install the profiler in the corresponding docking station slot. conversion. See Order accessories on page 73 for ordering instructions. ENWW Load inks 23 - HP Scitex FB750 | User Guide - Page 31
ink supplies for your printer. Table 3-1 Ink cartridges Cartridge HP FB250 3L Cyan Scitex Ink Cartridge HP FB250 3L Magenta Scitex Ink Cartridge HP FB250 3L Yellow Scitex Ink Cartridge HP FB250 3L Black Scitex Ink Cartridge HP FB250 3L Light Cyan Scitex Ink Cartridge HP FB250 3L Light Magenta - HP Scitex FB750 | User Guide - Page 32
4 Printing jobs ● Available print modes ● Stored jobs ● Position and eject options ● Printing tips ENWW 25 - HP Scitex FB750 | User Guide - Page 33
at the same resolution as it was sent from the RIP. The printer can print in several different modes for the combination of image quality and a white ink conversion. See Order accessories on page 73 for ordering instructions. Table 4-1 FB550 print modes and maximum print speeds Print mode Maximum - HP Scitex FB750 | User Guide - Page 34
Figure 4-1 Quality and speed of each print mode (FB550) Q m²/h (ft²/h) Table 4-2 FB750 print modes and maximum print speeds Print mode Maximum speed, Maximum speed, white CMYKcm, CMYK, CMYK+W flood Spot Photo Plus: Near offset quality, saturated colors, - HP Scitex FB750 | User Guide - Page 35
Figure 4-2 Quality and speed of each print mode (FB750) Q m²/h (ft²/h) Stored jobs When you send a print job to the printer, you can save the job automatically on the printer's hard disk drive, on a rotating first-in-first-out (FIFO) basis. You can "lock" a job to prevent it from being rotated out - HP Scitex FB750 | User Guide - Page 36
's thumbnail image. From the Stored Job properties screen, you can perform these operations on the print job: ● To print the job, press Load & Print. The printer will prompt you for the number of copies to print. If you have multiple sheets loaded, each copy will print on a separate sheet, and the - HP Scitex FB750 | User Guide - Page 37
"nest" them across the width of the media in rows. Position/Eject is available when the printer is configured for sheet-fed media. ● Position options - For print jobs with a width that humidity of 40%-60% will greatly reduce problems with static electricity. 30 Chapter 4 Printing jobs ENWW - HP Scitex FB750 | User Guide - Page 38
the ink over time and clog the ink jets. To minimize this: ◦ Do not keep reflective media loaded on the printer when not in use. ◦ Perform a manual purge after printing on reflective media. ◦ Visually inspect the printheads via the service door for ink buildup or ink curing, If observed, clean the - HP Scitex FB750 | User Guide - Page 39
5 Use white ink With the white ink option available from HP, you can replace the light magenta and light cyan inks with white ink, resulting in four colors of ink plus white ink. This enables you - HP Scitex FB750 | User Guide - Page 40
over time. The printer's white ink option incorporates a vibrating homogenizer base that keeps the white ink pigments in suspension without operator intervention. ● Printhead - The automatic printhead servicing (purging and wiping) must be supplemented with manual printhead cleaning, to enable - HP Scitex FB750 | User Guide - Page 41
6 Use the control panel ● Overview ● Home page ● Printing page ● Media page ● Ink page ● System page ● Menu tree 34 Chapter 6 Use the control panel ENWW - HP Scitex FB750 | User Guide - Page 42
media. Clear or reflective media cannot be detected. In this case, you must enter the media width manually when prompted by the control panel. 3 Network status - Indicates whether the printer is connected to the local area network. 4 Ink levels - Shows the current ink level for each color - HP Scitex FB750 | User Guide - Page 43
printer operation is performed from the control panel. NOTE: If printhead vacuum is ever lost, the ink in the printheads will seep onto the service information for technical support personnel. These messages do not halt printing and require no action from the user. When the printer issues one of - HP Scitex FB750 | User Guide - Page 44
jobs on page 28 for details. ● UV Lamps 2 Jobs - Displays the Stored Jobs feature. See Stored jobs on page 28 for details. 3 Options - Displays the Printer Options menu. See Printing Options menu on page 38 for details. ENWW Printing page 37 - HP Scitex FB750 | User Guide - Page 45
Calibrate Printer menu. See Calibrate the printer on page 49 for details. 5 Turn On Lamps/Turn Off Lamps - Enables you to manually switch the (available when Measure on all loads is selected) - Measures the user- and service-end edges on the first sheet, user-end edge only on subsequent sheets, - HP Scitex FB750 | User Guide - Page 46
Locates the left and right edges of the media before each print. This enables the printer to compensate for any "drifting" of the media, and print the image at prompt you to manually enter the thickness. ● Head Height off Media - Automatically raises the rail to set the printhead clearance from the - HP Scitex FB750 | User Guide - Page 47
page 11 for details. 3 Settings - Enables you to adjust media handing and printing settings. 4 Configure - Configures the printer for a media type. See Configure media on page 11 for instructions. 5 Eject Sheet buttons (when sheet fed media is loaded) - Ejects the media sheet to the input our - HP Scitex FB750 | User Guide - Page 48
After printing this pattern, the Check Jet Health pattern is printed. ● Printhead Procedures ◦ Load Ink in All Heads - Fills all printheads with ink. Typically used only when installing a new printer. ◦ Fill Heads with Ink - Fills the printheads that you select with ink. ◦ Empty Heads (Fill With Air - HP Scitex FB750 | User Guide - Page 49
set the number of prints after which the printer will automatically perform a purge and wipe of the printheads. This is intended to keep the jets screen ● Printer model ● Embedded software (firmware) version ● IP address - Enter this address in your RIP to send print jobs to the printer, and - HP Scitex FB750 | User Guide - Page 50
last performed. User Diagnostics User Diagnostics presents an interactive troubleshooting program to diagnose problems before calling technical support. It walks you through a series of tests and checks for certain printer functions. The printer asks you to make observations or run simple tests to - HP Scitex FB750 | User Guide - Page 51
Service Printer You can access troubleshooting data from the Embedded Web Server. Click Get Printer Events Files, then click InfoSettingsFile.txt. The file opens in the Web browser, and you can save it for reference or transmission to technical support personnel. Print Menus This option prints all - HP Scitex FB750 | User Guide - Page 52
Use Fast Print Speed Calibrate Printer ● Auto Calibrations ◦ AutoBidi Calibration ◦ Auto Head X Calibration ◦ AutoJet Calibration ◦ Full AutoSet ◦ AutoSet Summary ● Manual Calibrations ◦ Media Feed Calibration ◦ Manual Bidi Registration ◦ Printhead X Calibration ◦ Manual Jet Mapping ENWW Menu tree - HP Scitex FB750 | User Guide - Page 53
● Perform An Air Purge ● Access Carriage ● Print Recover Jets Pattern ● Printhead Procedures ◦ Load Ink In All Heads ◦ Fill Heads with Ink ◦ Empty Wipe Interval ● Upgrade Printer for White Ink Use (if printer has not been upgraded for white ink) ● Change Color Set (if printer has been upgraded for - HP Scitex FB750 | User Guide - Page 54
◦ Carriage Motion ◦ Rail Motion ◦ Calibration ◦ Verify H2H Y Alignment ◦ Print Quality ◦ Service Station ◦ UV System ◦ Vacuum Pressure ◦ Hard Drive ◦ LVDS ◦ Print Diagnostic Plot ◦ Warnings and Actions List ● Service Printer (for service provider use only) ● Print Menus ● Top Gutters ENWW Menu tree - HP Scitex FB750 | User Guide - Page 55
Measure ◦ Time Format ◦ Date Format ◦ Vacuum Pressure Units ◦ Language ● Sleep Wait Time ● UV Lamps Idle Time ● Attention Sorting ● Auto Maintenance Time ● Expert/Novice Messages ● Printer Name ● Network ● Customer Involvement Program ● Restore All Defaults 48 Chapter 6 Use the control panel ENWW - HP Scitex FB750 | User Guide - Page 56
7 Calibrate the printer ● When to calibrate ● AutoJet ● Automatic calibrations ● Manual calibrations ● Unfixed Jets Report ● Linearization ENWW 49 - HP Scitex FB750 | User Guide - Page 57
be detected by the printer Calibration Linearization (see RIP documentation for instructions). Media Feed Auto Calibrations Auto or Manual Bidirectional, Head-toHead, Saber angle, and Y calibration (all performed by the authorized service provider) Manual Calibrations Function Linearization of - HP Scitex FB750 | User Guide - Page 58
problems, the printhead Y calibration (a factory calibration) may need to be performed again. In this case, contact HP or your authorized service provider. Automatic calibrations The printer's piezo printheads or hide the detailed calibration data. Manual calibrations When you run the calibrations - HP Scitex FB750 | User Guide - Page 59
perform a linearization or color calibration (as supported by the RIP). See Linearization on page 58. NOTE: The manual BiDi and X head calibrations are time- 510 mm (20 in) calibration - Sheet fed only, uses the printer's onboard image sensor for precise adjustments. If the media feed needs larger - HP Scitex FB750 | User Guide - Page 60
Manual BiDi Registration Bidirectional registration is a method to align each of the printheads so that dot placement is accurate in both directions along the X axis (along the direction of printhead , then press Proceed. The printer prints the registration pattern, then prompts you to advance the - HP Scitex FB750 | User Guide - Page 61
Calibrations in the menu. 2. Press Printhead X Calibration in the menu. The control panel asks whether you want to print a manual head-to-head calibration page. ● If you need to print a new calibration pattern, press Proceed. The printer prints a calibration page. When the calibration page has - HP Scitex FB750 | User Guide - Page 62
closest to perfectly aligned. Use a printer's loupe or magnifying glass (10x printheads as necessary to ensure the maximum number of working jets. See Ink page on page 41 for instructions. 1. Press Calibrate from the Printing page, then press Manual Calibrations in the menu. 2. Press Manual - HP Scitex FB750 | User Guide - Page 63
heads. Press Cancel and go to the next step. Otherwise, press Proceed. The printer prints a jet map test pattern. If a line segment is missing or broken good) a jet. ● View current bad jets - Lists the bad jets on a given printhead. ● Clear all bad jets for a head - Clears (marks as good) all jets on - HP Scitex FB750 | User Guide - Page 64
hard and soft jets. Press X to clear the soft jets only. The control panel reports the number of jets that were cleared on the selected printhead. ENWW Manual calibrations 57 - HP Scitex FB750 | User Guide - Page 65
selection screen appears. 5. Repeat steps 1 through 4 for any other printhead, or press n to return to the menu. Clear All Bad or color calibration) involves printing and reading color test patches, and calibrating the printer to ensure that the expected and printed densities will match. This in turn - HP Scitex FB750 | User Guide - Page 66
8 Specialty printing options ● How to print selective gloss ● How to print relief texture ENWW 59 - HP Scitex FB750 | User Guide - Page 67
. Its application is at your own risk. Only operators technically experienced with the RIP and the printer are recommended to try it. If in doubt, contact your local printer service provider. 1. You must create gloss and matte media profiles for the material that is going to be used. Depending - HP Scitex FB750 | User Guide - Page 68
to create a gloss media profile for all the different substrates you would like to use for this purpose. CAUTION: Incorrect media settings may directly affect printer performance and print quality, and create risky situations such as printhead crashes. ENWW How to print selective gloss 61 - HP Scitex FB750 | User Guide - Page 69
6. Enter the media name. In this example, a new gloss mode is created from a standard Foam Board. 7. Press View Print Mode Specific Settings. 8. Press Change Print Mode Specific Settings. 62 Chapter 8 Specialty printing options ENWW - HP Scitex FB750 | User Guide - Page 70
9. Check the option Shutter Trailing Lamp for all print modes. 10. Press Change General Media Settings to uncheck the Detectable setting for matte and glossy. 11. Save the changes. 12. Repeat for other media types that you intend to use. ENWW How to print selective gloss 63 - HP Scitex FB750 | User Guide - Page 71
can extend the profitability and versatility of your printer. Its application is at your own risk. Only operators technically experienced with the RIP and the printer are recommended to try it. If in doubt, contact your local printer service provider. 64 Chapter 8 Specialty printing options ENWW - HP Scitex FB750 | User Guide - Page 72
. Procedures for Caldera and Onyx RIP software are described below. Caldera RIP 1. Select your texture file from the image bar and drop it onto your printer driver. ENWW How to print relief texture 65 - HP Scitex FB750 | User Guide - Page 73
2. Click the color settings icon. 3. Go to the Output tab and the linearization curves section. Click the ... button to edit. 66 Chapter 8 Specialty printing options ENWW - HP Scitex FB750 | User Guide - Page 74
want to print normally. To do this, click the Reset button in the Output tab. TIP: You can have two different configurations of your current printer driver settings and easily swap between the background and the texture mode. To do so, in the main - HP Scitex FB750 | User Guide - Page 75
2. Go to the Color Correction tab. 3. Press the Filter button and then the Manager button. 68 Chapter 8 Specialty printing options ENWW - HP Scitex FB750 | User Guide - Page 76
4. Create a new filter with a name such as "Texture Filter", and select it. 5. Press the Primary Color Curves button. ENWW How to print relief texture 69 - HP Scitex FB750 | User Guide - Page 77
6. Select all the colors and the Lines option in the Edit Type drop-down menu. Drag the point up to saturate the output for each color. 7. Close the window and set all saturations to 100%. 8. Press the Set Filter as Current button at the bottom of the screen. Your settings are saved in your - HP Scitex FB750 | User Guide - Page 78
9. Export it to save it in your computer. 10. When you open a new job, you can select your texture filter and the image will automatically take its settings. 11. Submit your image to be printed. Media handling ● Texture on a background ENWW How to print relief texture 71 - HP Scitex FB750 | User Guide - Page 79
◦ Load the media and print the background. ◦ Reload the media at the same position and print the texture on top of the background. ● Texture on colored media ◦ Load and print as a normal job. NOTE: As you are adding layers of C, M, Y, K, you will always have a black texture. If you want a colored - HP Scitex FB750 | User Guide - Page 80
FB5xx/FB7xx White Ink Upgrade Kit HP FB251 2L White Scitex Ink Cartridge HP Scitex FB550/950 Printer Cleaning Kit HP UV Replacement Bulb HP Scitex FB550 Roll Printing Kit HP Scitex FB750 Roll Printing Kit HP Scitex FB550 Extension Table HP Scitex FB750 Extension Table Product number CQ118A CQ123A - HP Scitex FB750 | User Guide - Page 81
regulatory compliance ● Clean and lubricate rail strips ● Clean the carriage encoder strip ● Clean the printheads ● Clean the carriage home sensor ● Clean the service-station wiper rails ● Clean the service-station wiper ● Clean the carriage wheels ● Vacuum the bottom of the carriage ● Replace the - HP Scitex FB750 | User Guide - Page 82
required for these procedures may be purchased as a kit (HP product number L1Q41-60034). Consistent and proper use of this kit will contribute to optimal printer performance, extend lamp and printhead life, reduce the number of service calls, increase image quality, and reduce the potential for - HP Scitex FB750 | User Guide - Page 83
any previous instructions, guidelines, or recommendations issued by HP regarding the cleaning or maintenance of the relevant printers in are not affected. Printers located in California should not be cleaned using SolaChrome-UV Printhead Flush, HP UV Printhead Flush (HP product number CH122A) - HP Scitex FB750 | User Guide - Page 84
NOTE: Users of printers in California must disregard all references to the Printhead Flush or IPA in the instructions or when displayed -side door will disable the carriage servo, allowing the carriage to be moved manually. 4. Using a lint-free cloth and isopropyl alcohol, clean the top carriage - HP Scitex FB750 | User Guide - Page 85
and block accurate reading of the encoder marks by the carriage encoder reader. NOTE: Users of printers in California must disregard all references to the Printhead Flush or IPA in the instructions or when displayed on the control panel. Instead, the alternative cleaning liquid specified at the - HP Scitex FB750 | User Guide - Page 86
door will disable the carriage servo, allowing the carriage to be moved manually. 4. Wipe the top of the encoder strip using a lint-free printheads CMYKcm - 40 Hours CMYKW - 20 Hours NOTE: Users of printers in California must disregard all references to the Printhead Flush or IPA in the instructions - HP Scitex FB750 | User Guide - Page 87
the carriage over the service station. CAUTION: Wear protective gloves, such as latex, to protect your hands from being stained with ink. CAUTION: Wear safety glasses to protect your eyes from ink and head flush that may splash into your eyes. Figure 10-5 Reaching the printheads through the access - HP Scitex FB750 | User Guide - Page 88
can accumulate in the thin slits of the optical sensor and cause errors. NOTE: Users of printers in California must disregard all references to the Printhead Flush or IPA in the instructions or when displayed on the control panel. Instead, the alternative cleaning liquid specified at the beginning - HP Scitex FB750 | User Guide - Page 89
the service-station wiper rails CMYKcm - 80 Hours CMYKW - 40 Hours Cleaning and lubricating the wiper rails keeps the wiper motion moving smoothly for best cleaning performance. NOTE: Users of printers in California must disregard all references to the Printhead Flush or IPA in the instructions or - HP Scitex FB750 | User Guide - Page 90
cloth moistened with printhead flush, wipe ink and debris from the top of the service station. Figure 10-10 Cleaning the top of the service station 5. Using the procedure, press Proceed. When you press Proceed, the printer resets the maintenance counter and moves the wiper carriage back and forth - HP Scitex FB750 | User Guide - Page 91
lint-free cloth saturated with printhead flush (do not use isopropyl alcohol), wipe both sides of the rubber wiper. Figure 10-12 Service-station wiper blade 5. NOTE: Users of printers in California must disregard all references to the Printhead Flush or IPA in the instructions or when displayed on - HP Scitex FB750 | User Guide - Page 92
table and open the output-side door. Opening the output-side door will disable the carriage servo, allowing the carriage to be moved manually. 4. Clean the top service-end wheel by placing an Isopropyl alcohol-moistened cotton swab against the side of the wheel (A in photo below) and moving the - HP Scitex FB750 | User Guide - Page 93
5. Clean the top user-end carriage wheel with an isopropyl alcohol-moistened cotton swab. Figure 10-15 Cleaning carriage-wheel with cotton swab 86 Chapter 10 User cleaning ENWW - HP Scitex FB750 | User Guide - Page 94
swab into the opening above the (A) wheels and moving the carriage back and forth. Perform the same process for each wheel on the user and service-end of the carriage. Figure 10-16 Cleaning slanted carriage-wheels with cotton swab (1 of 2) Figure 10-16 Cleaning slanted carriage-wheels with cotton - HP Scitex FB750 | User Guide - Page 95
printheads, where the service station's printhead wiper does not reach. This routine uses the printer's internal printhead printhead carriage. 3. Remove the output table and open the output-side door. Opening the output-side door disables the carriage servo, allowing the carriage to be moved manually - HP Scitex FB750 | User Guide - Page 96
box, located behind the user-end enclosure in the area indicated by (A) in the figure below. If the chassis wheels are still attached to the printer, rotate the wheel out of the way as shown below. Figure 10-18 Cleaning the electronics box fan filter on the input side ENWW Clean - HP Scitex FB750 | User Guide - Page 97
enough to avoid the need for wiper-height calibrations between replacements. If the wipers are not making adequate contact with the printheads, contact your service provider to calibrate the wiper height. 1. Select from the control panel System> Tools> User Cleaning and Maintenance> 11) Replace - HP Scitex FB750 | User Guide - Page 98
below) that secures the wiper clamp to the wiper assembly. Figure 10-20 Service station wiper assembly 5. Separate the two wiper clamp halves and remove the Ionizer Needles. 2. Press Proceed to continue. The printer moves the rail for easier access to the ionizer bar. ENWW Clean ionizer needles - HP Scitex FB750 | User Guide - Page 99
, press Proceed. Drain waste ink container CMYKcm - 40 Hours CMYKW - 20 Hours Waste ink accumulates in the service station until drained. Depending on printer use and ink service frequency, the service station may need to be drained more often, a Warning or Action in the Attention Queue alerts you - HP Scitex FB750 | User Guide - Page 100
closed during printing and service station use. An open spigot affects the vacuum level in the service station and will degrade service station performance if NOTE: Users of printers in California must disregard all references to the Printhead Flush or IPA in the instructions or when displayed on - HP Scitex FB750 | User Guide - Page 101
manually printer running at optimal temperatures by drawing warm air generated by the electric components away from the printer Fans are located along the top of the printer on both end-caps and on the output to ensure a full curing of the ink, a service life of 1000 hours is possible. Replace both - HP Scitex FB750 | User Guide - Page 102
recommended to replace both bulbs at the same time). 4. Press Proceed to continue. This resets the lamp service hours counter to zero hours. 5. Power down the printer using the power switch as instructed on the control panel. CAUTION: DO NOT attempt to access the UV Lamps without first powering down - HP Scitex FB750 | User Guide - Page 103
b. Remove the lamp power cable from the side of the lamp (A in the figure below) by turning the coupling counterclockwise. Figure 10-28 Lamp power cable c. Remove the four screws (A and B in the following figure) that secure the upper lamp assembly to the lower lamp assembly. Figure 10-29 User-end - HP Scitex FB750 | User Guide - Page 104
d. Lift up to remove upper lamp assembly from the lower lamp assembly. Figure 10-30 User-end screws 9. Remove the service-end upper lamp assembly. a. Disconnect the auxiliary cable (A in the figure 27) from the top of the user-end lamp. b. Remove the lamp power cable - HP Scitex FB750 | User Guide - Page 105
c. Remove the four silver screws (A and B in the following figure) that secure the upper lamp assembly to the lower lamp assembly. Figure 10-31 Service-end screws d. Lift up to remove the upper lamp assembly from the lower lamp assembly. 10. Remove the old UV lamp bulb NOTE: Wear cotton - HP Scitex FB750 | User Guide - Page 106
Figure 10-32 Spring-loaded clamp b. Loosen the two screws that hold the two reflectors together until the outside reflector can be removed. Figure 10-33 Reflector screws NOTE: The reflector screws are captive screws and are not meant to be fully removed. If you do fully remove the screws, take care - HP Scitex FB750 | User Guide - Page 107
. Figure 10-34 Removing the bulb Material disposal: mercury lamps This HP product contains the following materials that might require special handling at end recycling information, please contact your local authorities or the Electronic Industries Alliance (EIA) (http://www.eiae.org). 11. Install - HP Scitex FB750 | User Guide - Page 108
cable on page 95. e. Connect the lamp power cable to the side of the lamp. See Figure 10-28 Lamp power cable on page 96. Troubleshooting upper lamp assembly installation ● If you have difficulty fitting the upper lamp assembly back into the lower lamp assembly, loosen the four screws indicated below - HP Scitex FB750 | User Guide - Page 109
● If the upper lamp assembly is still difficult to install, squeeze the side of the lower lamp assembly to bend the side in about 0.8 mm (0.013 in) as shown in the figure below. Figure 10-38 Squeeze the sides of the lower lamp assembly 102 Chapter 10 User cleaning ENWW - HP Scitex FB750 | User Guide - Page 110
A Specifications ● Functional specifications ● Physical specifications ● Power specifications ● Environmental specifications ENWW 103 - HP Scitex FB750 | User Guide - Page 111
HP Scitex UV pigment ink supplies Printheads Ink cartridges Two printheads m (120 in) Width: 1.6 m (64 in) 68 kg (150 lb) Maximum (FB750) 64 mm (2.5 in) 1.2 m (48 in) 2.5 m (98 in) Length: 3 A-3 Functional specifications Print resolutions RIP supports print modes that include resolutions of - HP Scitex FB750 | User Guide - Page 112
table: 38 kg (83 lb) Extension tables (each): 59 kg (130 lb) Power specifications Table A-5 Printer power specifications Input voltage 200-240 VAC, single phase Input frequency 50/60 Hz Maximum load current 12 A FB750 Height: 153 cm (60 in) Width: 412 cm (162 in) Depth: 141 cm (56 in - HP Scitex FB750 | User Guide - Page 113
printer can use any of the following 4.5 m (14.8 ft) power cords: ● USA: HP part number 8120-6903 ● Europe: HP ink dripping from the printheads when the printer is idle. You when it is necessary to remove power from the printer for service. ● UPS - Customer-supplied uninterruptable power supply, - HP Scitex FB750 | User Guide - Page 114
Environmental specifications Table A-6 Printer environmental specifications Operating conditions Temperature: 20 to 30°C (68 to 85°F) Relative Humidity: 20-80%, non-condensing (40-60% recommended to avoid static electricity on - HP Scitex FB750 | User Guide - Page 115
problems and provides information about getting help from Hewlett-Packard. For other software-specific troubleshooting procedures, refer to your application software documentation or the other documentation listed on page iv of this manual. ● Troubleshooting checklist ● Warranty claims ● CallMe@hp - HP Scitex FB750 | User Guide - Page 116
in this checklist. Contact Technical Services. NO: Check the following: ● Banding or general poor image quality - The printheads may need to be calibrated (see Calibrate the printer on page 49). One or more inkjets may be clogged or not firing (see Ink page ENWW Troubleshooting checklist 109 - HP Scitex FB750 | User Guide - Page 117
between your third-party support and HP, but again only at the request of an HP support representative. Refer to the documentation CD-ROM disc that comes with the printer for more information: ● CallMe@hp Network Security Guide, which discusses the technology used in CallMe@hp as it relates to - HP Scitex FB750 | User Guide - Page 118
case of any question or problem, you should approach your local HP Authorized Representative for consultancy and support. However, if required, you can contact HP directly by using the following methods. NOTE: For up-to-date contact information, please visit http://www.hp.com/go/graphicarts. North - HP Scitex FB750 | User Guide - Page 119
Peru: 511 411 2443 / 0 800 10111 El Salvador: 800 6160 Venezuela: 58 212 278 8666 / 0 800 474 68368 CC LAR Nextel: (5255) 1088 0884; ID 52*20115*51 CC LAR e-Mail: [email protected] CC LAR Fax: +52 55 5258 6377 112 Appendix B Troubleshooting ENWW - HP Scitex FB750 | User Guide - Page 120
C Image quality tips ● Startup and check jet health ● RIP settings ● Color matching ENWW 113 - HP Scitex FB750 | User Guide - Page 121
was properly installed by an HP-authorized service technician, in a facility and environment that meets HP specifications as published in the Site Preparation Guide. ● The printer has the latest version of the embedded software (firmware) installed. ● The printer hardware is working, and has been - HP Scitex FB750 | User Guide - Page 122
are ready to select printer settings. ● If Manual Calibrations > Manual Jet Mapping) ◦ Printheads may be damaged ◦ Service station may need to be calibrated ◦ Contact your service representative for further assistance. RIP settings For detailed operating instructions, refer to the RIP user guide - HP Scitex FB750 | User Guide - Page 123
by the printer is the result of the interaction of numerous factors, listed below. Correction of errors in color reproduction may involve adjustments in more than one of these factors. ● Installation and initial calibrations (performed by an authorized service technician) ◦ Head height ◦ Printheads - HP Scitex FB750 | User Guide - Page 124
manual bidi 53 manual jet mapping 55 media feed 52 printhead X calibration 54 report individual bad jets 56 view current bad jets 57 when to perform 50 California regulatory compliance 76 CallMe@hp table 73 F firmware update 9 G general media settings 11 conductive 12 detectable to printer 12 feed - HP Scitex FB750 | User Guide - Page 125
9 M maintenance 74 manual bidi registration 53 manual calibrations 51 manual jet mapping 55 measure speeds 26 printer specifications 103 printer usage data 9 printhead flush ordering 24 printhead X troubleshooting 108 U unfixed jets report 58 uninterruptible power supply (UPS) 2 update printer
-
 1
1 -
 2
2 -
 3
3 -
 4
4 -
 5
5 -
 6
6 -
 7
7 -
8
-
9
-
10
-
11
-
12
-
13
-
14
-
15
-
16
-
17
-
18
-
19
-
20
-
21
-
22
-
23
-
24
-
25
-
26
-
27
-
28
-
29
-
30
-
31
-
32
-
33
-
34
-
35
-
36
-
37
-
38
-
39
-
40
-
41
-
42
-
43
-
44
-
45
-
46
-
47
-
48
-
49
-
50
-
51
-
52
-
53
-
54
-
55
-
56
-
57
-
58
-
59
-
60
-
61
-
62
-
63
-
64
-
65
-
66
-
67
-
68
-
69
-
70
-
71
-
72
-
73
-
74
-
75
-
76
-
77
-
78
-
79
-
80
-
81
-
82
-
83
-
84
-
85
-
86
-
87
-
88
-
89
-
90
-
91
-
92
-
93
-
94
-
95
-
96
-
97
-
98
-
99
-
100
-
101
-
102
-
103
-
104
-
105
-
106
-
107
-
108
-
109
-
110
-
111
-
112
-
113
-
114
-
115
-
116
-
117
-
118
-
119
-
120
-
121
-
122
-
123
-
124
-
125
 |
 |

Scitex FB550 and FB750 Printers
User’s Guide