HP Scitex FB750 User Guide - Page 21
Load rigid media, Load Media, Proceed
 |
View all HP Scitex FB750 manuals
Add to My Manuals
Save this manual to your list of manuals |
Page 21 highlights
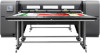
standard tables, the extension table tops are designed to pivot into the storage position under their own weight. CAUTION: The standard and accessory extension tables are intended for use only when attached to the printer as described in these instructions. When not in use, the tables should be stored with the table tops folded in the storage position. Use caution when operating the table tops and moving the tables, to avoid personal injury or damage to property. NOTE: If the accessory tables were properly leveled when they were installed, they should not have to be leveled again. If sheet-fed media feed problems occur, make sure the accessory tables are securely latched to the standard tables, and verify that the tables are level. Check for level over the fixed support assembly first, then over the folding support, and adjust the table wheels up or down as necessary. Load rigid media NOTE: See Table A-2 Media sizes on page 104 for a list of supported media sizes. 1. If the rigid media tables are not already installed, position the input and output tables at each end of the media drive belt, and engage the attachment latches to the printer. Make sure that the pivoting table tops are securely latched in the operating position. NOTE: If you have the optional roll-fed media accessory installed, remove the foam press rollers. The foam press rollers are not used with rigid media. 2. At the end of the Configure Media process (see Configure media on page 11), press Yes on the control panel; or press Home > Load Media. Before you can load, you must configure the media as explained in Configure media on page 11. 3. Select one of the following media rollers options, then press Proceed: ● Flat Media - If the rollers were set to "Yes" in the media configuration (see Configure media on page 11), the rollers will move up or down as needed to be just above the surface of the media. If the rollers were set to "No", the rollers will remain at their highest point and will not be used. In either case, the full imageable length of the sheet is available for printing. ● Warped Media, Hold Down - When a sheet is loaded, the leading edge is advanced so that it is underneath the output roller. Printing is allowed only until the trailing edge of the sheet has reached the input roller. The imageable area of the sheet is reduced by 65.4 cm (25.8 in) from both the leading and trailing edges. ● Short Media - Enables printing on sheets that are not long enough to reach the output roller and thickness sensor at the same time. The media length must be at least 22 cm (8.5 in). NOTE: The media rollers are lowered to just above the media with any force or pressure, other than their own weight. They are designed to hold down lighter weight media with at most a moderate amount of warping. They may have no effect on heavier, badly warped media. For best results, use the flattest available media. 4. Select the approximate thickness or enter the exact thickness of the media you are loading, then press Proceed. 5. Load the sheet of media onto the input table, sliding it forward against the media alignment bar (under the printhead carriage rail), then left along the media alignment bar until the media touches the leftmost alignment pin. 14 Chapter 2 Configure and load media ENWW
-
 1
1 -
2
-
3
-
4
-
5
-
6
-
7
-
8
-
9
-
10
-
11
-
12
-
13
-
14
-
15
-
 16
16 -
 17
17 -
 18
18 -
 19
19 -
 20
20 -
 21
21 -
 22
22 -
 23
23 -
 24
24 -
 25
25 -
 26
26 -
27
-
28
-
29
-
30
-
31
-
32
-
33
-
34
-
35
-
36
-
37
-
38
-
39
-
40
-
41
-
42
-
43
-
44
-
45
-
46
-
47
-
48
-
49
-
50
-
51
-
52
-
53
-
54
-
55
-
56
-
57
-
58
-
59
-
60
-
61
-
62
-
63
-
64
-
65
-
66
-
67
-
68
-
69
-
70
-
71
-
72
-
73
-
74
-
75
-
76
-
77
-
78
-
79
-
80
-
81
-
82
-
83
-
84
-
85
-
86
-
87
-
88
-
89
-
90
-
91
-
92
-
93
-
94
-
95
-
96
-
97
-
98
-
99
-
100
-
101
-
102
-
103
-
104
-
105
-
106
-
107
-
108
-
109
-
110
-
111
-
112
-
113
-
114
-
115
-
116
-
117
-
118
-
119
-
120
-
121
-
122
-
123
-
124
-
125
 |
 |
