HP Visualize b2000 hp Visualize b2000 UNIX workstation service handbook (a5983 - Page 95
Replacing the CD Drive Bay, s Rear Cover
 |
View all HP Visualize b2000 manuals
Add to My Manuals
Save this manual to your list of manuals |
Page 95 highlights
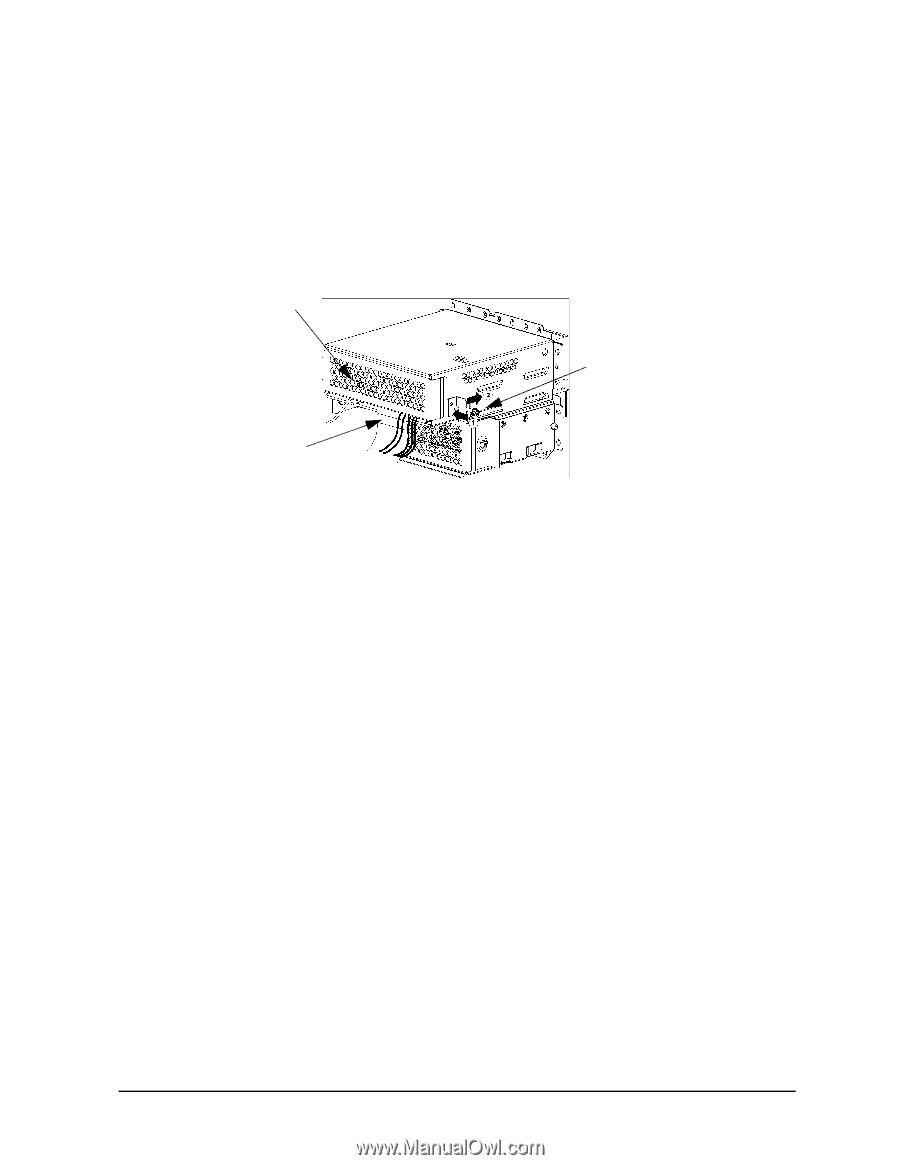
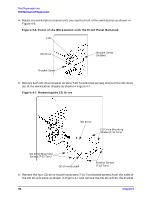
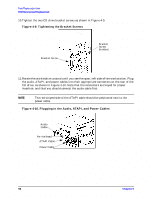
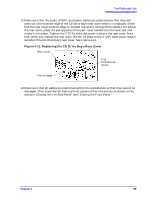
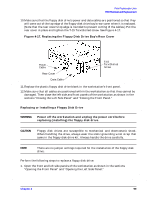
Field Replaceable Units FRU Removal and Replacement 12.Make sure that the audio, ATAPI, and power cables are positioned so that they will come out of the bottom edge of the CD drive bay's rear cover when it is replaced. (Note that the rear cover's bottom edge is rounded to prevent cutting of the cables.) To replace the rear cover, place the end opposite of the rear cover handle into the cover slot and rotate it into place. Tighten the T-15 Torx/slotted screw to secure the rear cover. Note that, when you replace the rear cover, the ferrite bead on the ATAPI cable must remain outside of the CD drive bay's rear cover. See Figure 4-11. Figure 4-11. Replacing the CD Drive Bay's Rear Cover Rear Cover T-15 Torx/Slotted Screw Ferrite Bead 13.Make sure that all cables are positioned within the workstation so that they cannot be damaged. Then close the left side and front panels of the workstation as shown in the sections "Closing the Left Side Panel" and "Closing the Front Panel." Chapter 4 95
-
 1
1 -
2
-
3
-
4
-
5
-
6
-
7
-
8
-
9
-
10
-
11
-
12
-
13
-
14
-
15
-
16
-
17
-
18
-
19
-
20
-
21
-
22
-
23
-
24
-
25
-
26
-
27
-
28
-
29
-
30
-
31
-
32
-
33
-
34
-
35
-
36
-
37
-
38
-
39
-
40
-
41
-
42
-
43
-
44
-
45
-
46
-
47
-
48
-
49
-
50
-
51
-
52
-
53
-
54
-
55
-
56
-
57
-
58
-
59
-
60
-
61
-
62
-
63
-
64
-
65
-
66
-
67
-
68
-
69
-
70
-
71
-
72
-
73
-
74
-
75
-
76
-
77
-
78
-
79
-
80
-
81
-
82
-
83
-
84
-
85
-
86
-
87
-
88
-
89
-
 90
90 -
 91
91 -
 92
92 -
 93
93 -
 94
94 -
 95
95 -
 96
96 -
 97
97 -
 98
98 -
 99
99 -
 100
100 -
101
-
102
-
103
-
104
-
105
-
106
-
107
-
108
-
109
-
110
-
111
-
112
-
113
-
114
-
115
-
116
-
117
-
118
-
119
-
120
-
121
-
122
-
123
-
124
-
125
-
126
-
127
-
128
-
129
-
130
-
131
-
132
-
133
-
134
-
135
-
136
-
137
-
138
-
139
-
140
-
141
-
142
-
143
-
144
-
145
-
146
-
147
-
148
-
149
-
150
-
151
-
152
-
153
-
154
-
155
-
156
-
157
-
158
-
159
-
160
-
161
-
162
-
163
-
164
-
165
-
166
-
167
-
168
-
169
-
170
-
171
-
172
-
173
-
174
-
175
-
176
-
177
-
178
-
179
-
180
-
181
-
182
-
183
-
184
-
185
-
186
-
187
-
188
-
189
-
190
-
191
-
192
-
193
-
194
-
195
-
196
-
197
-
198
-
199
-
200
-
201
-
202
-
203
-
204
 |
 |