HP t505 Administrator Guide 11 - Page 10
Making permanent system configurations, Disabling or enabling HP Write Manager, Configuring a marker
 |
View all HP t505 manuals
Add to My Manuals
Save this manual to your list of manuals |
Page 10 highlights
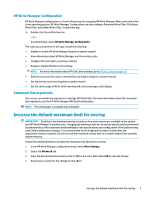
Making permanent system configurations The following table describes the possible methods for making permanent system configurations. IMPORTANT: HP strongly recommends using method 1 in most situations. Table 1-2 Methods for making permanent systems configurations Method 1 Method 2 1. Disable HP Write Manager (requires a system restart). 2. Make the necessary configurations. 3. Enable HP Write Manager (requires a system restart). ▲ Use the HP Write Manager Configuration app to add files or folders to the exclusion list, and then restart the thin client. See the following sections for more information about performing these tasks: ● Disabling or enabling HP Write Manager on page 4 ● Configuring a marker on page 4 ● Adding a profile on page 5 ● Adding files and folders to the file exclusion list on page 6 ● Adding a registry key to the registry exclusion list on page 8 Disabling or enabling HP Write Manager The following table describes the possible methods for disabling or enabling HP Write Manager. Table 1-3 Methods for disabling or enabling HP Write Manager Method 1 Method 2 1. Right-click the notification icon and select the desired state. 1. Open the HP Write Manager Configuration app. 2. Restart the thin client. 2. Select an option to set the desired state. 3. Restart the thin client. TIP: Method 1 is the quickest way to disable or enable HP Write Manager. Configuring a marker Markers can be used to trigger a purge, which removes files from the overlay. NOTE: The event is triggered when the available overlay size is equal to or more than the specified marker size. When the Warning marker is reached, a warning message is displayed. When the Critical marker is reached, a countdown to a Windows restart is displayed. To configure the markers: 1. Open the HP Write Manager Configuration app, and select More Settings. 2. In the Markers tab, set the size (in MB) of the Warning and Critical markers. Overlay size is also displayed, but size can not be modified while in the Markers tab. To modify overlay size, see Increase the default maximum limit for overlay on page 3. 4 Chapter 1 HP Write Manager
-
 1
1 -
2
-
3
-
4
-
 5
5 -
 6
6 -
 7
7 -
 8
8 -
 9
9 -
 10
10 -
 11
11 -
 12
12 -
 13
13 -
 14
14 -
 15
15 -
16
 |
 |
