HP vp6300 HP vp6300 Series Digital Projector - User's Guide - Page 62
Help > Diagnostics - projector manual
 |
View all HP vp6300 manuals
Add to My Manuals
Save this manual to your list of manuals |
Page 62 highlights
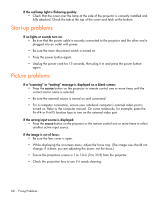
• Press enter, go to Help > Diagnostics, and run the color test. • Press enter, go to Picture > Color settings > Reset color settings, and press enter. • Press enter, go to Setup > Reset all settings, and press enter. If the picture is not clear (ghost images, smearing, poor quality): • Be sure the video cable you are using is coaxial cable rated at 75 ohms. Any other cable or impedance rating can reduce picture quality. • The video cable connecting the video source to the projector probably must be higher quality. See "Choosing cables" on page 49. If several picture settings seem completely wrong and you cannot fix them: • Press enter, go to Picture > Color settings > Reset color settings, and press enter. • Press enter, go to Setup > Reset all settings, and press enter. If a scrolling or cut-off image is displayed for a computer connection: • Press the auto sync button on the projector or remote control. • Turn everything off. Then power on the projector first and power on the notebook or desktop computer second. • If the previous steps do not correct the display image, adjust the resolution of the notebook or desktop computer to the same resolution as the projector, 800 × 600 or 1024 × 768 (see "Specifications" on page 65). If the computer has multiple monitors, adjust the resolution of the monitor assigned to the projector. If the image is flickering or unstable for a computer connection: • Press the auto sync butto on the projector or remote control. • Press enter, go to Picture > VGA settings, and adjust Frequency or Tracking. If the image disappears from the computer screen: • For a notebook computer, you might be able to turn on both the external VGA port and the built-in screen. Refer to the computer manual. • Connect a monitor to the VGA-out port. If text or lines from a computer display seem rough or uneven: • Check the focus adjustment. • Press enter, go to Setup > Reset keystone, and press enter. 62 Fixing Problems
-
 1
1 -
2
-
3
-
4
-
5
-
6
-
7
-
8
-
9
-
10
-
11
-
12
-
13
-
14
-
15
-
16
-
17
-
18
-
19
-
20
-
21
-
22
-
23
-
24
-
25
-
26
-
27
-
28
-
29
-
30
-
31
-
32
-
33
-
34
-
35
-
36
-
37
-
38
-
39
-
40
-
41
-
42
-
43
-
44
-
45
-
46
-
47
-
48
-
49
-
50
-
51
-
52
-
53
-
54
-
55
-
56
-
 57
57 -
 58
58 -
 59
59 -
 60
60 -
 61
61 -
 62
62 -
 63
63 -
 64
64 -
 65
65 -
 66
66 -
 67
67 -
68
-
69
-
70
-
71
-
72
-
73
-
74
-
75
 |
 |
