Hoover UH72430 Product Manual
Hoover UH72430 Manual
 |
View all Hoover UH72430 manuals
Add to My Manuals
Save this manual to your list of manuals |
Hoover UH72430 manual content summary:
- Hoover UH72430 | Product Manual - Page 1
Guide d'utilisation Instructions d'utilisation et d'entretien www.hoover.com www.hoover.com IMPORTANT : LIRE CES INSTRUCTIONS ATTENTIVEMENT AVANT D'UTILISER L'ASPIRATEUR. Vous avez des questions ou des inquiétudes? Veuillez appeler le service ID107329-R0 Owner's Manual Español - página E1 - Hoover UH72430 | Product Manual - Page 2
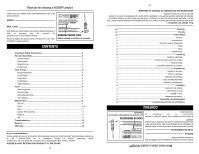
Dirt Cup...9 Filters...9-10 Hose...11 Cyclonic Filter Assembly...11 Brushroll...11 Belt...12 Troubleshooting 13 Service...14 Warranty...15 of vacuum) MFG. CODE Thank you for choosing a HOOVER® product. Please enter the complete model and manufacturing code in the spaces provided. Model Pour - Hoover UH72430 | Product Manual - Page 3
INSTRUCTIONS BEFORE USING THIS APPLIANCE. WARNING: TO REDUCE THE RISK OF FIRE, ELECTRIC SHOCK OR INJURY: • Fully assemble before operating. • Operate vacuum manual a service center air flow. • Keep hair, loose clothing, fingers, and all parts of body away from openings and moving parts. • Turn Filters - Hoover UH72430 | Product Manual - Page 4
clean out hose as they can cause damage. • With brushroll on, do not allow cleaner to sit in one location . If this happens proceed as follows: 1. Turn cleaner OFF and unplug it from the electrical and filters for any obstructions. Clear obstructions if present. When cleaner is unplugged and motor - Hoover UH72430 | Product Manual - Page 5
Tools 1.4 For storage mode, push dusting brush all the way down onto crevice tool. 1.5 Snap combination tool into tool storage area (B) on back side of vacuum. 1.5 B 1.4 Attach dirt cup 1.3 Place bottom of dirt cup into vacuum body first. Pivot cup into vacuum. Press down on the dirt cup release - Hoover UH72430 | Product Manual - Page 6
turn vacuum ON (l = ON), push ON/OFF switch (A) once. To turn vacuum OFF (0 = OFF), push switch again. To turn brushroll ON, push ON/OFF switch (B) once. To turn brushroll Rinsable Filter Access 8. Dirt Cup 9. Filter made with HEPA media 10. Brushroll Window 11. Furniture Guard 12. ON/OFF Brushroll - Hoover UH72430 | Product Manual - Page 7
parts-keep fingers away from opening - Unplug before servicing. To lock back into place, push hose into hose tube until you hear a click. 3.2 To remove hose for tool use, press the hose release button and pull hose end out. Make sure brushroll Dusting Brush may clean areas. The vacuum is ready for - Hoover UH72430 | Product Manual - Page 8
vacuum before connecting wand or tools. ! CAUTION ! To reduce the risk of injury from moving parts-keep fingers away from opening - Unplug before servicing. hose. To remove tool, twist and pull apart gently. *Available on select models only 3.3 3.5 3.7 3.4 3.6 ! MISE EN GARDE ! Faire preuve d'une - Hoover UH72430 | Product Manual - Page 9
filter is available. Ask for Hoover® Part No. 440005633. IMPORTANT Allow filter to dry completely before replacing. Dry filter on edge so air circulates on both sides of filter. This may take up to 24 hours. Filters cleaning or servicing. Do not use vacuum without dirt cup or filters in place. - Hoover UH72430 | Product Manual - Page 10
for Hoover® Part No. 440005393. 4.10 CORRECT INCORRECT 4.7 Remove dirt cup. 4.8 Unlock filter cover by pushing button and lifting up. Remove the filter with the filter housing and hold over a trash receptacle. Tap out dirt and debris. Replace filter to the filter housing. 4.9 Replace filter by - Hoover UH72430 | Product Manual - Page 11
parts - Unplug before servicing. 4.15 Turn vacuum over so bottom side is facing up. Remove any debris and/or hair from brushroll. For additional maintenance required for belt or brushroll please contact a HOOVER® service provider at 1-800944-9200. 4.16 Vacuum filter assembly back in place. Replace - Hoover UH72430 | Product Manual - Page 12
26 Reattach brush roll door by aligning the screw boss on the brushroll door with the screw hole and replacing 1 screw. Belt: What to Buy Use only genuine HOOVER® belts with your vacuum. When purchasing a new belt, ask for Belt - HOOVER® part No. 440004214. LUBRICATION: The motor and brushroll are - Hoover UH72430 | Product Manual - Page 13
smell detected 1. Belt broken or stretched. 2. Brushroll is clogged. 2. Brushroll is clogged. turn Brushroll will not 1. Brushroll switch is off 4. Rinsable and/ or filter made with HEPA media not installed completely. 3. Hose not installed correctly. Vacuum won't pick up or Low suction Dust - Hoover UH72430 | Product Manual - Page 14
Hoover® service and genuine Hoover® parts, locate the nearest Authorized Hoover® Warranty Service Dealer (Depot) by: • Checking the Yellow Pages under "Vacuum Cleaners" or "Household". • Visit our website at hoover.com (U.S. Customers) or hoover.ca (Canadian customers). Follow the service - Hoover UH72430 | Product Manual - Page 15
's Manual, your HOOVER® equipment rental services), brushroll, belt, improper replacement or repair performed under this Warranty. THIS WARRANTY IS THE EXCLUSIVE WARRANTY AND REMEDY PROVIDED BY HOOVER stipulé dans le Guide de l'utilisateur, contre acte ou négligence de la part du propriétaire du produit - Hoover UH72430 | Product Manual - Page 16
- Hoover UH72430 | Product Manual - Page 17
MANUAL DEL PROPIETARIO Instrucciones de Funcionamiento y Servicio IMPORTANTE: LEA ATENTAMENTE ANTES DE ENSAMBLAR Y USAR. ¿Tiene alguna pregunta o inquietud? Para obtener asistencia, llame al Servicio de atención - Hoover UH72430 | Product Manual - Page 18
el uso y el mantenimiento de su producto HOOVER® se realicen en condiciones de uso doméstico normales y según el Manual del usuario, el producto estará garantizado contra NINGÚN TIPO O NATURALEZA CON RESPECTO AL PROPIETARIO O A CUALQUIER PARTE QUE REALICE UN RECLAMO A TRAVÉS DEL PROPIETARIO, YA SEA - Hoover UH72430 | Product Manual - Page 19
-9200. No envíe su aspiradora a Hoover®, Inc., Company en Glenwillow para realizar está en la parte inferior del aspirador. • No use este aparato en lugares al aire libre ni en superficies Use el producto sólo como se describe en este manual. Use sólo los accesorios y productos recomendados por el - Hoover UH72430 | Product Manual - Page 20
contenedor para polvo ni en el filtro. Retire cualquier obstrucción, de ser necesario. Cuando la aspiradora está desenchufada y se deja enfriar el motor durante 30 minutos, el protector térmico se desactiva, y se puede continuar pasando la aspiradora. Si el protector térmico sigue activándose despu - Hoover UH72430 | Product Manual - Page 21
usada. 4.22 Instale la correa en el eje del motor, de modo que se vea la inscripción en la parte exterior. Utilice la puerta abierta del cepillo giratorio para de HOOVER® con su aspiradora. Al comprar una correa nueva, solicite la Correa n.° 440004214. de HOOVER®. 4.26 LUBRICACIÓN: El motor y - Hoover UH72430 | Product Manual - Page 22
la aspiradora de modo que la parte inferior mire hacia arriba. Retire cualquier residuo y/o cabello del rodillo de cepillos. Para solicitar mantenimiento adicional para la correa o para el rodillo de cepillos, comuníquese con un proveedor de servicios HOOVER®. 4.16 La aspiradora está equipada con - Hoover UH72430 | Product Manual - Page 23
del mismo. 4.9 Coloque el filtro insertando las dos lengüetas en la parte posterior del mismo y presione hacia abajo hasta que escuche un chasquido. 4.10 hay filtros adicionales disponibles. Solicite la pieza n.° 440005393. de Hoover®. CORRECTO INCORRECTO E10 Posiciones del mango 2.6 El mango de - Hoover UH72430 | Product Manual - Page 24
la Fig. 4.2. 4.5 Tire de la lengüeta que se encuentra en la parte frontal del contenedor para polvo para abrirlo. 4.6 Para retirar el filtro enjuagable, hay filtros adicionales disponibles. Solicite la pieza n.° 440005633. de Hoover®. el filtro se seque completamente durante 24 horas. Vuelva a
-
 1
1 -
 2
2 -
 3
3 -
 4
4 -
 5
5 -
 6
6 -
 7
7 -
8
-
9
-
10
-
11
-
12
-
13
-
14
-
15
-
16
-
17
-
18
-
19
-
20
-
21
-
22
-
23
-
24
 |
 |

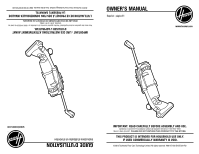
OWNER’S MANUAL
©2013 Techtronic Floor Care Technology Limited. All rights reserved. #961151100 ID107329-R0
IMPORTANT: READ CAREFULLY BEFORE ASSEMBLY AND USE.
Questions or concerns? For assistance, please call Customer Service at 1-800-944-9200
Mon-Fri 8am-7pm EST.
PLEASE DO NOT RETURN THIS PRODUCT TO THE STORE.
THIS PRODUCT IS INTENDED FOR HOUSEHOLD USE ONLY.
IF USED COMMERCIALLY WARRANTY IS VOID.
IMPORTANT : LIRE CES INSTRUCTIONS ATTENTIVEMENT AVANT
D’UTILISER L’ASPIRATEUR.
Vous avez des questions ou des inquiétudes? Veuillez appeler le service à la clientèle au 1 800 9449200 du lundi au
vendredi, de 8 h à 19 h (HNE).
VEUILLEZ NE PAS RETOURNER CE PRODUIT AU MAGASIN.
GUIDE D’UTILISATION
Instructions d’utilisation et d’entretien
L’UTILISATION DE CE PRODUIT À DES FINS COMMERCIALES INVALIDE
LA PRÉSENTE GARANTIE.
Español - página E1
www.hoover.com
www.hoover.com
©2013 Techtronic Floor Care Technology Limited. Tous droits réservés. #961151100 ID107329-R0