Huawei Vision User Manual 3 - Page 42
Customizing Your Account Synchronization
 |
View all Huawei Vision manuals
Add to My Manuals
Save this manual to your list of manuals |
Page 42 highlights
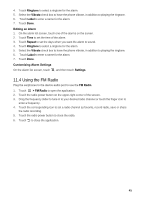
10.1.2 Removing an Account You can remove an account, deleting it and all information associated with it from your mobile phone, including email, contacts, settings, and so on. You cannot, however, remove some accounts, such as the first account you signed into on the mobile phone. If you attempt to remove certain accounts, all personal information associated with it will be deleted. 1. On the Accounts & sync settings screen, touch the account to delete. 2. Touch Remove account. 3. Confirm that you want to remove the account. 10.2 Customizing Your Account Synchronization You can configure background data use and synchronization options for all the applications on your phone. You can also configure what kind of data you synchronize for each account. For some accounts, synchronizing is two-directional; changes that you make to the information on your mobile phone are made to the copy of that information on the web. Some accounts support only one-way synchronize; the information on your mobile phone is read-only. 10.2.1 Configuring General Sync Settings On the Accounts & sync settings screen, do the following: • Select or clear the Background data check box to control whether applications and services can transmit data when you are not working with them directly (that is, when they are running in the background). If you clear this option, Gmail\Google Mail stops receiving new mail, Calendar stops synchronizing events, and so on, until you touch the Refresh menu item or send an email. • Select or clear the Auto-sync check box to control whether changes you make to information on the phone or on the web are automatically synchronized with each other. For example, when this option is selected, changes that you make in Contacts on the phone are automatically made in Google Contacts on the web. 10.2.2 Changing an Account's Synchronization Settings 1. On the Accounts & sync settings screen, touch the account whose synchronization settings you want to change. The data and synchronization screen opens, displaying a list of the kinds of information the account can synchronize. 2. Selected items are configured to synchronize to your mobile phone. 3. Select or clear the check box of information you want to synchronize to the mobile phone. 42
-
 1
1 -
2
-
3
-
4
-
5
-
6
-
7
-
8
-
9
-
10
-
11
-
12
-
13
-
14
-
15
-
16
-
17
-
18
-
19
-
20
-
21
-
22
-
23
-
24
-
25
-
26
-
27
-
28
-
29
-
30
-
31
-
32
-
33
-
34
-
35
-
36
-
 37
37 -
 38
38 -
 39
39 -
 40
40 -
 41
41 -
 42
42 -
 43
43 -
 44
44 -
 45
45 -
 46
46 -
 47
47 -
48
-
49
-
50
-
51
-
52
-
53
-
54
-
55
 |
 |