Image Fitness 10.2 Treadmill Owners Manual
Image Fitness 10.2 Treadmill Manual
 |
View all Image Fitness 10.2 Treadmill manuals
Add to My Manuals
Save this manual to your list of manuals |
Image Fitness 10.2 Treadmill manual content summary:
- Image Fitness 10.2 Treadmill | Owners Manual - Page 1
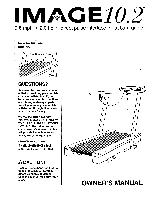
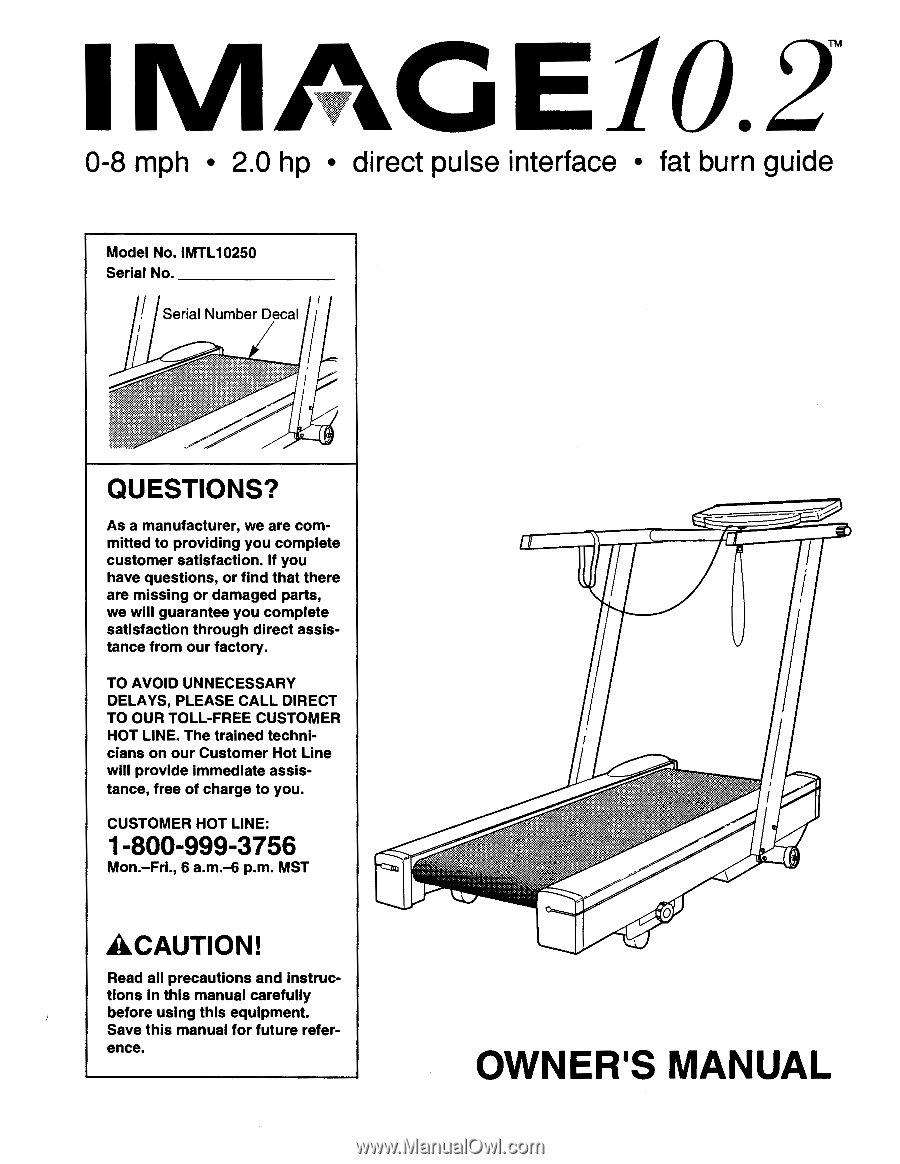
guide Model No. IMTL10250 Serial No. Serial Number Decal QUESTIONS? As a manufacturer, we are committed to providing you complete customer satisfaction. If you have questions, or find that there are missing or damaged parts Instructions in this manual carefully before using this equipment. Save this - Image Fitness 10.2 Treadmill | Owners Manual - Page 2
LIMITED WARRANTY ICON Health & Fitness, Inc. ("ICON"), warrants this product to be free from defects in workmanship and material, under normal use and service conditions, for a period of two (2) years from the date of purchase, excepting the pulse sensor which is covered by a 90 day limited warranty - Image Fitness 10.2 Treadmill | Owners Manual - Page 3
DRAWING ORDERING REPLACEMENT PARTS 4 5 6 8 9 14 16 18 19 Back Cover AWARNING: Before beginning this or any exercise program, consult your physician. This is especially important for persons over the age of 35 or persons with pre-existing health problems. Read all instructions before using. ICON - Image Fitness 10.2 Treadmill | Owners Manual - Page 4
. 11. Use the treadmill only as described in this manual. 12. Always unplug the power cord before performing the maintenance and adjustment procedures described in this manual. Never remove the safety cover unless instructed to do so by an authorized service representative. Servicing other than the - Image Fitness 10.2 Treadmill | Owners Manual - Page 5
for selecting the IMAGE 10.2TM treadmill. The IMAGE 10.2 treadmill blends advanced technology with innovative design to let you enjoy an excellent form of cardiovascular exercise in the convenience and privacy of your home. Please read this manual carefully before using the treadmill. If you have - Image Fitness 10.2 Treadmill | Owners Manual - Page 6
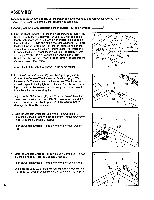
ASSEMBLY Assembly requires two people. Set the treadmill in a cleared area and remove all 26 2. Hold the Console Crossbar (6) near the Right Upright (15). 2 Connect the Console Wire Harness (10) to the Upright Wire Harness (12). The small latch on the Console Wire Harness should snap onto the - Image Fitness 10.2 Treadmill | Owners Manual - Page 7
against the hinge of the Clothes Clip (see the inset drawing). The use of the pulse sensor is explained on page 8. Make sure that all parts are tightened before using the treadmill. Note: In order to protect the floor, a covering should be placed on the floor underneath the - Image Fitness 10.2 Treadmill | Owners Manual - Page 8
PULSE SENSOR The treadmill features a unique headband-style pulse sensor. The rubber-armored pulse sensor and lightweight headband are specially designed for greater accuracy, comfort and durability. To get the best performance from the pulse sensor, please read the following instructions. HOW TO - Image Fitness 10.2 Treadmill | Owners Manual - Page 9
cause excessive wear. HOW TO ADJUST THE CUSHION LEVEL OF THE LEGS The legs at the back of the treadmill are designed to absorb shock as you walk or run on the treadmill. The cushion level of the legs can be adjusted to the level that is the most comfortable for you - Image Fitness 10.2 Treadmill | Owners Manual - Page 10
L .L 0 0 FITNESSTEST ( WNW,. CCNIROL IMAGE : i117:S' VSTE DECREASE SPEED INC-REA. SPEED while operating the treadmill. low, too high or perfect for burning fat. CAREFULLY READ THESE INSTRUCTIONS BEFORE OPERATING THE 9). All displays and 10 indicators will flash three times. Note: If the safety - Image Fitness 10.2 Treadmill | Owners Manual - Page 11
level that has been selected. SPEED DISPLAY OPERATION HOW TO MANUALLY CONTROL THE INCLINE The SPEED display will show the speed setting 10% or 10.5%, and 11% when the incline is set at either 11% or 11.5%. Note: After the INCLINE buttons are pressed, it will take a few seconds for the treadmill - Image Fitness 10.2 Treadmill | Owners Manual - Page 12
The console will then be in the MANUAL beginning of the fifth segment, the TO TURN OFF THE POWER Follow the instructions below to use the Fitness Test. Test to and distance that the treadmill has been operated. To operate properly YOUR AGE AND WEIGHT on page 10. The SPEED display will show the - Image Fitness 10.2 Treadmill | Owners Manual - Page 13
To view total time and distance, press the FITNESS TEST button. The letter 'T' in the SPEED display will darken. The total time will be shown in the TIME display, up to 9,999 hours. The total distance will be shown in the DISTANCE display, up to 999 miles (if the total distance exceeds 999 miles, - Image Fitness 10.2 Treadmill | Owners Manual - Page 14
TROUBLE-SHOOTING AND STORAGE Most treadmill problems can be solved by following the simple steps below. Find the symptom that applies, and follow the steps listed. If further assistance is needed, call our Customer Service on page 10.) c. Check the circuit breaker located on the treadmill near the - Image Fitness 10.2 Treadmill | Owners Manual - Page 15
bolt counterclockwise 1/4 of a turn. Plug in the power cord, insert the safety key and run the treadmill for a few minutes. Repeat until the walking belt is centered. STORAGE Unplug the power cord when the treadmill is not in use. Remove one bolt, washer and upright spacer from the lower end of each - Image Fitness 10.2 Treadmill | Owners Manual - Page 16
by using your heart rate as a guide. For effective aerobic exercise, your Each workout should consist of three basic parts: a warm-up, 20 to 30 Finish each workout with 5 to 10 minutes of stretching to cool down decrease soreness and other post-exercise problems. To maintain or improve your condition - Image Fitness 10.2 Treadmill | Owners Manual - Page 17
SUGGESTED STRETCHES The following stretches can provide a good warm-up or cool-down. Correct form for each stretch is shown in the drawings below. Move slowly as you stretch-never bounce. TOE TOUCH STRETCH Stand with your knees bent slightly and slowly bend forward from your hips. Allow your back - Image Fitness 10.2 Treadmill | Owners Manual - Page 18
PART LIST Model No. IMTL10250 Key No. Qty. Description Key No. Qty. 1 2 2 1 3 2 4 2 5 6 6 1 7 1 8 6 9 1 10 1 11 1 12 1 13 1 14 1 15 1 Bolt Power Board-Controller Wire Belt Guide 6" Cable Loom Wheel Bolt Screw Manual 18 Note: "#" indicates a non-illustrated part. Specifications are subject to change - Image Fitness 10.2 Treadmill | Owners Manual - Page 19
EXPLODED DRAWING Model No. IMTL10250 R395A 3 411 4 2 5 6 101 9 13 14 4 104 30 7 93 8 12 94 8 11 3 10 92 95 42 91 97 64 96 61 15 102 90 80 27 26 107 106 41 55 89 9 9 62 5 5 • 20 21 16 19 17 - Image Fitness 10.2 Treadmill | Owners Manual - Page 20
). • The NAME of the product (IMAGE 10.271'4 treadmill). • The SERIAL NUMBER of the product (see the front cover of this manual). • The KEY NUMBER of the part(s) (see page 18 of this manual). • The DESCRIPTION of the part(s) (see page 18 of this manual). Part No. 124180 R395A Printed in USA
-
 1
1 -
 2
2 -
 3
3 -
 4
4 -
 5
5 -
 6
6 -
 7
7 -
8
-
9
-
10
-
11
-
12
-
13
-
14
-
15
-
16
-
17
-
18
-
19
-
20
 |
 |
1
Iv?
•
TM
0-8
mph
•
2.0
hp
•
direct
pulse
interface
•
fat
burn
guide
Model
No.
IMTL10250
Serial
No.
Serial
Number
Decal
QUESTIONS?
As
a
manufacturer,
we
are
com-
mitted
to
providing
you
complete
customer
satisfaction.
If
you
have
questions,
or
find
that
there
are
missing
or
damaged
parts,
we
will
guarantee
you
complete
satisfaction
through
direct
assis-
tance
from
our
factory.
TO
AVOID
UNNECESSARY
DELAYS,
PLEASE
CALL
DIRECT
TO
OUR
TOLL
-FREE
CUSTOMER
HOT
LINE.
The
trained
techni-
cians
on
our
Customer
Hot
Line
will
provide
immediate
assis-
tance,
free
of
charge
to
you.
CUSTOMER
HOT
LINE:
1-800-999-3756
Mon.
-Fri.,
6
a.m.-6
p.m.
MST
ACAUTION!
Read
all
precautions
and
Instruc-
tions
in
this
manual
carefully
before
using
this
equipment.
Save
this
manual
for
future
refer-
ence.
OWNER'S
MANUAL