Insignia NS-DPFC01 User Manual (English) - Page 16
Adjusting the backlight, Displaying photos, Connecting your clock radio to your computer, SLEEP
 |
UPC - 600603123382
View all Insignia NS-DPFC01 manuals
Add to My Manuals
Save this manual to your list of manuals |
Page 16 highlights
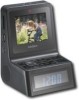
Insignia NS-DPFC01 Clock Radio with LCD Photo Viewer 2 Repeatedly press SLEEP to decrease the sleep timer in 10 minute increments. 3 To cancel the sleep function, repeatedly press SLEEP until "00" shows on the display. Adjusting the backlight To set the backlight level: 1 Make sure the power is connected. 2 Press SNOOZE/DIMMER to set the display backlight to a comfortable level, except when the alarm is on. Your choices include High, Middle, or Low. Displaying photos You can view photos on your clock radio from three sources: 1. A compatible USB device connected to the USB port. 2. A memory card (SD/MMC/MS/XD) plugged into the memory card slot on the side of your clock radio. 3. The clock radio's internal memory (approximately 128 MB). Connecting your clock radio to your computer Photos can be transferred to your clock radio using your personal computer.To connect to a computer you need a USB cable (provided). Note Your clock radio may not work with all versions of Microsoft Windows. To connect your clock radio to your computer: 1 Plug in your clock radio (refer to "Plugging your clock radio"). 2 Plug the small end of the USB cable into the USB cable port on the clock radio, then plug the large USB connector into a USB port on your computer. 16 www.insigniaproducts.com
-
 1
1 -
2
-
3
-
4
-
5
-
6
-
7
-
8
-
9
-
10
-
 11
11 -
 12
12 -
 13
13 -
 14
14 -
 15
15 -
 16
16 -
 17
17 -
 18
18 -
 19
19 -
 20
20 -
 21
21 -
22
-
23
-
24
-
25
-
26
 |
 |
