Intel DQ67EP English Product Guide - Page 68
Updating the BIOS Using the F7 Function Key
 |
View all Intel DQ67EP manuals
Add to My Manuals
Save this manual to your list of manuals |
Page 68 highlights
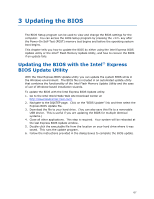
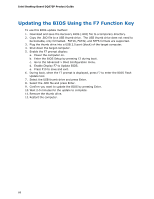
Intel Desktop Board DQ67EP Product Guide Updating the BIOS Using the F7 Function Key To use this BIOS update method: 1. Download and save the Recovery BIOS (.BIO) file to a temporary directory. 2. Copy the .BIO file to a USB thumb drive. The USB thumb drive does not need to be bootable, only formatted. FAT16, FAT32, and NTFS formats are supported. 3. Plug the thumb drive into a USB 2.0 port (black) of the target computer. 4. Shut down the target computer. 5. Enable the F7 prompt display: a. Power the computer on. b. Enter the BIOS Setup by pressing F2 during boot. c. Go to the Advanced > Boot Configuration menu. d. Enable Display F7 to Update BIOS. e. Press F10 to save and exit. 6. During boot, when the F7 prompt is displayed, press F7 to enter the BIOS Flash Update tool. 7. Select the USB thumb drive and press Enter. 8. Select the .BIO file and press Enter. 9. Confirm you want to update the BIOS by pressing Enter. 10. Wait 2-5 minutes for the update to complete. 11. Remove the thumb drive. 12. Restart the computer. 68
-
 1
1 -
2
-
3
-
4
-
5
-
6
-
7
-
8
-
9
-
10
-
11
-
12
-
13
-
14
-
15
-
16
-
17
-
18
-
19
-
20
-
21
-
22
-
23
-
24
-
25
-
26
-
27
-
28
-
29
-
30
-
31
-
32
-
33
-
34
-
35
-
36
-
37
-
38
-
39
-
40
-
41
-
42
-
43
-
44
-
45
-
46
-
47
-
48
-
49
-
50
-
51
-
52
-
53
-
54
-
55
-
56
-
57
-
58
-
59
-
60
-
61
-
62
-
 63
63 -
 64
64 -
 65
65 -
 66
66 -
 67
67 -
 68
68 -
 69
69 -
 70
70 -
 71
71 -
 72
72 -
 73
73 -
74
-
75
-
76
-
77
-
78
-
79
-
80
-
81
-
82
-
83
-
84
-
85
-
86
 |
 |