Invacare RPS350-2 Owners Manual - Page 24
Replacing the Mast Actuator, This will damage mounting brackets.
 |
View all Invacare RPS350-2 manuals
Add to My Manuals
Save this manual to your list of manuals |
Page 24 highlights
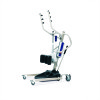
SECTION 7-MAINTENANCE Replacing the Mast Actuator NOTE: For this procedure, refer to FIGURE 7.3. 1. Remove the bottom nut, washer and shoulder bolt that secure the electric actuator to the mast mounting bracket. 2. Rest the lift arm on your shoulder and remove the top nut, bolt, bracket and bushing from the lift arm mounting bracket. 3. Remove the electric actuator. 4. Reverse STEPS 1-3 to install the new electric actuator. ƽ WARNING DO NOT overtighten mounting hardware. This will damage mounting brackets. Bracket Bolt Washer Bushing Bolt Washer Nut Washer Bushing Bolt Washer Replacing the Leg Actuator FIGURE 7.3 Replacing the Mast Actuator NOTE: For this procedure, refer to FIGURE 7.4 on page 25. 1. Remove the existing leg actuator. 2. Slide the replacement leg actuator into the slot in the base of the lift. 3. Perform the following to secure the leg actuator to the pivot bracket (Detail "A"): ƽ WARNING Ensure that there is sufficient room to put the patient lift on its side and the floor area is clear of debris. Otherwise, injury to personnel or damage to the patient lift may occur. A. Use caution and put the patient lift on its side. B. Position the slot in the leg actuator over the pivot bracket. C. Install the pin through the leg actuator and pivot bracket and secure with hitch pin. D. Return the lift to the upright position. Stand Up Patient Lift 24 Part No. 1145811
-
 1
1 -
2
-
3
-
4
-
5
-
6
-
7
-
8
-
9
-
10
-
11
-
12
-
13
-
14
-
15
-
16
-
17
-
18
-
 19
19 -
 20
20 -
 21
21 -
 22
22 -
 23
23 -
 24
24 -
 25
25 -
 26
26 -
 27
27 -
 28
28
 |
 |
