Invacare RPS350-2 Owners Manual - Page 25
Replacing the Leg Actuator
 |
View all Invacare RPS350-2 manuals
Add to My Manuals
Save this manual to your list of manuals |
Page 25 highlights
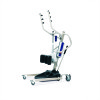
SECTION 7-MAINTENANCE 4. Perform the following to secure the leg actuator to the mast bracket (Detail "B"): A. Position the leg actuator between the mast bracket. B. Move the legs to align the holes in the leg actuator with the holes in the mast bracket. C. Install the pin through the holes of the leg actuator and mast bracket and secure with hitch pin. 5. Plug the hand control into the bottom of the control box. Leg Base Pivot Bracket Hitch Pin Hand Control Leg Actuator Pin Lift Arm Hitch Pin (not shown) Mast Bracket Pin Part No. 1145811 Mast Battery and Control Box Mast Actuator Leg Actuator Slot in Base FIGURE 7.4 Replacing the Leg Actuator 25 Stand Up Patient Lift
-
 1
1 -
2
-
3
-
4
-
5
-
6
-
7
-
8
-
9
-
10
-
11
-
12
-
13
-
14
-
15
-
16
-
17
-
18
-
19
-
 20
20 -
 21
21 -
 22
22 -
 23
23 -
 24
24 -
 25
25 -
 26
26 -
 27
27 -
 28
28
 |
 |

SECTION 7—MAINTENANCE
Part No. 1145811
25
Stand Up Patient Lift
4.
Perform the following to secure the leg actuator to the mast bracket (Detail “B”):
A.
Position the leg actuator between the mast bracket.
B.
Move the legs to align the holes in the leg actuator with the holes in the mast bracket.
C.
Install the pin through the holes of the leg actuator and mast bracket and secure with hitch pin.
5.
Plug the hand control into the bottom of the control box.
FIGURE 7.4
Replacing the Leg Actuator
Hitch Pin
Pin
Leg Actuator
Pivot
Bracket
Base
Leg
Hand Control
Lift Arm
Mast Actuator
Battery and
Control Box
Leg Actuator
Slot in Base
Hitch Pin
(not shown)
Mast Bracket
Mast
Pin