JVC GR-D775 Instructions
JVC GR-D775 - GR D775U Camcorder Manual
 |
UPC - 046838028595
View all JVC GR-D775 manuals
Add to My Manuals
Save this manual to your list of manuals |
JVC GR-D775 manual content summary:
- JVC GR-D775 | Instructions - Page 1
DIGITAL VIDEO CAMERA GR-D775U INSTRUCTIONS Dear Customer, Thank you for purchasing this digital video camera. Before use, please read the safety information and precautions contained in the pages 3 - 5 to ensure safe use of this product. ENGLISH GETTING STARTED 7 RECORDING & PLAYBACK 18 DIGITAL - JVC GR-D775 | Instructions - Page 2
CONDITION 100% MAX TIME LCD 50% min FINDER 0% min Auto Button You can change the recording mode between manual setting to the standard mode setting of the camcorder by pressing the AUTO button. (੬ pg. 20) LED Light You can brighten the subject in the dark place with the LED Light. (੬ pg - JVC GR-D775 | Instructions - Page 3
and will operate only with JVC Data Battery. Use the JVC BN-VF808U/VF815U/VF823U battery packs. Using generic non-JVC batteries can cause damage to the internal charging circuitry. ● This camcorder is designed exclusively for the digital video cassette, SD Memory Card and MultiMediaCard. Only - JVC GR-D775 | Instructions - Page 4
operating and maintenance (servicing) instructions in the literature JVC Data Battery. Use the JVC BN-VF808U/VF815U/VF823U battery packs and, to recharge them or to supply power to the camcorder to the camcorder. CAUTION! Connecting cables (Audio/Video, S-Video, etc.) to the camcorder and leaving - JVC GR-D775 | Instructions - Page 5
accordance with the manufacturer's instructions. 8. Do not install . Refer all servicing to qualified service personnel. Servicing is required when Camcorder Before cleaning, turn off the camcorder and remove the battery pack nder, please consult your nearest JVC dealer. USE CLEANING CASSETTE Appears - JVC GR-D775 | Instructions - Page 6
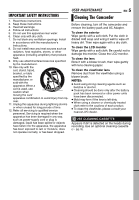
Images Recorded On A Tape To A Memory Card 42 EDITING 42 Dubbing To A VCR 42 Dubbing To Or From A Video Unit Equipped With A DV Connector (Digital Dubbing) .. 43 Connection To A Personal Computer.......... 44 Audio Dubbing 45 Insert Editing 45 REFERENCES 46 TROUBLESHOOTING 46 CAUTIONS 48 - JVC GR-D775 | Instructions - Page 7
/left/right (3/4/1/2) to select: Select Battery Pack BN-VF808U USB Cable Audio/Video Cable (ø3.5 mini-plug to RCA plug) CD-ROM lever right. 1 1 QUICK REVIEW Move the control lever left. 2) Press down the control lever to select SET: SET Lithium Battery CR2025* (for remote control unit - JVC GR-D775 | Instructions - Page 8
the LCD monitor. The LCD monitor can rotate 270°. Power-linked operation When the power switch is set to "REC", you can also turn the camcorder on/off by opening/ closing the LCD monitor or pulling out/pushing in the viewfinder. NOTES: ● The image will not appear simultaneously on the - JVC GR-D775 | Instructions - Page 9
off the camcorder. PLAY: ● To play back a recording on the tape. ● To display a still image stored in the memory card or to transfer a still image stored in the memory card to a PC. VIDEO/MEMORY Switch Position VIDEO: To record on a tape or play back a tape. MEMORY: To record in a memory card or - JVC GR-D775 | Instructions - Page 10
Digital Image Stabilizer ("DIS") (੬ pg. 32) (only indicator is displayed) "SOUND 12BIT/16BIT: Sound Mode Indicator (੬ pg. 33) (Appears for approx. 5 seconds after turning on the camcorder.) During Both Video #Card Icon (੬ pg. 26) : Appears during shooting. : Blinks in white when a memory card is - JVC GR-D775 | Instructions - Page 11
During Video Playback GETTING STARTED EN 11 During D.S.C. Playback GETTING STARTED 12 34 5 6 12B I T/MI X L LP x3 BLANK SEARCH PUSH "STOP" BUTTON TO CANCEL VOLUME 11 :1 3 AM - JVC GR-D775 | Instructions - Page 12
firm the lens cap is on correctly make sure the cap is flush to the camcorder. Grip Adjustment Open the pad and make grip adjustments. ● Before making the adjustment, its length, and use the strap guide to fix it in place. Strap Guide Buckle 3 Position the buckle near the eyelet and reattach the pad. - JVC GR-D775 | Instructions - Page 13
first time or after a long storage period, the POWER/ CHARGE lamp may not light. In this case, remove the battery pack from the camcorder, then try charging again. ● If a fully charged battery pack is attached to the unit, POWER/CHARGE lamp will blink for approx. 10 seconds before it turns off. ● If - JVC GR-D775 | Instructions - Page 14
camcorder malfunction. Data Battery System You can check the remaining battery power and the recordable time. When the battery is attached, press DATA. BATTERY problem with your battery. In such a case, consult your nearest JVC dealer. Using AC Power Perform step 4 - 5 in "Charging The Battery - JVC GR-D775 | Instructions - Page 15
. YEAR 12h JAN. 03. 2007 2 SET 02 : 10 AM The date/time is recorded onto the tape at all times, but its display can be turned on or off. (੬ pg. 34, 35) Perform previous menu screen. Tripod Mounting To attach the camcorder to a tripod, align the direction stud and screw to the mounting socket and - JVC GR-D775 | Instructions - Page 16
cassette holder cover. ● When the battery pack's charge is low, you may not be still does not open, turn the camcorder off then on again. ● If the tape does not load properly, open the set to "REC" and the VIDEO/MEMORY Switch is set to "VIDEO". CHECK TAPE'S ERASE PROTECTION TAB Appears when the - JVC GR-D775 | Instructions - Page 17
at 4:3 size and 16:9 size. By default, the camera is set to record videos at the 16:9 size. GETTING STARTED Memory card (Optional) Clipped edge 1 Make sure the camcorder's power is off. 2 Open the card cover ( ). 3 To load a memory card, firmly insert it with its clipped edge first. To unload - JVC GR-D775 | Instructions - Page 18
to the type of tape used. Quick Review Lock Button Recording Start/Stop Button 1 Set the VIDEO/MEMORY Switch to "VIDEO". 2 Set the Power for 5 minutes and no operation is performed, the camcorder's power shuts off automatically. To turn the camcorder on again, push back and pull out the viewfinder - JVC GR-D775 | Instructions - Page 19
done through digital image processing, and is therefore called digital zoom. Digital zooming is a subject close to the lens, the camera may automatically zoom out depending on the results. Hold the camcorder in the desired position ° upward). VIDEO RECORDING EN ● If the Quick Review (੬ pg. 18) - JVC GR-D775 | Instructions - Page 20
. ● The Still image is saved into the memory card while video is recorded onto the cassette tape. ● "REC SELECT" must be set to " (CARD)" only. Auto/Manual Mode Press AUTO button repeatedly to switch to M auto/manual recording mode. When manual mode is selected, the indicator " " appears on - JVC GR-D775 | Instructions - Page 21
VIDEO PLAYBACK EN 21 NOTES: ● The playback picture can be viewed in the LCD monitor, viewfinder or on a connected TV. (੬ pg. 23) ● If Stop mode continues for 5 minutes when power is supplied from a battery, the camcorder to fast-forward the tape. ● Press SET to display the guide operation screen. To - JVC GR-D775 | Instructions - Page 22
5 seconds of tape may not be detected. ● The detected blank portion may be located between recorded scenes. Before you start recording, make sure there is no recorded scene after the blank portion. Playback Snapshot This camcorder allows you to take snapshots during video playback. Press SNAPSHOT - JVC GR-D775 | Instructions - Page 23
: ● It is recommended to use the AC Adapter as the power supply instead of the battery pack. (੬ pg. 13) ● To monitor the picture and sound from the camcorder without inserting a tape or memory card, set the camcorder's Power Switch to"REC", then set your TV to the appropriate input mode. ● Make sure - JVC GR-D775 | Instructions - Page 24
VIDEO PLAYBACK Playback Using The Remote Control Buttons And Functions A battery is included inside the remote control at the time of purchase. Remove the insulation sheet before use. Installing The Battery The remote control uses one lithium battery (CR2025). Pull out the battery the camcorder's - JVC GR-D775 | Instructions - Page 25
Zoom can also be used during slow-motion and still playback. ● Due to digital image processing, the quality of the image may suffer. Playback Special Effects Allows you to add creative effects to the video playback image. SEPIA (੬ pg. 41). MONOTONE (੬ pg. 41). CLASSIC (੬ pg. 41). STROBE (੬ pg - JVC GR-D775 | Instructions - Page 26
camcorder as a Digital Still Camera for taking snapshots. Still images are stored in the memory card. NOTE: Before continuing, perform the procedures listed below: ● Power (੬ pg. 13) ● Loading a Memory Card (੬ pg. 17) ● Remove the lens cap. ● Open the LCD monitor fully. (੬ pg. 8) SNAPSHOT VIDEO - JVC GR-D775 | Instructions - Page 27
Normal Playback Of Images Images shot with the camcorder are automatically numbered, then stored in numerical order in the memory card. You can view the stored images, one at a time, much like flipping through a photo album. VIDEO/MEMORY Lock Button [PLAY] 3, 3 2 Power Switch 1 SET [STOP] 7, 4 - JVC GR-D775 | Instructions - Page 28
protection, select "RETURN". ● Repeat steps 5 and 6 EXECUTE RETURN for all files you want to protect. To protect all files stored in the memory card 4 Select "PROT.ALL", press SET or 2. The PROTECT screen appears. 5 Select "EXECUTE", press SET. ● To cancel protection, select "RETURN". NOTE: If the - JVC GR-D775 | Instructions - Page 29
ALL appears. Setting Print Information (DPOF Setting)* This camcorder is compatible with the DPOF (Digital Print Order Format) standard in order to support future systems such as automatic printing. * Up to a maximum limit of 999 stored files in the memory card. To Print All Still Images (One Print - JVC GR-D775 | Instructions - Page 30
appears at the bottom of the screen. This is not a malfunction. By recording with "DIS" de-activated (੬ pg. 32) this can be avoided. Initializing A Memory Card 2 SET ● Repeat steps 3 through 5 for the desired number of prints. DPOF SHEETS ● The number of prints can be set up to 15. ● To correct - JVC GR-D775 | Instructions - Page 31
is equipped with an easy-touse, on-screen menu system that simplifies many of the more detailed camcorder settings. (੬ pg. 31 - 35) VIDEO/MEMORY Power Switch 1 Select Lock Button 4 Select the desired function, press SET or 2. The selected function menu appears. Example: FUNCTION menu. Current - JVC GR-D775 | Instructions - Page 32
of 800X digital magnification. * Available only when the VIDEO/MEMORY Switch is set to "VIDEO". TELE To compensate for unstable images caused by camera-shake, particularly at high magnification. . ● Switch off this mode when recording with the camcorder on a tripod. ● DIS cannot be activated when - JVC GR-D775 | Instructions - Page 33
kHz mode of previous models) REC SELECT (TAPE): When Snapshot recording is performed with the VIDEO/MEMORY Switch set to "VIDEO", still images are recorded only onto the tape. / (TAPE/CARD): When Snapshot recording is performed with the VIDEO/ MEMORY Switch set to "VIDEO", still images are - JVC GR-D775 | Instructions - Page 34
camcorder and on the connected TV. Frame numbers are not displayed during recording. (੬ pg. 20) * Available only when the VIDEO/MEMORY Switch is set to "VIDEO : Even though not heard while shooting, shutter sound is recorded on the tape. [ON]: A melody sounds when any operation is performed. It also - JVC GR-D775 | Instructions - Page 35
When set to "OFF", the camcorder's display disappears. DATE/TIME [OFF] / ON REC MODE [SP]* / LP Allows you to set the video recording mode (SP or LP) is not recorded.) ON: Enables dubbing of images recorded on a tape to a memory card. (੬ pg. 42). The parameters are the same as in the - JVC GR-D775 | Instructions - Page 36
setting is "ON", they will appear slightly blurred. Snapshot (Record Still Image On Tape) This feature lets you record still images that look like photographs onto a tape. 1 Set the VIDEO/MEMORY Switch to "VIDEO". 2 Set the Power Switch to "REC". M 3 Set the recording mode to " ". (੬ pg. 20 - JVC GR-D775 | Instructions - Page 37
FEATURES FOR RECORDING EN 37 Manual Focus Exposure Control The camcorder's Full Range AF system offers continuous shooting ability from close-up (as close as approx. 5 cm (2") to the subject) to infinity. However, correct focus - JVC GR-D775 | Instructions - Page 38
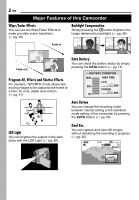
38 EN FEATURES FOR RECORDING Iris Lock Backlight Compensation Like the pupil of the human eye, the iris contracts in well-lit environments to keep too much light from entering, and dilates in dim environments to allow in more light. Use this function in the following situations: ● When shooting a - JVC GR-D775 | Instructions - Page 39
. However, more advanced camcorder operators control this function manually to achieve a more professional manually when shooting under various types of lighting. (੬ "Manual White Balance Adjustment", pg. 40) FINE: Outdoors on a sunny day. CLOUD: Outdoors on a cloudy day. HALOGEN: A video - JVC GR-D775 | Instructions - Page 40
engage the setting. 6 Press MENU. The Menu Screen closes and the Manual White Balance indicator is displayed. NOTES: ● In step 3, it may scene to the next. Wipe or Fader works when video recording is started or stopped. 1 Set the VIDEO/MEMORY Switch to "VIDEO". M 2 Set the Power Switch to "REC - JVC GR-D775 | Instructions - Page 41
White Balance (੬ pg. 39) is automatically set to "AUTO". When Twilight is chosen, the camcorder automatically adjusts the focus from approx. 10 m (32 ft) to infinity. From less than 10 m, adjust the focus manually. FEATURES FOR RECORDING EN 41 NIGHT : Makes dark subjects or areas even brighter than - JVC GR-D775 | Instructions - Page 42
Tape To A Memory Card Still images can be dubbed from a tape to a memory card. 1 Load a cassette. (੬ pg. 16) 2 Load a memory card. (੬ pg. 17) 3 Set the VIDEO/MEMORY Switch to "VIDEO 's instruction manual.) 4 To stop dubbing, stop recording on the VCR, then stop playback on the camcorder. NOTES - JVC GR-D775 | Instructions - Page 43
. 2 Connect this camcorder to a video unit equipped with a DV input connector using a DV cable as shown in the illustration. 3 Start playback on the camcorder. (੬ pg. 21) 4 At the point you want to start dubbing, start recording on the video unit. (Refer to the video unit's instruction manual.) 5 To - JVC GR-D775 | Instructions - Page 44
: ● Refer to "SOFTWARE INSTALLATION AND USB CONNECTION GUIDE" for the bundled software and drivers. ● It is recommended to use the AC Adapter as the power supply instead of the battery pack. (੬ pg. 13) ● Never connect the USB cable and the DV cable simultaneously to the camcorder. Connect only the - JVC GR-D775 | Instructions - Page 45
PAUSE (8). The "8 " indicator and the Time Code (min.:sec.) appear and the camcorder enters Insert-Pause mode. 4 Press START/STOP to begin editing. ● Confirm the on the tape, the audio and video may be disrupted. Make sure you only edit recorded areas. ● During Insert Editing, when the tape moves to - JVC GR-D775 | Instructions - Page 46
TROUBLESHOOTING If, after following the steps in the chart below, the problem still exists, please consult your nearest JVC dealer. No power is supplied. ● The power is not connected properly. ➜Connect the AC Adapter securely. (੬ pg. 13) ● The battery pack is not attached firmly. ➜Detach the battery - JVC GR-D775 | Instructions - Page 47
if Insert Editing is attempted on a blank portion of a tape. (੬ pg. 45) MEMORY IS FULL Appears when the memory card's memory is full and shooting is not possible. SET DATE/TIME! ● Appears when the date/time is not set. (੬ pg. 15). ● The built-in clock battery has run out and the previously set date - JVC GR-D775 | Instructions - Page 48
a fully discharged battery pack. Cassettes To properly use and store your cassettes, be sure to read the following cautions: ● During use ... make sure the cassette bears the Mini DV mark. ... be aware that recording onto prerecorded tapes automatically erases the previously recorded video and audio - JVC GR-D775 | Instructions - Page 49
once consecutively, damage to the video heads may result. After the camcorder plays back for about 20 seconds, it stops automatically. Also refer to the cleaning cassette's instructions. If, after using the cleaning cassette, the problems still exist, consult your nearest JVC dealer. REFERENCES - JVC GR-D775 | Instructions - Page 50
video tape, and can lead to internal damage to the camcorder battery pack, AC Adapter, etc.) and wait a few minutes and then re-connect it and proceed as usual from the beginning. Declaration of Conformity Model Number : GR-D775U Trade Name : JVC Responsible party : JVC digital instructions - JVC GR-D775 | Instructions - Page 51
(12-BIT), 48 kHz 2-channel (16-BIT) Cassette Mini DV cassette Tape speed SP: 18.8 mm/s, LP: 12.5 mm/s Maximum recording time (using 80 min. cassette) SP: 80 min., LP: 120 min. For Digital Still Camera Storage media SD Memory Card/MultiMediaCard Compression system JPEG (compatible) File size Still - JVC GR-D775 | Instructions - Page 52
Review 18 EN R Rec Mode 33, 35 Recording Capacity Memory Card ......... 26 Tape Troubleshooting ...... 46, 47 V Video/Memory Switch ..... 9 W White Balance 39 Wind Cut 33 Wipe Or Fader Effects .. 40 Z Zooming 19, 25, 32 16:9 Output 34, 35 GR-D775U © 2006 Victor Company of Japan, Limited US
-
 1
1 -
 2
2 -
 3
3 -
 4
4 -
 5
5 -
 6
6 -
 7
7 -
8
-
9
-
10
-
11
-
12
-
13
-
14
-
15
-
16
-
17
-
18
-
19
-
20
-
21
-
22
-
23
-
24
-
25
-
26
-
27
-
28
-
29
-
30
-
31
-
32
-
33
-
34
-
35
-
36
-
37
-
38
-
39
-
40
-
41
-
42
-
43
-
44
-
45
-
46
-
47
-
48
-
49
-
50
-
51
-
52
 |
 |
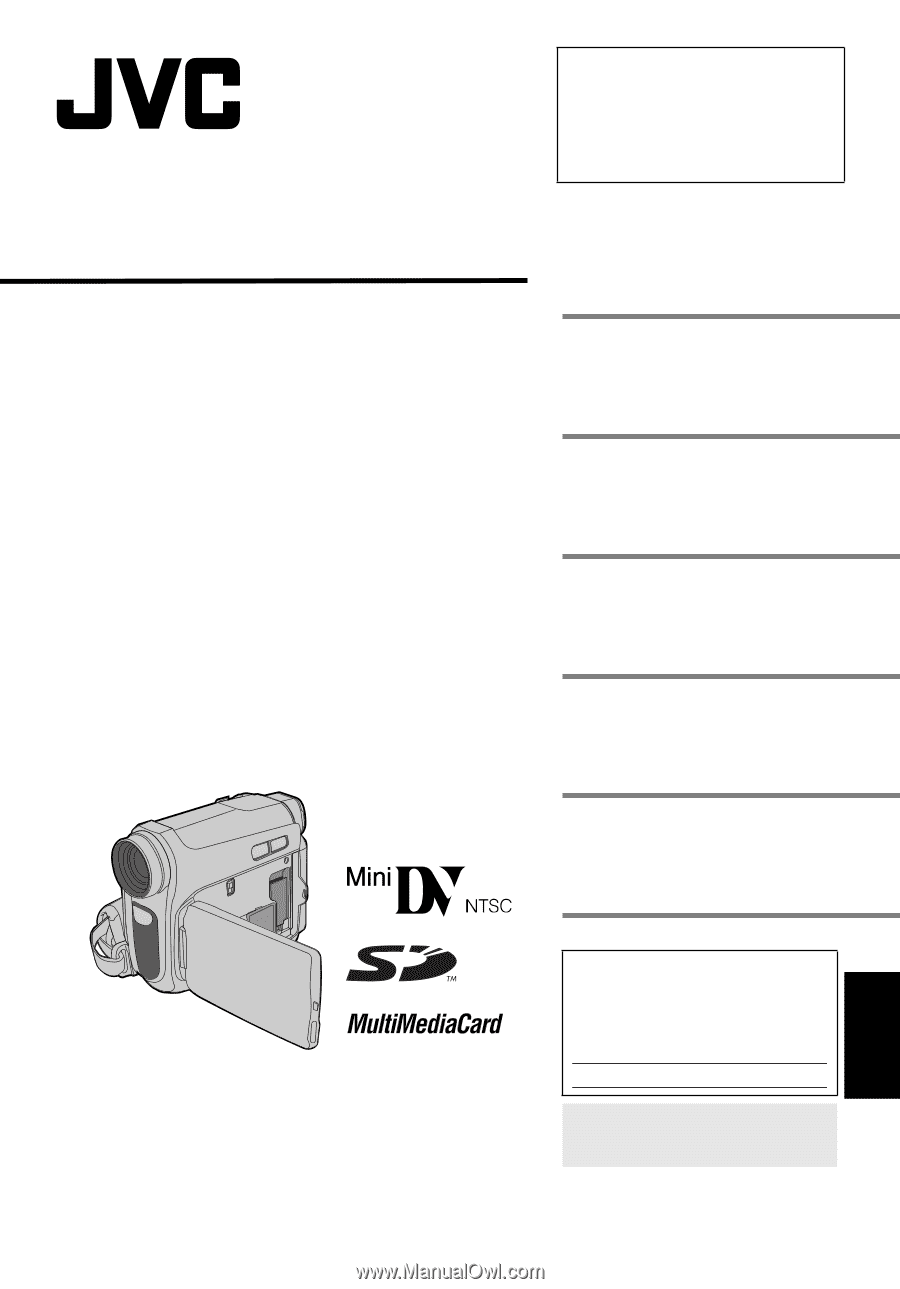
ENGLISH
GR-D775U
ENGLISH
LYT1656-001B
TERMS
Dear Customer,
Thank you for purchasing this digital
video camera. Before use, please
read the safety information and
precautions contained in the pages
3 – 5 to ensure safe use of this
product.
INSTRUCTIONS
DIGITAL VIDEO CAMERA
GETTING STARTED
7
RECORDING & PLAYBACK
18
DIGITAL STILL CAMERA
(D.S.C.) RECORDING &
PLAYBACK
26
ADVANCED FEATURES
31
REFERENCES
46
52
For Customer Use:
Enter below the Model No. and
Serial No. which is located on the
bottom of the camcorder. Retain
this information for future reference.
Model No.
Serial No.
To deactivate the demonstration,
set “DEMO MODE” to “OFF”.
(
±
pg. 31, 34)