JVC LT-42WX70 Instructions
JVC LT-42WX70 - 42" LCD TV Manual
 |
View all JVC LT-42WX70 manuals
Add to My Manuals
Save this manual to your list of manuals |
JVC LT-42WX70 manual content summary:
- JVC LT-42WX70 | Instructions - Page 1
ENGLISH LCD Monitor LT-42WX70EU INSTRUCTIONS - JVC LT-42WX70 | Instructions - Page 2
open cover. Repair shall be done by service personnel only. ● If the problem cannot be solved in "Troubleshooting" (➔ page 38), unplug the power cord the power cord is unplugged. The main power supply for this product is controlled by inserting or removing the power plug. Do not use any power cord - JVC LT-42WX70 | Instructions - Page 3
that children do not climb upon furniture to operate the product. Take care when handling the glossy finish! ● For more details, see page vi. Handle LCD panel with care! ● Use a soft, dry cloth when cleaning. Hold the product so as not to scratch the screen! ● Do not touch the screen when - JVC LT-42WX70 | Instructions - Page 4
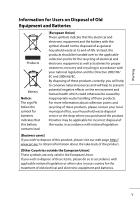
On disposal of the product! ● Follow the instruction in "Information for Users on Disposal of Old Equipment and Batteries". (➔ the blade screwdriver, and replace the fuse. Fuse For UK only: If you accidentally cut the power cord Attach of Victor Company of Japan, Limited is: JVC Technical Services - JVC LT-42WX70 | Instructions - Page 5
please contact your local municipal office, your household waste disposal service or the shop where you purchased the product. Penalties may with national legislation. [Business users] If you wish to dispose of this product, please visit our web page http:// www.jvc.eu/ to obtain information about - JVC LT-42WX70 | Instructions - Page 6
. Damages to these layers can lead to irreversible changes in appearance such as uneven colour, discolouration, and scratches. Follow the instructions below to prevent such troubles. ● Do not paste or stick anything using any glues or adhesive tapes. ● Do not write anything on the screen. ● Do - JVC LT-42WX70 | Instructions - Page 7
the openings). If a vacuum cleaner is not available, use a cloth and wipe it off. Leaving the dust around the intakes may prevent proper temperature control and cause damage to the product. Keep space around the product as illustrated below at minimum for proper ventilation. 200 mm 200 mm 150 mm - JVC LT-42WX70 | Instructions - Page 8
of picture quality with a wide range of adjustment properties ➔ page A-2 › Quick response making video games more exciting - Game Mode ➔ page A-5 › Operating HDMI devices from the TV remote contoller - HDMI CEC compatible ➔ page 13 02 - JVC LT-42WX70 | Instructions - Page 9
04 Included items 04 Inserting batteries into the remote control 05 Attaching and connecting the speaker unit 05 identification 11 Controlling HDMI devices 13 Changing the settings 14 Picture 15 Sound 27 Setup 29 HDMI 36 Troubleshooting 38 Specifications 41 Index - JVC LT-42WX70 | Instructions - Page 10
Included items ● Main unit (monitor and stand) ● Speaker unit ● Screws for the speaker unit ● Remote control unit ● AAA size batteries ● Video cable (D-sub 15 pin / RCA) ● Audio cable (3.5 mm stereo mini / RCA) ● Power cable ● Instructions (this book), startup sheet, other printed material 04 - JVC LT-42WX70 | Instructions - Page 11
Installation Inserting batteries into the remote control When replacing the batteries To avoid short-circuit, place the minus end of the batteries first. ● Batteries shall not be exposed to excessive heat such - JVC LT-42WX70 | Instructions - Page 12
To adjust the vertical position of monitor The monitor is height-adjustable in 3 positions, by 5.5 cm at the maximum. Adjust the vertical position of the monitor when you need to place a device under the monitor. 1 Detach the monitor from the stand. 1-1 Spread a soft cloth on a flat table or floor - JVC LT-42WX70 | Instructions - Page 13
again. ● Select the positions of the hooks according to the monitor position you want, and fix them with the screws. Speaker unit x √ x √ Tuner x x √ √ Hook (upper) Hook (lower) 3 Attach the monitor to the stand. 3-1 Hang the monitor to the stand. ● After hanging the monitor on the - JVC LT-42WX70 | Instructions - Page 14
Connecting external devices To connect an HDMI device To INPUT-1/INPUT-2/ INPUT-3 terminals To connect a device with component terminals To connect a device with a composite terminal Green To connect a DVI device To connect a computer 08 - JVC LT-42WX70 | Instructions - Page 15
Deep Color, with x.v.ColourTM, HDMITM CEC Support) INPUT-2: HDMITM terminal INPUT-3: HDMITM terminal Installation INPUT-1: HDMITM terminal AUDIO INPUT terminal INPUT-4 terminal: D-sub 15 pin Speaker terminals (➔ page 05) RS-232C terminal (For controlling the monitor from a computer. Contact - JVC LT-42WX70 | Instructions - Page 16
Connecting the power cable/Turning on the power Power cable ● Ground the earth plug of the power cable to the earth terminal of the AC outlet. ● When several kinds of power cord are provided in the package, use the one which fits your AC outlet. Power switch Power on Power off Initial settings - JVC LT-42WX70 | Instructions - Page 17
sensor panel Power switch Turns on or off the main power supply. (on the rear) Power indicator Lights while the monitor is on. Remote sensor Aim the remote control here. Touch sensor panel Touch on the function name to operate the function. You hear a beep sound when the button is touched. Turns - JVC LT-42WX70 | Instructions - Page 18
Remote control Turns the monitor on/off (on standby). LINK Opens the operation window for HDMI CEC devices. (➔ page 13) OPTION volume. Attenuates the sound. INPUT 1 INPUT 2 INPUT 3 Switches the input. INPUT 4 ● Buttons not mentioned above are equipped for the operations of a TV tuner. 12 - JVC LT-42WX70 | Instructions - Page 19
HDMI devices You can control HDMI CEC devices connected to this monitor using the remote of the monitor. ● This function can be customized in the "HDMI" settings (➔ page 36). ● Devices may not operate or may function differently from described, depending - JVC LT-42WX70 | Instructions - Page 20
Changing the settings Example: to change the setting of "Colour Temperature" 1 Open the menu. 2 Select "Picture". Setting Memory Load Preset Hue Hue Setting Colour Contrast Contrast Setting Brightness Sharpness Picture 0 0 0 0 0 Page 1/3 Memory1 3 Select "Colour Temperature". ● The item - JVC LT-42WX70 | Instructions - Page 21
Technical information Customize the picture to your taste A-2 Set up the monitor for your PC A-10 Enjoy SLR digital camera photographs A-11 Menu index by task A-12 A-1 - JVC LT-42WX70 | Instructions - Page 22
Customize the picture to your taste To use a preset 1 Open the menu. 2 Select a memory from "Setting Memory" in "Picture". In the initial setting, 6 presets are assigned to each memory as follows: ● Memory1 : Standard ● Memory2 : Dynamic ● Memory3 : Theater ● Memory4 : Monitor ● Memory5 : - JVC LT-42WX70 | Instructions - Page 23
to your taste This monitor features rich menus for picture control, in addition to 6 preinstalled sets of picture settings carefully prepared by JVC to suit various types of video content and viewing environment. Enjoy controlling appearance of pictures using the "Picture" menu, and create your - JVC LT-42WX70 | Instructions - Page 24
● Characteristics of the 6 presets Standard Suitable for watching TV programs and DVDs in a living room. Dynamic Makes pictures colourful and bright, suitable for watching in a well-lighted room. Theater Suitable for watching cinemas in a dark room. A-4 - JVC LT-42WX70 | Instructions - Page 25
Customize the picture to your taste Monitor Does not apply colour adjustments or noise reductions. Input video signals are displayed as they are. Suitable for monitoring purpose. Photo Pro Suitable for watching still pictures of SLR digital cameras. Game Gives priority to the response time for - JVC LT-42WX70 | Instructions - Page 26
● Setting values of each preset ● The settings are subject to change for amelioration. Hue Hue Setting BY Gain BY/RY Angle Colour Contrast Contrast Setting Black Stretch Dynamic DC Offset Auto Contrast Brightness Sharpness Enhancer Enhancer Setting Detail H.Sharp V.Sharp Backlight Backlight Setting - JVC LT-42WX70 | Instructions - Page 27
Customize the picture to your taste Theater 0 0 2 0 0 Low On Off 0 0 Mode-4 0 5 0 0 On Low Auto Auto Normal Warm2 Monitor 0 0 0 0 0 Off Off Off 0 -30 Mode-5 0 0 0 0 Off Off Auto Auto Normal Warm2 Photo Pro 0 0 0 0 0 Off Off Off 0 0 Mode-5 -15 -5 0 10 Off Off Auto Auto sRGB Warm2 Game 0 0 0 0 0 - JVC LT-42WX70 | Instructions - Page 28
White Balance Setting R Drive / G Drive / B Drive R Cutoff / G Cutoff / B Cutoff Colour Management Colour Mngmt. Setting Red Hue / Red Colour Yellow Hue / Yellow Colour Green Hue / Green Colour Cyan Hue / Cyan Colour Skin Hue / Skin Colour Colour : Bright Area Colour : Dark Area Gamma Picture - JVC LT-42WX70 | Instructions - Page 29
Customize the picture to your taste Theater 0 0 Mode-3 0 0 0 0 0 0 0 Mode-4 Low Auto Low On Auto Normal Off Off On On Monitor 0 0 Off 0 0 0 0 0 0 0 Mode-4 Off Off Off Off Off Normal Off Off On On Photo Pro 0 0 Off 0 0 0 0 0 0 0 Mode-4 Off Auto Off On Off Normal Off Off On Off Game 0 0 Mode-2 0 0 - JVC LT-42WX70 | Instructions - Page 30
Set up the monitor for your PC Selecting the input signal When you connect a PC to the INPUT-4 terminal, set the type of the input signal accordingly. ● For signals in VGA60 and XGA60 Set "Sampling Mode" to "Std". (➔ page 34) ● For signals in WVGA60 Set "Sampling Mode" to "Wide". (➔ page 34) ● For - JVC LT-42WX70 | Instructions - Page 31
Set up the monitor for your PC If the picture is not aligned vertically, or letters on the screen look blurred Set the aspect to "1:1", and adjust "Dot Clock" and "Clock Phase". (➔ page 35) ● For signals in 1920 x 1080, set the aspect to "Full" and adjust the same items. If the picture is cropped, - JVC LT-42WX70 | Instructions - Page 32
Hue adjustment Colour adjustment Menu index by task General tone of colour Tone of colour (including white) Tone of colour (in detail) Range of colour representation Amplitude of the colour difference signal Demodulation angle of the colour difference signal Pattern of colour correction Colour - JVC LT-42WX70 | Instructions - Page 33
Load" to load a preset. ■ Dynamic : Makes pictures colorful and bright, suitable for watching in a well-lighted room. ■ Standard : Suitable for watching TV programs and DVDs in a living room. ■ Theater : Suitable for watching cinemas in a dark room. ■ Monitor : Applies no colour corrections or noise - JVC LT-42WX70 | Instructions - Page 34
Hue Adjusts the tone of colour. ■ -30 - +30 (Skin colour reddish ↔ Skin colour greenish) Hue Setting Adjusts the tone of colour in detail. ● The setting is fixed to 0 and unadjustable when "Colour Space" is set to "sRGB", "AdobeRGB", or "x.v.Colour". ● The setting is fixed to 0 and unadjustable when - JVC LT-42WX70 | Instructions - Page 35
Emphasizes darker areas depending on the characteristics of a picture to make contrast clearer. ■ High / Medium / Low / Off ◆ Dynamic DC Offset Controls the blackness of the picture automatically depending on the total brightness. ■ On / Off ◆ Auto Contrast Emphasizes brighter areas depending on the - JVC LT-42WX70 | Instructions - Page 36
Sharpness Emphasizes outlines on a picture. ● The setting is unadjustable when "Enhancer" is set to "Off". ■ -30 - +30 (Fuzzy ↔ Sharp) Enhancer Selects the frequency band enhanced by "Sharpness". ■ Off : Deactivates the function. ■ Mode-1 / Mode-2 / Mode-3 / Mode-4 / Mode-5 (Emphasizes lower - JVC LT-42WX70 | Instructions - Page 37
Changing the settings : Picture Backlight Setting Adjusts settings of functions relating with backlight. ◆ Smart Picture Reduces the backlight automatically in dazzling scenes. ■ On / Off ◆ Dynamic Backlight Reduces the backlight automatically in dark scenes to represent black deeper. ■ High / - JVC LT-42WX70 | Instructions - Page 38
signal is input to the HDMI terminal, "x.v.Colour" is applied automatically. ■ Normal : HDTV standard. ■ Wide : The wide colour gamut of the equipped LED panel. (Wider than the HDTV standard.) ■ x.v.Colour : Colour representation suitable for x.v.Colour. ■ sRGB : Colour representation suitable for - JVC LT-42WX70 | Instructions - Page 39
". ■ Cool1 / Cool2 / Normal / Warm1 / Warm2 (Higher temperature ↔ Lower temperature) White Balance Setting Adjusts colour temperature in detail; subtle control of RGB gradations. ● These settings are independent of the setting of "Colour Temperature". ◆ R Drive / G Drive / B Drive Adjusts the depth - JVC LT-42WX70 | Instructions - Page 40
Colour Management Adjusts the total colouring of pictures. Three colour management presets are available to suit a variety of colour temperature settings. ● The setting is fixed to "Off" and unadjustable when "Colour Space" is set to "sRGB", "AdobeRGB", or "x.v.Colour". ● The setting is fixed to " - JVC LT-42WX70 | Instructions - Page 41
Area Adjusts the colour depth of dark areas. ■ -15 - +15 (Dilute ↔ Dense) Gamma Adjusts the gamma correction value and controls the brightness and gradation of intermediately bright areas. ■ Mode-1 / Mode-2 / Mode-3 / Mode-4 (γ = 2.2) / Mode-5 / Mode-6 (Brighter ↔ Darker) Picture Management Adjusts - JVC LT-42WX70 | Instructions - Page 42
Noise Reduction Adjusts the settings of picture noise reduction. ● The functions are unavailable when "PC Monitor Mode" is set to "On" or when signals in a PC signal format are coming in. ◆ Digital VNR Reduces picture noise. ■ Auto : Estimates the amount of noise automatically and applies suitable - JVC LT-42WX70 | Instructions - Page 43
Changing the settings : Picture Natural Cinema Displays quick-moving parts on cinemas originally taken on films with more clarity. ● The setting is fixed to "Off" and unadjustable when "Picture Delay Time" is set to "Short". ● The setting is fixed to "Off" and unadjustable when "PC Monitor Mode" is - JVC LT-42WX70 | Instructions - Page 44
Eco Mode Adjusts the brightness of backlight depending on the luminance of the room to reduce power consumption. ■ Demo : Activating the function and indicating its performance. ■ On : Activating the function. Its performance is not indicated. ■ Off : Deactivates the function. Other ◆ Real Bit - JVC LT-42WX70 | Instructions - Page 45
(Weaker ↔ Stronger) Treble Adjusts treble tone. ■ -6 - +6 (Weaker ↔ Stronger) Balance Adjusts sound balance. ■ L10 - 10R (To the left ↔ To the right) Auto Volume Control Turns down the volume automatically when an excessive strong sound signal is input. ■ On / Off Lip Sync Adjusts the delay time of - JVC LT-42WX70 | Instructions - Page 46
PEQ Optimizes the sound for the monitor's supplied speaker unit. Select "Off" when connecting other speakers. ■ On / Off Turn On Volume Adjusts the initial volume when turning on the monitor. ■ 0 - 50 ■ Current : Setting the current volume to the initial. ● If the setting value surpass that of " - JVC LT-42WX70 | Instructions - Page 47
Changing the settings : Setup Setup Menu Language You can choose the language used for on-screen messages. ■ English (EU) / Deutsch / Français(UE) / Italiano / Español (UE) / Català / Nederlands / Dansk / Svenska / Norsk / Suomi / Polski / Magyar Português / Česky Türkçe / Română / / / - JVC LT-42WX70 | Instructions - Page 48
Zoom Adjusts the aspect of pictures. ● The setting is also adjustable through the [ZOOM] button on the remote control. ◆ Options when the current input signal is SD ■ Auto : When the video signal contains information about aspect ratio (WSS etc.), the aspect is switched accordingly. - JVC LT-42WX70 | Instructions - Page 49
Changing the settings : Setup ◆ Options when the current input signal is HD ● You can select "Full Native" only when the input signal is 1080i/p. ■ Full : Stretching a picture to the width of the monitor. ■ Full Native : Displaying a picture of 1080i/p without enlargement. ■ Slim : Shrinking a - JVC LT-42WX70 | Instructions - Page 50
Position Adjustment Adjusts the picture position on the monitor. ● Vertical adjustment is effective when "Zoom" is set to "14:9 Zoom", "16:9 Zoom", "Panoramic", "16:9 Zoom Subtitle", or "Panoramic Zoom". ● Horizontal adjustment is effective only when "Zoom" is set to "Panoramic Zoom". ● When a PC - JVC LT-42WX70 | Instructions - Page 51
Changing the settings : Setup Input Label Adds a source name specifying a device after the source name ("Input-1" "Input-4"). ■ (No label) / VCR / DVD / Blu-ray Disc / PVR / D-VHS / STB / SAT / AMP / GAME / CAM / DISC / PC 4:3 Aspect Setting Selects the aspect setting which is applied when "Zoom" - JVC LT-42WX70 | Instructions - Page 52
PC Setting Adjusts the settings for PC signals. ● The items below are unadjustable when no PC signal is input: "H Size", "V Size", "Dot Clock", "Clock Phase", "PC Position Adjustment", and "Auto Position Adjustment". ● "Auto Position Adjustment" is unavailable for INPUT-4. ● "Dot Clock" and "Clock - JVC LT-42WX70 | Instructions - Page 53
Changing the settings : Setup ◆ Dot Clock Adjust this when the picture is not aligned vertically. ● The adjustment is kept after turning off the power. ■ -20 - +20 ◆ Clock Phase Adjust this when letters on the screen look blurred or swaying. ● The adjustment is kept after turning off the power. ■ 0 - JVC LT-42WX70 | Instructions - Page 54
external component automatically turns on the monitor and change its source to the component. ● The setting is fixed to "Off" and unadjustable when "Control with HDMI" is set to "Off". ● Dedicated HDMI components cooperate with the monitor regardless of the setting. ■ On / Off Power Off Link Turning - JVC LT-42WX70 | Instructions - Page 55
through the monitor. ● The setting is fixed to "Off" and unadjustable when "Control with HDMI" is set to "Off". ■ On / Off Input-1 Audio Selects the audio signal type for INPUT-1. ■ Auto : Detects the type automatically. ■ Digital : For HDMI - JVC LT-42WX70 | Instructions - Page 56
Troubleshooting The following are not malfunctions. ● This LCD display is built with very high precision has changed. The remaining picture will disappear after a while. ● The following symptoms are problems only when pictures or sounds are not played back normally. ● A slight electric shock - JVC LT-42WX70 | Instructions - Page 57
Troubleshooting Cannot turn on the monitor. ● Connect the power cord properly. (➔ page 10) ● Turn on the power switch. (➔ page 10) The remote control does not work. ● Insert the batteries in the correct direction. (➔ page 05) ● Replace the batteries with new ones. ● Aim the remote control to the - JVC LT-42WX70 | Instructions - Page 58
No sound from HDMI devices. ● Set "Input-1 Audio" properly. (➔ page 37) Cannot control HDMI CEC devices. ● Set "Control with HDMI" to "On". (➔ page 36) ● Some devices may not accept controls by HDMI CEC. Cannot operate the product using the buttons on the monitor. ● Set "Front Panel Lock" to "Off". - JVC LT-42WX70 | Instructions - Page 59
Specifications Specifications Model name LCD panel Screen size (visible area size measured diagonally) Display formats Audio output Operating environment Power requirements Power consumption Power consumption (on standby) LT-42WX70EU 42-inch (viewable) 107 cm 1920×1080 16.77 million 178 ° ( - JVC LT-42WX70 | Instructions - Page 60
the stand) Power cable ×1, Speaker unit ×1, Screws for the speaker unit ×2, remote control unit ×1, AAA batteries ×2 HDMI ×3 D-sub (15 pin) ×1 Audio slightly be different from actual products. ● Design and specifications are subject to change without notice. ● HDMI, JVC or JVC-authorized dealers. 42 - JVC LT-42WX70 | Instructions - Page 61
Specifications Dimensions unit: mm 1 : 990.0 2 : 716.8*1 / 689.3*2 / 661.8*3 3 : 400.0 4 : 117.0*1 / 89.5*2 / 62.0*3 5 : 400.0 6 : 200.0 7 : 42.5 8 : 599.8 9 : 170.0 *1 At the high position *2 At the middle position *3 At the low position 43 - JVC LT-42WX70 | Instructions - Page 62
Compliant signal formats (1) INPUT-4 terminal (PC) Signal PC98 VGA 60†1 VGA 72 VGA 75 WVGA 60†2 SVGA 60 SVGA 72 SVGA 75 XGA 60†1 XGA 70 XGA 75 WXGA(1280)†2†3 WXGA(1360)†2†4 WXGA 60†2†5 SXGA 60†6 SXGA+ 60†7 SXGA+ 60* 1280x720 1920x1080 Vertical (Hz) 56.42 59.94 72.81 75.00 60.00 60.32 72.19 75.00 - JVC LT-42WX70 | Instructions - Page 63
Specifications Total pixels pixel per line line per frame 848 440 800 525 832 520 840 500 1088 517 1056 628 1040 666 1056 625 1344 - JVC LT-42WX70 | Instructions - Page 64
Compliant signal formats (2) INPUT-4 terminal (composite) Signal PAL/50 PAL/60 SECAM NTSC3.58 NTSC4.43 PAL M PAL N Frequency Vertical (Hz) Horizontal (Hz) 50.00 15.63 59.94 15.73 50.00 15.63 59.94 15.73 59.94 15.73 59.94 15.73 50.00 15.63 INPUT-4 terminal (component) Signal 480/ - JVC LT-42WX70 | Instructions - Page 65
Specifications Total pixels pixel per line 800 858 1650 2200 858 2200 864 1980 2640 864 2640 2750 2640 2200 line per frame 525 525 750 - JVC LT-42WX70 | Instructions - Page 66
22 Colour Space 20 Colour System 19 Colour Temperature 21 Component 08 Composite 08 Computer 08, A-10 Connection 08 Contrast 17 Contrast Setting 17 Control with HDMI 36 D Digital camera A-11 DVI 08 E Eco Mode 26 Enhancer 18 Enhancer Setting 18 EXIT 14 F Front Panel Lock 29 G Gamma - JVC LT-42WX70 | Instructions - Page 67
25 Picture Management 23 Position Adjustment 32 Power cable 10 Power indicator 11 Power Indicator 32 Power Off Link 36 Power switch 10 R Remote control unit 12 Remote sensor 11 Reset 28, 35, 37 S Setup 29 Sharpness 18 Sound 27 Speaker unit 05 T Touch sensor panel 11 Treble 27 Turn - JVC LT-42WX70 | Instructions - Page 68
- JVC LT-42WX70 | Instructions - Page 69
ENGLISH LCD Monitor LT-42WX70 INSTRUCTIONS As an "ENERGY STAR®" partner, JVC has determined that this product or ). Staple your sales receipt or invoice to the inside cover of this guide. Keep this user's guide in a convenient place for future reference. Keep the carton and original packaging - JVC LT-42WX70 | Instructions - Page 70
is intended to alert the user to the presence of important operating and maintenance (servicing) instructions in the literature accompanying the appliance cabinet openings. 5. In the event of trouble, unplug the unit and call a service technician. Do not attempt to repair it yourself or remove - JVC LT-42WX70 | Instructions - Page 71
Changes or modifications not approved by JVC could void the warranty. ● When user serviceable parts inside. Please refer to qualified service personnel for repairs. Important Safety Instructions 1) Read these instructions. 2) Keep these instructions. 3) Heed all warnings. 4) Follow all instructions - JVC LT-42WX70 | Instructions - Page 72
injury from tip-over. 13) Unplug this apparatus during lightning storms or when unused for long periods of time. 14) Refer all servicing to qualified service personnel. Servicing is required when the apparatus has been damaged in any way, such as powersupply cord or plug is damaged, liquid has been - JVC LT-42WX70 | Instructions - Page 73
Warnings 18) DO NOT allow young children to play with the plastic bag that came with the monitor when you unpacked it. Failure to do so can result in suffocation, causing injury. 19) Avoid improper installation and never position the unit where good ventilation is impossible. When installing this - JVC LT-42WX70 | Instructions - Page 74
for inserting and removing the power plug. Place the monitor as close to the outlet as possible. The main power supply for this monitor is controlled by inserting or removing the power plug. 23) Batteries shall not be exposed to excessive heat such as sunshine, fire or the like. 24) When - JVC LT-42WX70 | Instructions - Page 75
void the user's authority to operate the equipment. Note: This equipment has been tested and found used in accordance with the instructions, may cause harmful interference to is connected. ● Consult the dealer or an experienced radio/TV technician for help. To prevent an accidental fall When fixing - JVC LT-42WX70 | Instructions - Page 76
of picture quality with a wide range of adjustment properties ➔ page A-2 › Quick response making video games more exciting - Game Mode ➔ page A-5 › Operating HDMI devices from the TV remote contoller - HDMI CEC compatible ➔ page 13 02 - JVC LT-42WX70 | Instructions - Page 77
04 Included items 04 Inserting batteries into the remote control 05 Attaching and connecting the speaker unit 05 identification 11 Controlling HDMI devices 13 Changing the settings 14 Picture 15 Sound 27 Setup 29 HDMI 36 Troubleshooting 38 Specifications 40 Index - JVC LT-42WX70 | Instructions - Page 78
Included items ● Main unit (monitor and stand) ● Speaker unit ● Screws for the speaker unit ● Remote control unit ● AAA size batteries ● Video cable (D-sub 15 pin / RCA) ● Audio cable (3.5 mm stereo mini / RCA) ● Power cable ● Instructions (this book), startup sheet, other printed material 04 - JVC LT-42WX70 | Instructions - Page 79
Installation Inserting batteries into the remote control If this symbol is shown, When replacing the batteries it is only valid in the To avoid short-circuit, place the minus European Union end - JVC LT-42WX70 | Instructions - Page 80
To adjust the vertical position of monitor The monitor is height-adjustable in 3 positions, by 5.5 cm (2 1/4'') at the maximum. Adjust the vertical position of the monitor when you need to place a device under the monitor. 1 Detach the monitor from the stand. 1-1 Spread a soft cloth on a flat table - JVC LT-42WX70 | Instructions - Page 81
again. ● Select the positions of the hooks according to the monitor position you want, and fix them with the screws. Speaker unit x √ x √ Tuner x x √ √ Hook (upper) Hook (lower) 3 Attach the monitor to the stand. 3-1 Hang the monitor to the stand. ● After hanging the monitor on the - JVC LT-42WX70 | Instructions - Page 82
Connecting external devices To connect an HDMI device To INPUT-1/INPUT-2/ INPUT-3 terminals To connect a device with component terminals To connect a device with a composite terminal Green To connect a DVI device To connect a computer 08 - JVC LT-42WX70 | Instructions - Page 83
Deep Color, with x.v.ColorTM, HDMITM CEC Support) INPUT-2: HDMITM terminal INPUT-3: HDMITM terminal Installation INPUT-1: HDMITM terminal AUDIO INPUT terminal INPUT-4 terminal: D-sub 15 pin Speaker terminals (➔ page 05) RS-232C terminal (For controlling the monitor from a computer. Contact - JVC LT-42WX70 | Instructions - Page 84
Connecting the power cable/Turning on the power Power cable ● Ground the earth plug of the power cable to the earth terminal of the AC outlet. ● When several kinds of power cord are provided in the package, use the one which fits your AC outlet. Power switch Power on Power off Initial settings - JVC LT-42WX70 | Instructions - Page 85
sensor panel Power switch Turns on or off the main power supply. (on the rear) Power indicator Lights while the monitor is on. Remote sensor Aim the remote control here. Touch sensor panel Touch on the function name to operate the function. You hear a beep sound when the button is touched. Turns - JVC LT-42WX70 | Instructions - Page 86
Remote control POWER Turns the monitor on/off (on standby). LINK Opens the operation window for HDMI CEC devices. (➔ page 13) MUTING Attenuates the sound. INPUT 1 INPUT 2 INPUT 3 Switches the input. INPUT 4 ● Buttons not mentioned above are equipped for the operations of a TV tuner. 12 - JVC LT-42WX70 | Instructions - Page 87
HDMI devices You can control HDMI CEC devices connected to this monitor using the remote of the monitor. ● This function can be customized in the "HDMI" settings (➔ page 36). ● Devices may not operate or may function differently from described, depending - JVC LT-42WX70 | Instructions - Page 88
Changing the settings Example: to change the setting of "Color Temperature" 1 Open the menu. 2 Select "Picture". Memory Setting Load Preset Tint Tint Setting Color Contrast Contrast Setting Brightness Sharpness Picture 0 0 0 0 0 Page 1/3 Memory1 3 Select "Color Temperature". ● The item - JVC LT-42WX70 | Instructions - Page 89
Technical information Customize the picture to your taste A-2 Set up the monitor for your PC A-10 Enjoy SLR digital camera photographs A-11 Menu index by task A-12 A-1 - JVC LT-42WX70 | Instructions - Page 90
Customize the picture to your taste To use a preset 1 Open the menu. 2 Select a memory from " Memory Setting " in "Picture". In the initial setting, 6 presets are assigned to each memory as follows: ● Memory1 : Standard ● Memory2 : Dynamic ● Memory3 : Theater ● Memory4 : Monitor ● Memory5 : - JVC LT-42WX70 | Instructions - Page 91
to your taste This monitor features rich menus for picture control, in addition to 6 preinstalled sets of picture settings carefully prepared by JVC to suit various types of video content and viewing environment. Enjoy controlling appearance of pictures using the "Picture" menu, and create your - JVC LT-42WX70 | Instructions - Page 92
● Characteristics of the 6 presets Standard Suitable for watching TV programs and DVDs in a living room. Dynamic Makes pictures colorful and bright, suitable for watching in a well-lighted room. Theater Suitable for watching cinemas in a dark room. A-4 - JVC LT-42WX70 | Instructions - Page 93
Customize the picture to your taste Monitor Does not apply color adjustments or noise reductions. Input video signals are displayed as they are. Suitable for monitoring purpose. Photo Pro Suitable for watching still pictures of SLR digital cameras. Game Gives priority to the response time for - JVC LT-42WX70 | Instructions - Page 94
● Setting values of each preset ● The settings are subject to change for amelioration. Tint Tint Setting BY Gain BY/RY Angle Color Contrast Contrast Setting Black Stretch Dynamic DC Offset Auto Contrast Brightness Sharpness Enhancer Enhancer Setting Detail H.Sharp V.Sharp Backlight Backlight - JVC LT-42WX70 | Instructions - Page 95
Customize the picture to your taste Theater 0 0 2 0 0 Low On Off 0 0 Mode-4 0 5 0 0 On Low Auto Auto Normal Warm2 Monitor 0 0 0 0 0 Off Off Off 0 -30 Mode-5 0 0 0 0 Off Off Auto Auto Normal Warm2 Photo Pro 0 0 0 0 0 Off Off Off 0 0 Mode-5 -15 -5 0 10 Off Off Auto Auto sRGB Warm2 Game 0 0 0 0 0 - JVC LT-42WX70 | Instructions - Page 96
White Balance Setting R Drive / G Drive / B Drive R Cutoff / G Cutoff / B Cutoff Color Management Color Mngmt. Setting Red Tint / Red Color Yellow Tint / Yellow Color Green Tint / Green Color Cyan Tint / Cyan Color Skin Tint / Skin Color Color : Bright Area Color : Dark Area Gamma Dynamic Gamma - JVC LT-42WX70 | Instructions - Page 97
Customize the picture to your taste Theater 0 0 Mode-3 0 0 0 0 0 0 0 Mode-4 Low Auto Low On Auto Normal Off Off On On Monitor 0 0 Off 0 0 0 0 0 0 0 Mode-4 Off Off Off Off Off Normal Off Off On On Photo Pro 0 0 Off 0 0 0 0 0 0 0 Mode-4 Off Auto Off On Off Normal Off Off On Off Game 0 0 Mode-2 0 0 - JVC LT-42WX70 | Instructions - Page 98
Set up the monitor for your PC Selecting the input signal When you connect a PC to the INPUT-4 terminal, set the type of the input signal accordingly. ● For signals in VGA60 and XGA60 Set "Sampling Mode" to "Std". (➔ page 34) ● For signals in WVGA60 Set "Sampling Mode" to "Wide". (➔ page 34) ● For - JVC LT-42WX70 | Instructions - Page 99
Set up the monitor for your PC If the picture is not aligned vertically, or letters on the screen look blurred Set the aspect to "1:1", and adjust "Dot Clock" and "Clock Phase". (➔ page 35) ● For signals in 1920 x 1080, set the aspect to "Full" and adjust the same items. If the picture is cropped, - JVC LT-42WX70 | Instructions - Page 100
Hue adjustment Color adjustment Menu index by task Page General tone of color Tint 16 Tone of color (including white) Color Temperature 21 Tone of color (in detail) White Balance Setting 21 Range of color representation Color Space 20 Amplitude of the color difference signal Tint - JVC LT-42WX70 | Instructions - Page 101
"Load" to load a preset. ■ Dynamic : Makes pictures colorful and bright, suitable for watching in a well-lighted room. ■ Standard : Suitable for watching TV programs and DVDs in a living room. ■ Theater : Suitable for watching cinemas in a dark room. ■ Monitor : Applies no color corrections or noise - JVC LT-42WX70 | Instructions - Page 102
Tint Adjusts the tone of color. ■ -30 - +30 (Skin color reddish ↔ Skin color greenish) Tint Setting Adjusts the tone of color in detail. ● The setting is fixed to 0 and unadjustable when "Color Space" is set to "sRGB", "AdobeRGB", or "x.v.Color". ● The setting is fixed to 0 and unadjustable when " - JVC LT-42WX70 | Instructions - Page 103
Emphasizes darker areas depending on the characteristics of a picture to make contrast clearer. ■ High / Medium / Low / Off ◆ Dynamic DC Offset Controls the blackness of the picture automatically depending on the total brightness. ■ On / Off ◆ Auto Contrast Emphasizes brighter areas depending on the - JVC LT-42WX70 | Instructions - Page 104
Sharpness Emphasizes outlines on a picture. ● The setting is unadjustable when "Enhancer" is set to "Off". ■ -30 - +30 (Fuzzy ↔ Sharp) Enhancer Selects the frequency band enhanced by "Sharpness". ■ Off : Deactivates the function. ■ Mode-1 / Mode-2 / Mode-3 / Mode-4 / Mode-5 (Emphasizes lower - JVC LT-42WX70 | Instructions - Page 105
Changing the settings : Picture Backlight Setting Adjusts settings of functions relating with backlight. ◆ Smart Picture Reduces the backlight automatically in dazzling scenes. ■ On / Off ◆ Dynamic Backlight Reduces the backlight automatically in dark scenes to represent black deeper. ■ High / - JVC LT-42WX70 | Instructions - Page 106
xvYCC signal is input to the HDMI terminal, "x.v.Color" is applied automatically. ■ Normal : HDTV standard. ■ Wide : The wide color gamut of the equipped LED panel. (Wider than the HDTV standard.) ■ x.v.Color : Color representation suitable for x.v.Color. ■ sRGB : Color representation suitable for - JVC LT-42WX70 | Instructions - Page 107
"On". ■ Cool1 / Cool2 / Normal / Warm1 / Warm2 (Higher temperature ↔ Lower temperature) White Balance Setting Adjusts color temperature in detail; subtle control of RGB gradations. ● These settings are independent of the setting of "Color Temperature". ◆ R Drive / G Drive / B Drive Adjusts the depth - JVC LT-42WX70 | Instructions - Page 108
Color Management Adjusts the total coloring of pictures. Three color management presets are available to suit a variety of color temperature settings. ● The setting is fixed to "Off" and unadjustable when "Color Space" is set to "sRGB", "AdobeRGB", or "x.v.Color". ● The setting is fixed to "Off" and - JVC LT-42WX70 | Instructions - Page 109
: Dark Area Adjusts the color depth of dark areas. ■ -15 - +15 (Dilute ↔ Dense) Gamma Adjusts the gamma correction value and controls the brightness and gradation of intermediately bright areas. ■ Mode-1 / Mode-2 / Mode-3 / Mode-4 (γ = 2.2) / Mode-5 / Mode-6 (Brighter ↔ Darker) Dynamic Gamma Adjusts - JVC LT-42WX70 | Instructions - Page 110
Noise Reduction Adjusts the settings of picture noise reduction. ● The functions are unavailable when "PC Monitor Mode" is set to "On" or when signals in a PC signal format are coming in. ◆ Digital VNR Reduces picture noise. ■ Auto : Estimates the amount of noise automatically and applies suitable - JVC LT-42WX70 | Instructions - Page 111
Changing the settings : Picture Natural Cinema Displays quick-moving parts on cinemas originally taken on films with more clarity. ● The setting is fixed to "Off" and unadjustable when "Picture Delay Time" is set to "Short". ● The setting is fixed to "Off" and unadjustable when "PC Monitor Mode" is - JVC LT-42WX70 | Instructions - Page 112
Eco Mode Adjusts the brightness of backlight depending on the luminance of the room to reduce power consumption. ■ Display : Activating the function and indicating its performance. ■ On : Activating the function. Its performance is not indicated. ■ Off : Deactivates the function. Other ◆ Real Bit - JVC LT-42WX70 | Instructions - Page 113
(Weaker ↔ Stronger) Treble Adjusts treble tone. ■ -6 - +6 (Weaker ↔ Stronger) Balance Adjusts sound balance. ■ L10 - 10R (To the left ↔ To the right) Auto Volume Control Turns down the volume automatically when an excessive strong sound signal is input. ■ On / Off Lip Sync Adjusts the delay time of - JVC LT-42WX70 | Instructions - Page 114
PEQ Optimizes the sound for the monitor's supplied speaker unit. Select "Off" when connecting other speakers. ■ On / Off Turn On Volume Adjusts the initial volume when turning on the monitor. ■ 0 - 50 ■ Current : Setting the current volume to the initial. ● If the setting value surpass that of " - JVC LT-42WX70 | Instructions - Page 115
Changing the settings : Setup Setup Menu Language You can choose the language used for on-screen messages. ■ English (EU) / Deutsch / Français(UE) / Italiano / Español (UE) / Català / Nederlands / Dansk / Svenska / Norsk / Suomi / Polski / Magyar Português / Česky Türkçe / Română / / / - JVC LT-42WX70 | Instructions - Page 116
Aspect Adjusts the aspect of pictures. ● The setting is also adjustable through the [ASPECT] button on the remote control. ◆ Options when the current input signal is SD ■ Auto : When the video signal contains information about aspect ratio (WSS etc.), the aspect is switched accordingly. - JVC LT-42WX70 | Instructions - Page 117
Changing the settings : Setup ◆ Options when the current input signal is HD ● You can select "Full Native" only when the input signal is 1080i/p. ■ Full : Stretching a picture to the width of the monitor. ■ Full Native : Displaying a picture of 1080i/p without enlargement. ■ Slim : Shrinking a - JVC LT-42WX70 | Instructions - Page 118
Position Adjustment Adjusts the picture position on the monitor. ● Vertical adjustment is effective when "Aspect" is set to "14:9 Zoom", "16:9 Zoom", "Panoramic", "16:9 Zoom Subtitle", or "Panoramic Zoom". ● Horizontal adjustment is effective only when "Aspect" is set to "Panoramic Zoom". ● When a - JVC LT-42WX70 | Instructions - Page 119
Changing the settings : Setup Input Label Adds a source name specifying a device after the source name ("Input-1" "Input-4"). ■ (No label) / VCR / DVD / Blu-ray Disc / PVR / D-VHS / STB / SAT / AMP / GAME / CAM / DISC / PC 4:3 Aspect Setting Selects the aspect setting which is applied when "Aspect" - JVC LT-42WX70 | Instructions - Page 120
PC Setting Adjusts the settings for PC signals. ● The items below are unadjustable when no PC signal is input: "H Size", "V Size", "Dot Clock", "Clock Phase", "PC Position Adjustment", and "Auto Position Adjustment". ● "Auto Position Adjustment" is unavailable for INPUT-4. ● "Dot Clock" and "Clock - JVC LT-42WX70 | Instructions - Page 121
Changing the settings : Setup ◆ Dot Clock Adjust this when the picture is not aligned vertically. ● The adjustment is kept after turning off the power. ■ -20 - +20 ◆ Clock Phase Adjust this when letters on the screen look blurred or swaying. ● The adjustment is kept after turning off the power. ■ 0 - JVC LT-42WX70 | Instructions - Page 122
external component automatically turns on the monitor and change its source to the component. ● The setting is fixed to "Off" and unadjustable when "Control with HDMI" is set to "Off". ● Dedicated HDMI components cooperate with the monitor regardless of the setting. ■ On / Off Power Off Link Turning - JVC LT-42WX70 | Instructions - Page 123
through the monitor. ● The setting is fixed to "Off" and unadjustable when "Control with HDMI" is set to "Off". ■ On / Off Input-1 Audio Selects the audio signal type for INPUT-1. ■ Auto : Detects the type automatically. ■ Digital : For HDMI - JVC LT-42WX70 | Instructions - Page 124
Troubleshooting The following are not malfunctions. ● This LCD disappear after a while. ● The following symptoms are problems only when pictures or sounds are not played back Aim the remote control to the remote sensor on the monitor. (➔ page 11) ● The effective range of the remote control is about - JVC LT-42WX70 | Instructions - Page 125
Troubleshooting No logo. ● Please use a High Speed HDMITM Cable. High Speed HDMITM Cables are tested to carry an HD signal up to 1080p and higher. (➔ page 09) No page 37) Cannot control HDMI CEC devices. ● Set "Control with HDMI" to "On". (➔ page 36) ● Some devices may not accept controls by HDMI CEC - JVC LT-42WX70 | Instructions - Page 126
Specifications Model name LCD panel Screen size (visible area size measured diagonally) Display resolution Audio output Operating environment Power requirements Power consumption Power consumption (on standby) Dimensions Mass LT-42WX70 42-inch (viewable) 106.6 cm (42'') 1920×1080 16.77 million 178 - JVC LT-42WX70 | Instructions - Page 127
Screws for the speaker unit ×2, remote control unit ×1, AAA batteries ×2 HDMI ×3 D-sub (15 pin) ×1 Audio input (3.5 mm stereo mini jack) Speaker output RS-232C Dimensions unit: mm (inch) Specifications 1 : 990.0 (39) material supplied from sources other than JVC or JVC-authorized dealers. 41 - JVC LT-42WX70 | Instructions - Page 128
Compliant signal formats (1) INPUT-4 terminal (PC) Signal PC98 VGA 60†1 VGA 72 VGA 75 WVGA 60†2 SVGA 60 SVGA 72 SVGA 75 XGA 60†1 XGA 70 XGA 75 WXGA(1280)†2†3 WXGA(1360)†2†4 WXGA 60†2†5 SXGA 60†6 SXGA+ 60†7 SXGA+ 60* 1280x720 1920x1080 Vertical (Hz) 56.42 59.94 72.81 75.00 60.00 60.32 72.19 75.00 - JVC LT-42WX70 | Instructions - Page 129
Specifications Total pixels pixel per line line per frame 848 440 800 525 832 520 840 500 1088 517 1056 628 1040 666 1056 625 1344 - JVC LT-42WX70 | Instructions - Page 130
Compliant signal formats (2) INPUT-4 terminal (composite) Signal PAL/50 PAL/60 SECAM NTSC3.58 NTSC4.43 PAL M PAL N Frequency Vertical (Hz) Horizontal (Hz) 50.00 15.63 59.94 15.73 50.00 15.63 59.94 15.73 59.94 15.73 59.94 15.73 50.00 15.63 INPUT-4 terminal (component) Signal 480/ - JVC LT-42WX70 | Instructions - Page 131
Specifications Total pixels pixel per line 800 858 1650 2200 858 2200 864 1980 2640 864 2640 2750 2640 2200 line per frame 525 525 750 - JVC LT-42WX70 | Instructions - Page 132
22 Color Space 20 Color System 19 Color Temperature 21 Component 08 Composite 08 Computer 08, A-10 Connection 08 Contrast 17 Contrast Setting 17 Control with HDMI 36 D Digital camera A-11 Display 32 DVI 08 Dynamic Gamma 23 E Eco Mode 26 Enhancer 18 Enhancer Setting 18 EXIT 14 - JVC LT-42WX70 | Instructions - Page 133
Time 25 Position Adjustment 32 POWER 12 Power cable 10 Power indicator 11 Power Indicator 32 Power Off Link 36 Power switch 10 R Remote control unit 12 Remote sensor 11 Reset 28, 35, 37 S Setup 29 Sharpness 18 Sound 27 Speaker unit 05 T Tint 16 Tint Setting 16 Touch sensor panel - JVC LT-42WX70 | Instructions - Page 134
, JVC has determined that this product or product model meets the "ENERGY STAR®" guidelines for energy efficiency. ● For easy understanding, pictures and illustrations are shown by being emphasized, omitted or composed, and may slightly be different from actual products. ● Design and specifications - JVC LT-42WX70 | Instructions - Page 135
a brief description of the problem(s). Please call 1-800-252-5722 to locate the nearest JVC authorized service center. Service locations can also be obtained from our website http://www.jvc.com. If your product qualifies for in-home service, the service representative will require clear access - JVC LT-42WX70 | Instructions - Page 136
: 1 (800) 252-5722 http://www.jvc.com Canada TOLL FREE: 1 (800) 964-2650 http://www.jvc.ca Remember to retain your Bill of Sales for Warranty Service. JVC COMPANY OF AMERICA Division of JVC Americas Corp. 1700 Valley Road Wayne, New Jersey, 07470 JVC CANADA, INC. 21 Finchdene Square Scarborough - JVC LT-42WX70 | Instructions - Page 137
ENGLISH LCD Monitor LT-42WX70 INSTRUCTIONS - JVC LT-42WX70 | Instructions - Page 138
open cover. Repair shall be done by service personnel only. ● If the problem cannot be solved in "Troubleshooting" (➔ page 38), unplug the power cord the power cord is unplugged. The main power supply for this product is controlled by inserting or removing the power plug. Do not use any power cord - JVC LT-42WX70 | Instructions - Page 139
care that children do not climb upon furniture to operate the product. Take care when handling the glossy finish! ● For more details, see page v. Handle LCD panel with care! ● Use a soft, dry cloth when cleaning. Hold the product so as not to scratch the screen! ● Do not touch the screen when - JVC LT-42WX70 | Instructions - Page 140
Never insert objects into the cabinet openings! ● It may cause a fatal electric shock. Take care when children are near. Never obstruct the ventilation holes! ● It may cause overheating or a fire. Do not carry the product on your own! ● In order to prevent accidents, ensure that the product is - JVC LT-42WX70 | Instructions - Page 141
. Damages to these layers can lead to irreversible changes in appearance such as uneven colour, discolouration, and scratches. Follow the instructions below to prevent such troubles. ● Do not paste or stick anything using any glues or adhesive tapes. ● Do not write anything on the screen. ● Do - JVC LT-42WX70 | Instructions - Page 142
the openings). If a vacuum cleaner is not available, use a cloth and wipe it off. Leaving the dust around the intakes may prevent proper temperature control and cause damage to the product. Keep space around the product as illustrated below at minimum for proper ventilation. 150 mm 200 mm 200 mm - JVC LT-42WX70 | Instructions - Page 143
Warning To prevent an accidental fall When hanging on a wall When attaching the monitor onto a wall, use the optional wall mounting unit. Consult qualified installers for installation. When fixing to furniture 1 Thread a belt (not supplied) through the hole on the back of the stand. 2 Fix the belt - JVC LT-42WX70 | Instructions - Page 144
of picture quality with a wide range of adjustment properties ➔ page A-2 › Quick response making video games more exciting - Game Mode ➔ page A-5 › Operating HDMI devices from the TV remote contoller - HDMI CEC compatible ➔ page 13 02 - JVC LT-42WX70 | Instructions - Page 145
04 Included items 04 Inserting batteries into the remote control 05 Attaching and connecting the speaker unit 05 identification 11 Controlling HDMI devices 13 Changing the settings 14 Picture 15 Sound 27 Setup 29 HDMI 36 Troubleshooting 38 Specifications 41 Index - JVC LT-42WX70 | Instructions - Page 146
Included items ● Main unit (monitor and stand) ● Speaker unit ● Screws for the speaker unit ● Remote control unit ● AAA size batteries ● Video cable (D-sub 15 pin / RCA) ● Audio cable (3.5 mm stereo mini / RCA) ● Power cable ● Instructions (this book), startup sheet, other printed material 04 - JVC LT-42WX70 | Instructions - Page 147
Inserting batteries into the remote control Installation If this symbol is shown, When replacing the batteries it is only valid in the To avoid short-circuit, place the European Union. minus - JVC LT-42WX70 | Instructions - Page 148
To adjust the vertical position of monitor The monitor is height-adjustable in 3 positions, by 5.5 cm at the maximum. Adjust the vertical position of the monitor when you need to place a device under the monitor. 1 Detach the monitor from the stand. 1-1 Spread a soft cloth on a flat table or floor - JVC LT-42WX70 | Instructions - Page 149
again. ● Select the positions of the hooks according to the monitor position you want, and fix them with the screws. Speaker unit x √ x √ Tuner x x √ √ Hook (upper) Hook (lower) 3 Attach the monitor to the stand. 3-1 Hang the monitor to the stand. ● After hanging the monitor on the - JVC LT-42WX70 | Instructions - Page 150
Connecting external devices To connect an HDMI device To INPUT-1/INPUT-2/ INPUT-3 terminals To connect a device with component terminals To connect a device with a composite terminal Green To connect a DVI device To connect a computer 08 - JVC LT-42WX70 | Instructions - Page 151
Deep Color, with x.v.ColourTM, HDMITM CEC Support) INPUT-2: HDMITM terminal INPUT-3: HDMITM terminal Installation INPUT-1: HDMITM terminal AUDIO INPUT terminal INPUT-4 terminal: D-sub 15 pin Speaker terminals (➔ page 05) RS-232C terminal (For controlling the monitor from a computer. Contact - JVC LT-42WX70 | Instructions - Page 152
Connecting the power cable/Turning on the power Power cable ● Ground the earth plug of the power cable to the earth terminal of the AC outlet. ● When several kinds of power cord are provided in the package, use the one which fits your AC outlet. Power switch Power on Power off Initial settings - JVC LT-42WX70 | Instructions - Page 153
sensor panel Power switch Turns on or off the main power supply. (on the rear) Power indicator Lights while the monitor is on. Remote sensor Aim the remote control here. Touch sensor panel Touch on the function name to operate the function. You hear a beep sound when the button is touched. Turns - JVC LT-42WX70 | Instructions - Page 154
Remote control Turns the monitor on/off (on standby). LINK Opens the operation window for HDMI CEC devices. (➔ page 13) OPTION volume. Attenuates the sound. VIDEO 1 VIDEO 2 VIDEO 3 VIDEO 4 Switches the input. ● Buttons not mentioned above are equipped for the operations of a TV tuner. 12 - JVC LT-42WX70 | Instructions - Page 155
HDMI devices You can control HDMI CEC devices connected to this monitor using the remote of the monitor. ● This function can be customized in the "HDMI" settings (➔ page 36). ● Devices may not operate or may function differently from described, depending - JVC LT-42WX70 | Instructions - Page 156
Changing the settings Example: to change the setting of "Colour Temperature" 1 Open the menu. 2 Select "Picture". Setting Memory Load Preset Hue Hue Setting Colour Contrast Contrast Setting Brightness Sharpness Picture 0 0 0 0 0 Page 1/3 Memory1 3 Select "Colour Temperature". ● The item - JVC LT-42WX70 | Instructions - Page 157
Technical information Customize the picture to your taste A-2 Set up the monitor for your PC A-10 Enjoy SLR digital camera photographs A-11 Menu index by task A-12 A-1 - JVC LT-42WX70 | Instructions - Page 158
Customize the picture to your taste To use a preset 1 Open the menu. 2 Select a memory from "Setting Memory" in "Picture". In the initial setting, 6 presets are assigned to each memory as follows: ● Memory1 : Standard ● Memory2 : Dynamic ● Memory3 : Theater ● Memory4 : Monitor ● Memory5 : - JVC LT-42WX70 | Instructions - Page 159
to your taste This monitor features rich menus for picture control, in addition to 6 preinstalled sets of picture settings carefully prepared by JVC to suit various types of video content and viewing environment. Enjoy controlling appearance of pictures using the "Picture" menu, and create your - JVC LT-42WX70 | Instructions - Page 160
● Characteristics of the 6 presets Standard Suitable for watching TV programs and DVDs in a living room. Dynamic Makes pictures colourful and bright, suitable for watching in a well-lighted room. Theater Suitable for watching cinemas in a dark room. A-4 - JVC LT-42WX70 | Instructions - Page 161
Customize the picture to your taste Monitor Does not apply colour adjustments or noise reductions. Input video signals are displayed as they are. Suitable for monitoring purpose. Photo Pro Suitable for watching still pictures of SLR digital cameras. Game Gives priority to the response time for - JVC LT-42WX70 | Instructions - Page 162
● Setting values of each preset ● The settings are subject to change for amelioration. Hue Hue Setting BY Gain BY/RY Angle Colour Contrast Contrast Setting Black Stretch Dynamic DC Offset Auto Contrast Brightness Sharpness Enhancer Enhancer Setting Detail H.Sharp V.Sharp Backlight Backlight Setting - JVC LT-42WX70 | Instructions - Page 163
Customize the picture to your taste Theater 0 0 2 0 0 Low On Off 0 0 Mode-4 0 5 0 0 On Low Auto Auto Normal Warm2 Monitor 0 0 0 0 0 Off Off Off 0 -30 Mode-5 0 0 0 0 Off Off Auto Auto Normal Warm2 Photo Pro 0 0 0 0 0 Off Off Off 0 0 Mode-5 -15 -5 0 10 Off Off Auto Auto sRGB Warm2 Game 0 0 0 0 0 - JVC LT-42WX70 | Instructions - Page 164
White Balance Setting R Drive / G Drive / B Drive R Cutoff / G Cutoff / B Cutoff Colour Management Colour Mngmt. Setting Red Hue / Red Colour Yellow Hue / Yellow Colour Green Hue / Green Colour Cyan Hue / Cyan Colour Skin Hue / Skin Colour Colour : Bright Area Colour : Dark Area Gamma Picture - JVC LT-42WX70 | Instructions - Page 165
Customize the picture to your taste Theater 0 0 Mode-3 0 0 0 0 0 0 0 Mode-4 Low Auto Low On Auto Normal Off Off On On Monitor 0 0 Off 0 0 0 0 0 0 0 Mode-4 Off Off Off Off Off Normal Off Off On On Photo Pro 0 0 Off 0 0 0 0 0 0 0 Mode-4 Off Auto Off On Off Normal Off Off On Off Game 0 0 Mode-2 0 0 - JVC LT-42WX70 | Instructions - Page 166
Set up the monitor for your PC Selecting the input signal When you connect a PC to the INPUT-4 terminal, set the type of the input signal accordingly. ● For signals in VGA60 and XGA60 Set "Sampling Mode" to "Std". (➔ page 34) ● For signals in WVGA60 Set "Sampling Mode" to "Wide". (➔ page 34) ● For - JVC LT-42WX70 | Instructions - Page 167
Set up the monitor for your PC If the picture is not aligned vertically, or letters on the screen look blurred Set the aspect to "1:1", and adjust "Dot Clock" and "Clock Phase". (➔ page 35) ● For signals in 1920 x 1080, set the aspect to "Full" and adjust the same items. If the picture is cropped, - JVC LT-42WX70 | Instructions - Page 168
Hue adjustment Colour adjustment Menu index by task General tone of colour Tone of colour (including white) Tone of colour (in detail) Range of colour representation Amplitude of the colour difference signal Demodulation angle of the colour difference signal Pattern of colour correction Colour - JVC LT-42WX70 | Instructions - Page 169
Load" to load a preset. ■ Dynamic : Makes pictures colorful and bright, suitable for watching in a well-lighted room. ■ Standard : Suitable for watching TV programs and DVDs in a living room. ■ Theater : Suitable for watching cinemas in a dark room. ■ Monitor : Applies no colour corrections or noise - JVC LT-42WX70 | Instructions - Page 170
Hue Adjusts the tone of colour. ■ -30 - +30 (Skin colour reddish ↔ Skin colour greenish) Hue Setting Adjusts the tone of colour in detail. ● The setting is fixed to 0 and unadjustable when "Colour Space" is set to "sRGB", "AdobeRGB", or "x.v.Colour". ● The setting is fixed to 0 and unadjustable when - JVC LT-42WX70 | Instructions - Page 171
Emphasizes darker areas depending on the characteristics of a picture to make contrast clearer. ■ High / Medium / Low / Off ◆ Dynamic DC Offset Controls the blackness of the picture automatically depending on the total brightness. ■ On / Off ◆ Auto Contrast Emphasizes brighter areas depending on the - JVC LT-42WX70 | Instructions - Page 172
Sharpness Emphasizes outlines on a picture. ● The setting is unadjustable when "Enhancer" is set to "Off". ■ -30 - +30 (Fuzzy ↔ Sharp) Enhancer Selects the frequency band enhanced by "Sharpness". ■ Off : Deactivates the function. ■ Mode-1 / Mode-2 / Mode-3 / Mode-4 / Mode-5 (Emphasizes lower - JVC LT-42WX70 | Instructions - Page 173
Changing the settings : Picture Backlight Setting Adjusts settings of functions relating with backlight. ◆ Smart Picture Reduces the backlight automatically in dazzling scenes. ■ On / Off ◆ Dynamic Backlight Reduces the backlight automatically in dark scenes to represent black deeper. ■ High / - JVC LT-42WX70 | Instructions - Page 174
signal is input to the HDMI terminal, "x.v.Colour" is applied automatically. ■ Normal : HDTV standard. ■ Wide : The wide colour gamut of the equipped LED panel. (Wider than the HDTV standard.) ■ x.v.Colour : Colour representation suitable for x.v.Colour. ■ sRGB : Colour representation suitable for - JVC LT-42WX70 | Instructions - Page 175
". ■ Cool1 / Cool2 / Normal / Warm1 / Warm2 (Higher temperature ↔ Lower temperature) White Balance Setting Adjusts colour temperature in detail; subtle control of RGB gradations. ● These settings are independent of the setting of "Colour Temperature". ◆ R Drive / G Drive / B Drive Adjusts the depth - JVC LT-42WX70 | Instructions - Page 176
Colour Management Adjusts the total colouring of pictures. Three colour management presets are available to suit a variety of colour temperature settings. ● The setting is fixed to "Off" and unadjustable when "Colour Space" is set to "sRGB", "AdobeRGB", or "x.v.Colour". ● The setting is fixed to " - JVC LT-42WX70 | Instructions - Page 177
Area Adjusts the colour depth of dark areas. ■ -15 - +15 (Dilute ↔ Dense) Gamma Adjusts the gamma correction value and controls the brightness and gradation of intermediately bright areas. ■ Mode-1 / Mode-2 / Mode-3 / Mode-4 (γ = 2.2) / Mode-5 / Mode-6 (Brighter ↔ Darker) Picture Management Adjusts - JVC LT-42WX70 | Instructions - Page 178
Noise Reduction Adjusts the settings of picture noise reduction. ● The functions are unavailable when "PC Monitor Mode" is set to "On" or when signals in a PC signal format are coming in. ◆ Digital VNR Reduces picture noise. ■ Auto : Estimates the amount of noise automatically and applies suitable - JVC LT-42WX70 | Instructions - Page 179
Changing the settings : Picture Natural Cinema Displays quick-moving parts on cinemas originally taken on films with more clarity. ● The setting is fixed to "Off" and unadjustable when "Picture Delay Time" is set to "Short". ● The setting is fixed to "Off" and unadjustable when "PC Monitor Mode" is - JVC LT-42WX70 | Instructions - Page 180
Eco Mode Adjusts the brightness of backlight depending on the luminance of the room to reduce power consumption. ■ Demo : Activating the function and indicating its performance. ■ On : Activating the function. Its performance is not indicated. ■ Off : Deactivates the function. Other ◆ Real Bit - JVC LT-42WX70 | Instructions - Page 181
(Weaker ↔ Stronger) Treble Adjusts treble tone. ■ -6 - +6 (Weaker ↔ Stronger) Balance Adjusts sound balance. ■ L10 - 10R (To the left ↔ To the right) Auto Volume Control Turns down the volume automatically when an excessive strong sound signal is input. ■ On / Off Lip Sync Adjusts the delay time of - JVC LT-42WX70 | Instructions - Page 182
PEQ Optimizes the sound for the monitor's supplied speaker unit. Select "Off" when connecting other speakers. ■ On / Off Turn On Volume Adjusts the initial volume when turning on the monitor. ■ 0 - 50 ■ Current : Setting the current volume to the initial. ● If the setting value surpass that of " - JVC LT-42WX70 | Instructions - Page 183
Changing the settings : Setup Setup Menu Language You can choose the language used for on-screen messages. ■ English (EU) / Deutsch / Français(UE) / Italiano / Español (UE) / Català / Nederlands / Dansk / Svenska / Norsk / Suomi / Polski / Magyar Português / Česky Türkçe / Română / / / - JVC LT-42WX70 | Instructions - Page 184
Zoom Adjusts the aspect of pictures. ● The setting is also adjustable through the [ZOOM] button on the remote control. ◆ Options when the current input signal is SD ■ Auto : When the video signal contains information about aspect ratio (WSS etc.), the aspect is switched accordingly. - JVC LT-42WX70 | Instructions - Page 185
Changing the settings : Setup ◆ Options when the current input signal is HD ● You can select "Full Native" only when the input signal is 1080i/p. ■ Full : Stretching a picture to the width of the monitor. ■ Full Native : Displaying a picture of 1080i/p without enlargement. ■ Slim : Shrinking a - JVC LT-42WX70 | Instructions - Page 186
Position Adjustment Adjusts the picture position on the monitor. ● Vertical adjustment is effective when "Zoom" is set to "14:9 Zoom", "16:9 Zoom", "Panoramic", "16:9 Zoom Subtitle", or "Panoramic Zoom". ● Horizontal adjustment is effective only when "Zoom" is set to "Panoramic Zoom". ● When a PC - JVC LT-42WX70 | Instructions - Page 187
Changing the settings : Setup Input Label Adds a source name specifying a device after the source name ("Input-1" "Input-4"). ■ (No label) / VCR / DVD / Blu-ray Disc / PVR / D-VHS / STB / SAT / AMP / GAME / CAM / DISC / PC 4:3 Aspect Setting Selects the aspect setting which is applied when "Zoom" - JVC LT-42WX70 | Instructions - Page 188
PC Setting Adjusts the settings for PC signals. ● The items below are unadjustable when no PC signal is input: "H Size", "V Size", "Dot Clock", "Clock Phase", "PC Position Adjustment", and "Auto Position Adjustment". ● "Auto Position Adjustment" is unavailable for INPUT-4. ● "Dot Clock" and "Clock - JVC LT-42WX70 | Instructions - Page 189
Changing the settings : Setup ◆ Dot Clock Adjust this when the picture is not aligned vertically. ● The adjustment is kept after turning off the power. ■ -20 - +20 ◆ Clock Phase Adjust this when letters on the screen look blurred or swaying. ● The adjustment is kept after turning off the power. ■ 0 - JVC LT-42WX70 | Instructions - Page 190
external component automatically turns on the monitor and change its source to the component. ● The setting is fixed to "Off" and unadjustable when "Control with HDMI" is set to "Off". ● Dedicated HDMI components cooperate with the monitor regardless of the setting. ■ On / Off Power Off Link Turning - JVC LT-42WX70 | Instructions - Page 191
through the monitor. ● The setting is fixed to "Off" and unadjustable when "Control with HDMI" is set to "Off". ■ On / Off Input-1 Audio Selects the audio signal type for INPUT-1. ■ Auto : Detects the type automatically. ■ Digital : For HDMI - JVC LT-42WX70 | Instructions - Page 192
Troubleshooting The following are not malfunctions. ● This LCD display is built with very high precision has changed. The remaining picture will disappear after a while. ● The following symptoms are problems only when pictures or sounds are not played back normally. ● A slight electric shock - JVC LT-42WX70 | Instructions - Page 193
Troubleshooting Cannot turn on the monitor. ● Connect the power cord properly. (➔ page 10) ● Turn on the power switch. (➔ page 10) The remote control does not work. ● Insert the batteries in the correct direction. (➔ page 05) ● Replace the batteries with new ones. ● Aim the remote control to the - JVC LT-42WX70 | Instructions - Page 194
No sound from HDMI devices. ● Set "Input-1 Audio" properly. (➔ page 37) Cannot control HDMI CEC devices. ● Set "Control with HDMI" to "On". (➔ page 36) ● Some devices may not accept controls by HDMI CEC. Cannot operate the product using the buttons on the monitor. ● Set "Front Panel Lock" to "Off". - JVC LT-42WX70 | Instructions - Page 195
Specifications Specifications Model name LCD panel Screen size (visible area size measured diagonally) Display formats Audio output Operating environment Power requirements Power consumption Power consumption (on standby) LT-42WX70 42-inch (viewable) 107 cm 1920×1080 16.77 million 178 ° ( - JVC LT-42WX70 | Instructions - Page 196
the stand) Power cable ×1, Speaker unit ×1, Screws for the speaker unit ×2, remote control unit ×1, AAA batteries ×2 HDMI ×3 D-sub (15 pin) ×1 Audio slightly be different from actual products. ● Design and specifications are subject to change without notice. ● HDMI, JVC or JVC-authorized dealers. 42 - JVC LT-42WX70 | Instructions - Page 197
Specifications Dimensions unit: mm 1 : 990.0 2 : 716.8*1 / 689.3*2 / 661.8*3 3 : 400.0 4 : 117.0*1 / 89.5*2 / 62.0*3 5 : 400.0 6 : 200.0 7 : 42.5 8 : 599.8 9 : 170.0 *1 At the high position *2 At the middle position *3 At the low position 43 - JVC LT-42WX70 | Instructions - Page 198
Compliant signal formats (1) INPUT-4 terminal (PC) Signal PC98 VGA 60†1 VGA 72 VGA 75 WVGA 60†2 SVGA 60 SVGA 72 SVGA 75 XGA 60†1 XGA 70 XGA 75 WXGA(1280)†2†3 WXGA(1360)†2†4 WXGA 60†2†5 SXGA 60†6 SXGA+ 60†7 SXGA+ 60* 1280x720 1920x1080 Vertical (Hz) 56.42 59.94 72.81 75.00 60.00 60.32 72.19 75.00 - JVC LT-42WX70 | Instructions - Page 199
Specifications Total pixels pixel per line line per frame 848 440 800 525 832 520 840 500 1088 517 1056 628 1040 666 1056 625 1344 - JVC LT-42WX70 | Instructions - Page 200
Compliant signal formats (2) INPUT-4 terminal (composite) Signal PAL/50 PAL/60 SECAM NTSC3.58 NTSC4.43 PAL M PAL N Frequency Vertical (Hz) Horizontal (Hz) 50.00 15.63 59.94 15.73 50.00 15.63 59.94 15.73 59.94 15.73 59.94 15.73 50.00 15.63 INPUT-4 terminal (component) Signal 480/ - JVC LT-42WX70 | Instructions - Page 201
Specifications Total pixels pixel per line 800 858 1650 2200 858 2200 864 1980 2640 864 2640 2750 2640 2200 line per frame 525 525 750 - JVC LT-42WX70 | Instructions - Page 202
22 Colour Space 20 Colour System 19 Colour Temperature 21 Component 08 Composite 08 Computer 08, A-10 Connection 08 Contrast 17 Contrast Setting 17 Control with HDMI 36 D Digital camera A-11 DVI 08 E Eco Mode 26 Enhancer 18 Enhancer Setting 18 EXIT 14 F Front Panel Lock 29 G Gamma - JVC LT-42WX70 | Instructions - Page 203
25 Picture Management 23 Position Adjustment 32 Power cable 10 Power indicator 11 Power Indicator 32 Power Off Link 36 Power switch 10 R Remote control unit 12 Remote sensor 11 Reset 28, 35, 37 S Setup 29 Sharpness 18 Sound 27 Speaker unit 05 T Touch sensor panel 11 Treble 27 Turn - JVC LT-42WX70 | Instructions - Page 204
-
 1
1 -
 2
2 -
 3
3 -
 4
4 -
 5
5 -
 6
6 -
 7
7 -
8
-
9
-
10
-
11
-
12
-
13
-
14
-
15
-
16
-
17
-
18
-
19
-
20
-
21
-
22
-
23
-
24
-
25
-
26
-
27
-
28
-
29
-
30
-
31
-
32
-
33
-
34
-
35
-
36
-
37
-
38
-
39
-
40
-
41
-
42
-
43
-
44
-
45
-
46
-
47
-
48
-
49
-
50
-
51
-
52
-
53
-
54
-
55
-
56
-
57
-
58
-
59
-
60
-
61
-
62
-
63
-
64
-
65
-
66
-
67
-
68
-
69
-
70
-
71
-
72
-
73
-
74
-
75
-
76
-
77
-
78
-
79
-
80
-
81
-
82
-
83
-
84
-
85
-
86
-
87
-
88
-
89
-
90
-
91
-
92
-
93
-
94
-
95
-
96
-
97
-
98
-
99
-
100
-
101
-
102
-
103
-
104
-
105
-
106
-
107
-
108
-
109
-
110
-
111
-
112
-
113
-
114
-
115
-
116
-
117
-
118
-
119
-
120
-
121
-
122
-
123
-
124
-
125
-
126
-
127
-
128
-
129
-
130
-
131
-
132
-
133
-
134
-
135
-
136
-
137
-
138
-
139
-
140
-
141
-
142
-
143
-
144
-
145
-
146
-
147
-
148
-
149
-
150
-
151
-
152
-
153
-
154
-
155
-
156
-
157
-
158
-
159
-
160
-
161
-
162
-
163
-
164
-
165
-
166
-
167
-
168
-
169
-
170
-
171
-
172
-
173
-
174
-
175
-
176
-
177
-
178
-
179
-
180
-
181
-
182
-
183
-
184
-
185
-
186
-
187
-
188
-
189
-
190
-
191
-
192
-
193
-
194
-
195
-
196
-
197
-
198
-
199
-
200
-
201
-
202
-
203
-
204
 |
 |
ENGLISH
INSTRUCTIONS
LCD Monitor
LT-42WX70EU