JVC LT-42WX70 Instructions - Page 99
Adjust the position of the picture using PC Position Adjustment, If the picture is cropped
 |
View all JVC LT-42WX70 manuals
Add to My Manuals
Save this manual to your list of manuals |
Page 99 highlights
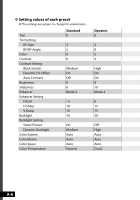
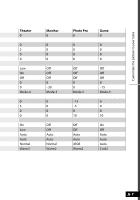
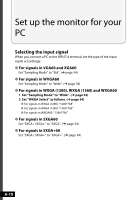
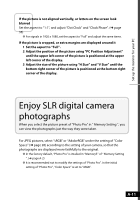
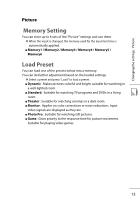
Set up the monitor for your PC If the picture is not aligned vertically, or letters on the screen look blurred Set the aspect to "1:1", and adjust "Dot Clock" and "Clock Phase". (➔ page 35) ● For signals in 1920 x 1080, set the aspect to "Full" and adjust the same items. If the picture is cropped, or extra margins are displayed around it 1 Set the aspect to "Full". 2 Adjust the position of the picture using "PC Position Adjustment" until the upper left corner of the picture is positioned at the upper left corner of the display. 3 Adjust the size of the picture using "H Size" and "V Size" until the bottom right corner of the picture is positioned at the bottom right corner of the display. Enjoy SLR digital camera photographs When you select the picture preset of "Photo Pro" in " Memory Setting ", you can view the photographs just the way they were taken. For JPEG pictures, select "sRGB" or "AdobeRGB" under the setting of "Color Space" (➔ page 20) according to the setting of your camera, so that the photographs are displayed more faithfully to the original. ● In the factory default, "Photo Pro" is intalled in "Memory5" of " Memory Setting ". (➔ page A-2) ● It is recommended not to modify the settings of "Photo Pro". In the initial setting of "Photo Pro", "Color Space" is set to "sRGB". A-11
-
 1
1 -
2
-
3
-
4
-
5
-
6
-
7
-
8
-
9
-
10
-
11
-
12
-
13
-
14
-
15
-
16
-
17
-
18
-
19
-
20
-
21
-
22
-
23
-
24
-
25
-
26
-
27
-
28
-
29
-
30
-
31
-
32
-
33
-
34
-
35
-
36
-
37
-
38
-
39
-
40
-
41
-
42
-
43
-
44
-
45
-
46
-
47
-
48
-
49
-
50
-
51
-
52
-
53
-
54
-
55
-
56
-
57
-
58
-
59
-
60
-
61
-
62
-
63
-
64
-
65
-
66
-
67
-
68
-
69
-
70
-
71
-
72
-
73
-
74
-
75
-
76
-
77
-
78
-
79
-
80
-
81
-
82
-
83
-
84
-
85
-
86
-
87
-
88
-
89
-
90
-
91
-
92
-
93
-
 94
94 -
 95
95 -
 96
96 -
 97
97 -
 98
98 -
 99
99 -
 100
100 -
 101
101 -
 102
102 -
 103
103 -
 104
104 -
105
-
106
-
107
-
108
-
109
-
110
-
111
-
112
-
113
-
114
-
115
-
116
-
117
-
118
-
119
-
120
-
121
-
122
-
123
-
124
-
125
-
126
-
127
-
128
-
129
-
130
-
131
-
132
-
133
-
134
-
135
-
136
-
137
-
138
-
139
-
140
-
141
-
142
-
143
-
144
-
145
-
146
-
147
-
148
-
149
-
150
-
151
-
152
-
153
-
154
-
155
-
156
-
157
-
158
-
159
-
160
-
161
-
162
-
163
-
164
-
165
-
166
-
167
-
168
-
169
-
170
-
171
-
172
-
173
-
174
-
175
-
176
-
177
-
178
-
179
-
180
-
181
-
182
-
183
-
184
-
185
-
186
-
187
-
188
-
189
-
190
-
191
-
192
-
193
-
194
-
195
-
196
-
197
-
198
-
199
-
200
-
201
-
202
-
203
-
204
 |
 |