Kenmore 4101 Use and Care Guide
Kenmore 4101 - Elite 30 in. Slide-In Electric Range Manual
 |
View all Kenmore 4101 manuals
Add to My Manuals
Save this manual to your list of manuals |
Kenmore 4101 manual content summary:
- Kenmore 4101 | Use and Care Guide - Page 1
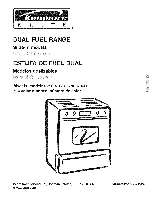
® DUAL EL A GE Slide-in models ESTU E EL UAL IVlodeios deslizables IVlodeis, modelos 790.4103_-, 790.4104__- = color number, n_mero de color 00 00 Sears Roebuck www.sears.com and Co., Hoffman Estates, IL 60179 U.S.A. 1 PIN 318203893 Bey. A (0806) - Kenmore 4101 | Use and Care Guide - Page 2
shown. Common sense and caution must be practiced when installing, operating and maintaining any appliance. Kenmore Elite Warranty When installed, operated and maintained according to all instructions supplied with the product, if this appliance fails due to a defect in material and workmanship - Kenmore 4101 | Use and Care Guide - Page 3
. 70--latest edition, and local code requirements. Install only per installation instructions provided in the literature package for this range. Sears Parts & Repair is the recommended repair service for this appliance. Know how to disconnect the power to the range at the circuit breaker or fuse box - Kenmore 4101 | Use and Care Guide - Page 4
that may ignite, or a pan that has boiled dry may melt. ,, Protective linersiDo not use aluminum foil to line oven bottom or any other part of the appliance. Only use aluminum foil as recommended for baking if used as a cover placed on the food. Any other use of protective liners or aluminum - Kenmore 4101 | Use and Care Guide - Page 5
located on the main back of the range. The kit contains installation instructions which must be read before and followed carefully when installing the kit. To avoid serious injury, any additions, changes or conversions required in order for this appliance to satisfactorily meet the application needs - Kenmore 4101 | Use and Care Guide - Page 6
covered refrigerator or freeoer. [] Rental reimbursement if repair of your covered product takes longer than promised. [] 10% discount off the regular price of any non-covered repair service and related installed parts. Enhorabuena por haber hecho una compra intetigente. Su nuevo producto Kenmore - Kenmore 4101 | Use and Care Guide - Page 7
Window Opening Warmer Drawer with Rack i *9,000 BTU Burner Dishwasher Safe Burner Grates 5,OOOBTU Simmer Burner Porcelain Cooktop 9,500 BTU 000 BTU Burner *9,000 BTU Burner Note: The features of your range will vary according to model, 27,000 BTU when used with all 3 burners combined as a - Kenmore 4101 | Use and Care Guide - Page 8
Burner Heads, Surface Burner Caps and Surface Burner Grates are installed correctly and at the correct locations. ii 1. Be sure to follow the Installation Instructions before installing and using your new range. 3 peSitions :S %_ (not m_rked) qk A 2. Remove all packing tape from cooktop - Kenmore 4101 | Use and Care Guide - Page 9
Surface Burner Heads, Surface Burner Caps and Surface Burner Grates are installed correctly and at the correct locations. 1. Remove all packing tape iH............ Locations of the Gas Surface Burners (See Figure 4) Your range is equipped with gas surface burners with different BTU ratings. The - Kenmore 4101 | Use and Care Guide - Page 10
wrappings on top of the range when it is in use. outage, the surface burners can be lit manually. To light a surface burner, hold a surface ignitors will spark at the same time. However, only the burner you are Use the recommendations below as a guide for determining proper flame size for various - Kenmore 4101 | Use and Care Guide - Page 11
that is supplied with your range is designed specifically for size for both burners. Use the guide marks between the 2nd HI and LO Burner is needed, follow the instructions provided below. Operating only the Left surface ignitors will spark at the same time. However, only the left rear Burner - Kenmore 4101 | Use and Care Guide - Page 12
use a utensil for its intended purpose. Follow manufacturer's instructions. Some utensils were not made to be used in the recommended cookware requirements. Using a wok (some models) Woks with flat bottoms suitable for use on The metal ring was designed to support the wok safely when it is filled - Kenmore 4101 | Use and Care Guide - Page 13
models) Before first use: ,, Wash Griddle in hot soapy water. Rinse and then dry completely. ,, Apply a thin coat of vegetable oil to the entire surface (front and back of griddle). ,, Preheat . • DO NOT CLEAN GRIDDLE IN DISHWASHER. ,, Dry Immediately and apply a guides on the oven walls. Tilt the - Kenmore 4101 | Use and Care Guide - Page 14
racks. Wait until the oven has completely cooled if possible. Oven racks may be HOT and may cause burns. Flat Half Oven Rack (some models) Figure 3 Your appliance may be equipped with one or more of the oven rack types shown; Flat Handle Oven Rack (Figure 2) and Flat Oven Half Rack (Figure - Kenmore 4101 | Use and Care Guide - Page 15
oven as described below. Detailed instructions for each feature and function follow later in this Use & Care Guide. FLEX CLEAN START--Use BAKE PAD to turn the oven light ON and OFF. models). PREHEAT-- Use to raise oven to cooking temperature. CLOCK SET-time of day. STOP/CLEAR to stop Use to - Kenmore 4101 | Use and Care Guide - Page 16
in, or when the power supply to the range has been interrupted, the timer in the display will flash (See Fig. 1). INSTRUCTIONS To set the clock (example below for 1:30) 1. Press @. "CLO" will appear in the display (Figure 2). 2. Press (_ (_) _ pads to set the time of day to 1:30 (Figure 3). "CLO - Kenmore 4101 | Use and Care Guide - Page 17
Timer feature can be used during any of the other oven control functions. Refer to "Minimum and Maximum Control Pad Settings" for time amount settings. INSTRUCTIONS To set the Kitchen Timer (example for 5 minutes) PRESS DISPLAY 1. Press will appear and "TIMER" will flash in the display (Figure - Kenmore 4101 | Use and Care Guide - Page 18
for silent operation and later returned to operating with all the normal sounds and beeps. INSTRUCTIONS PRESS DISPLAY To change control from normal sound operation to silent control operation 1. To tell if your range is set for normal or silent operation press and hold will appear and "DELAY - Kenmore 4101 | Use and Care Guide - Page 19
in Fahrenheit. iNSTRUCTiONS PRESS DISPLAY To appliance has been factory pre-set to start any BAKE, CONV BAKE, CONV ROAST, PREHEAT , CAKE or BREAD function with the oven set temperature automatically set for 350°R However if desired, the oven set temperature may be adjusted at any time - Kenmore 4101 | Use and Care Guide - Page 20
is not necessary when roasting or cooking casseroles. The oven can be programmed to preheat at any temperature between 170°F to 550°F. INSTRUCTIONS PRESS DISPLAY To set the Preheat temperature 1. Arrange the interior oven racks. for 375°F 2. Press @. "350" and "BAKE" will appear in the - Kenmore 4101 | Use and Care Guide - Page 21
preheating is necessary, refer to the _ Preheat Feature for instructions. The oven can be programmed to bake at any temperature from 170 ° F to 550 ° F (the sample shown below is for 350°F). INSTRUCTIONS _TO_ will cancel the Bake feature at any time. To change the Bake Temperature (example: - Kenmore 4101 | Use and Care Guide - Page 22
slightly from your previously owned appliance. Refer to "Adjusting the Oven Temperature" section. Baking problems and solutions Baking Problems Cookies and biscuits burn on the bottom. Ca uses • Cookies and biscuits put into the oven before the preheating time is completed. Oven rack overcrowded - Kenmore 4101 | Use and Care Guide - Page 23
time. Breads and pastries brown more evenly. Convection bake cooks most foods faster and more evenly than conventional bake. Some models General Convection Bake instructions 1. Time reductions will vary a dark finish will cook faster. 2. Preheating is not necessary when cooking casseroles with - Kenmore 4101 | Use and Care Guide - Page 24
(77°C to 288°C). Remember to use tested recipes with times adjusted for convection roasting when using the convection mode, This oven outside - type of searing) sealing in juices for better tasting meats. INSTRUCTIONS PRESS DISPLAY To Set the oven to Convection 1. Arrange oven racks. Roast - Kenmore 4101 | Use and Care Guide - Page 25
food temperature and a food thermometer to determine when the food is done. Preheating the oven will not be necessary when using the Slow Cook feature. Add any cream or cheese sauces during the last hour of cooking. iNSTRUCTiONS To Program the Oven to begin baking Cook feature 1. Place the food - Kenmore 4101 | Use and Care Guide - Page 26
BAKE _,B_k_o,_rf CONVECTION ROAST _oa_,, and OVEN COOK TIME _ pads control the Timed Bake feature. The automatic timer of the Timed Bake feature will turn the oven OFF after cooking for the desired amount of time you selected. iNSTRUCTiONS PRESS DISPLAY To program the oven to begin baking - Kenmore 4101 | Use and Care Guide - Page 27
Convection Bake 12-24 hours in advance set the control for the 24 hour time of day display mode• INSTRUCTIONS PR ESS DISPLAY To program the oven for a delayed BAKE start time and to shut off automatically (example: baking at 350°F, starting at 5:30 and baking for 30 minutes) 1. Be sure that - Kenmore 4101 | Use and Care Guide - Page 28
preheat feature to the bake cycle to thoroughly heat the oven from top to bottom to give more evenly browned foods. Refer to (Figure 4) for foods to cook in each category. INSTRUCTIONS or Breads, or to cancel cooking Cakes or Breads at any time. PRESS 0 OQ(Z> @ DISPLAY Figure 1 Figure 2 Figure 3 - Kenmore 4101 | Use and Care Guide - Page 29
Probe (Some Models) Checking the internal the probe supplied with your appliance; any other may result in damage to the probe or the appliance. Handle the probe carefully when the probe so that the tip rests in the center of the thickest part of the meat. Do not allow the probe to touch bone, fat, - Kenmore 4101 | Use and Care Guide - Page 30
(Some Models) To use the meat probe: 1. Prepare the food and properly insert the temperature probe into the food. DO NOT PREHEAT or start some food poisoning organisms may survive." (Source: Safe Food Book, Your Kitchen Guide, USDA Rev. June 1985.) The lowest temperature recommended by the USDA is - Kenmore 4101 | Use and Care Guide - Page 31
when cooking has finished. The Timed Bake features require you to set start time and the amount of cooking time. With this information the control can calculate the time when cooking will complete and can then start the Warm & Hold feature automatically. INSTRUCTIONS PRESS DISPLAY To set Warm - Kenmore 4101 | Use and Care Guide - Page 32
and water can cause a grease fire to spread and cause personal injury. INSTRUCTIONS PRESS To set the oven to broil at 500°F 1. Place the broiler (See Figure 6). Electric Range Broiling Table Recommendations Food Rack Temp Cook Time Supplied with some models Figure 5 Item Position Setting - Kenmore 4101 | Use and Care Guide - Page 33
not, skip this step and continue to step 7. Refer to the Timed Bake (complete steps 5-7) / Delayed Start Bake (complete steps 6-10) section for complete instructions. Remember the oven will shut down after using Timed Bake or Delay Start Bake and therefore may only be used once during the Sabbath - Kenmore 4101 | Use and Care Guide - Page 34
For further assistance, guidelines for proper usage, and a complete list of models with the Sabbath feature, please visit the web at htt p:\\www. work with any other function including a Delayed Timed Bake, a Clean Cycle or a Broil setting. INSTRUCTIONS PRESS DISPLAY To Program the Oven to Begin - Kenmore 4101 | Use and Care Guide - Page 35
Setting Warmer Drawer Controls (SOME MODELS ONLY) Arranging Warmer (Warm & Ready TM) Drawer Rack Positions The rack can be used in 2 ways: • in the upright position to allow low profile food - Kenmore 4101 | Use and Care Guide - Page 36
cont'd) (SOME MODELS ONLY) To preparation instructions on this page). To return to standard Warmer Drawer setting touch Q pad at least once. Note: For best results, preheat prepare bread dough. The recommended length of time to keep bread dough in the Warmer Drawer is about 45-60 minutes - Kenmore 4101 | Use and Care Guide - Page 37
near the appliance. The health of some birds is extremely sensitive to the fumes given off during the Self- Cleaning cycle of any range. Move birds ,, DO NOT use oven cleaners or oven protective coatings in or around any part of the Self-Cleaning oven. ,, DO NOT clean the oven door gasket. The - Kenmore 4101 | Use and Care Guide - Page 38
and a 4 hour cycle for heavy soils (to assure satisfactory results). INSTRUCTIONS PRESS DO NOT force the oven door open. This can damage the the Self-Clean Cycle is Completed 1. "HOT" will appear in the display. The time of day, the "DOOR LOCKED" and "CLEAN" icon will remain in the display - Kenmore 4101 | Use and Care Guide - Page 39
the Delayed Self-Clean operation. The automatic timer will turn the oven on and off at the time you select in advance. Be sure to review TO START THE SELF-CLEAN CYCLE for recommended clean times. INSTRUCTIONS PR ESS DISPLAY To set the control for the Self-Cleaning Cycle to start at a delayed - Kenmore 4101 | Use and Care Guide - Page 40
using the oven, be sure to follow recipe times and temperatures. If you think the oven is to decide how much of an adjustment is needed. INSTRUCTIONS To adjust the oven temperature higher 1. Press ( will stay forever in the unit memory unless you manually change it again. Even a power outage will - Kenmore 4101 | Use and Care Guide - Page 41
Parts of Your Range Before cleaning any part of the range, be sure all controls are turned OFF and the range the appliance. Be and Plastic Body Parts, Control Knobs damage to the appliance. Do not Steel (some models) Oven door Liner, Body Parts and Warmer , on Self-Cleaning models, which is essential - Kenmore 4101 | Use and Care Guide - Page 42
an uneven flame. Refer to the following instructions: THE COOKTOP IS NOT REMOVABLE. Do the Triple Burner Parts (some models only) Follow the steps described in models)- The Burner Grates are dishwasher safe and may be cleaned in the dishwasher. Remove any excessive soils before placing in the dishwasher - Kenmore 4101 | Use and Care Guide - Page 43
Cooktop Cleaning and Maintenance Consistent and proper cleaning is essential to your ceramic glass cooktop Prior to using your cooktop for the first time, apply the recommended CookTop® Cleaning Creme to the ceramic surface (on the web visit www.sears.com for replacement cooktop cleaner, item - Kenmore 4101 | Use and Care Guide - Page 44
up and toward you to disengage the hinge supports. Keep pulling the bottom of the door toward you while rotating the top of the door toward the range to completely disengage the hinge levers (Figure 2). 4. To clean oven door, follow the instructions provided in the General Care & Cleaning table. To - Kenmore 4101 | Use and Care Guide - Page 45
or death. Disconnect appliance from electric power before cleaning and servicing the warmer drawer. (See Figure 1). 4. Pull the drawer away from the range. To Replace Warmer (Warm & Ready TM) Drawer: Light Be sure the oven is unplugged and all parts are COOL before replacing the oven light bulb. - Kenmore 4101 | Use and Care Guide - Page 46
to Common Problems Before you call for service, review this list. It may save you time and expense. The list includes common occurrences that are not the result of defective workmanship or materials in this appliance. OCCURRENCE Range is not level. Cannot move appliance easily. Appliance must be - Kenmore 4101 | Use and Care Guide - Page 47
and Care Guide for instructions. Many factors time. If you feel the oven is too hot or cool, see "Adjusting the Oven Temperature" section in this Use and Care Guide. A cooling fan may automatically turn on and off to cool internal parts. It is normal, and the fan may continue to run after the range - Kenmore 4101 | Use and Care Guide - Page 48
the replacement parts, accessories and owner's manuals that you need to do-it-yourself. For Sears professional installation of home appliances and items piezas: 1-888-SU-HOGAR ® ® Registered Trademark / TM Trademark / SM Service Mark of Sears Brands, LLC ® Marca Registrada / TM Marca de Fabrica /
-
 1
1 -
 2
2 -
 3
3 -
 4
4 -
 5
5 -
 6
6 -
 7
7 -
8
-
9
-
10
-
11
-
12
-
13
-
14
-
15
-
16
-
17
-
18
-
19
-
20
-
21
-
22
-
23
-
24
-
25
-
26
-
27
-
28
-
29
-
30
-
31
-
32
-
33
-
34
-
35
-
36
-
37
-
38
-
39
-
40
-
41
-
42
-
43
-
44
-
45
-
46
-
47
-
48
 |
 |
®
DUAL
EL
Slide-in
models
A
GE
ESTU
E
EL
IVlodeios deslizables
UAL
IVlodeis,
modelos
790.4103_-,
790.4104_-
_- = color
number,
n_mero
de color
00 00
Sears
Roebuck
and
Co.,
Hoffman
Estates,
IL
60179
U.S.A.
www.sears.com
1
PIN
318203893
Bey. A (0806)