Kenmore 4101 Use and Care Guide - Page 42
General, Care & Cleaning, cont'd
 |
View all Kenmore 4101 manuals
Add to My Manuals
Save this manual to your list of manuals |
Page 42 highlights
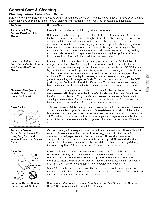
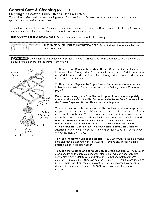
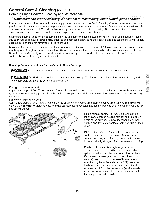
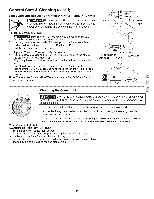
General Care & Cleaning (cont'd) Cleaning the Cooktop, Burner Heads, Caps & Grates The cooktop is designed to make cleaning easier. Because the gas Burners are sealed, cleanups are easy when spillovers are cleaned up immediately. The cooktop, Burner Heads and Caps should be routinely cleaned. Keeping the Burner Head Ports clean will prevent improper ignition and an uneven flame. Refer to the following instructions: THE COOKTOP IS NOT REMOVABLE. Do not attempt to remove or lift the cooktop. THE FIXED OVEN VENT IS NOT REMOVABLE. Do not attempt to remove the fixed oven vent cover. Use caution when replacing the Burner Caps so the Electrodes are not damaged. This may cause a delayed ignition or prevent the burner from igniting. Surface Burner G rate urface Burner Cap Surface Burner Head '_ Figure 1 Orifice holder Electrode To Remove and Replace the Surface Burner Caps and Burner Heads Remove in the following order: (1 st) surface Burner Grates, (2nd) Burner Caps and (3rd) Burner Heads. Replace in the following order: Burner Heads, Burner Caps and Burner Grates. To Remove and Replace the Triple Burner Parts (some models only) Follow the steps described in the section Before Setting Surface Controls at page 9. Do not remove any parts from the cooktop until they have completely cooled and are safe to handle. Do not operate the surface Burners without the Burner Caps and Burner Heads properly in place. To Clean the surface Burner Caps and Burner Heads (all models)- Use a soap-filled scouring pad or a mild abrasive cleanser to clean the surface Burner Caps and Burner Heads. The ports (or slots) around the Burner Heads must be routinely cleaned. If residue still remains in these ports, use a small-gauge wire or needle to clean the slots or holes. For proper flow of gas and ignition of the burner--DO NOT ALLOW SPILLS, FOOD, CLEANING AGENTS OR ANY OTHER MATERIAL TO ENTER THE GAS ORIFICE HOLDER OPENING. ALWAYS keep the surface Burner Caps and Burner Heads in place whenever the gas Burners are in use. To Clean the Burner Grates (all models)- The Burner Grates are dishwasher safe and may be cleaned in the dishwasher. Remove any excessive soils before placing in the dishwasher. To Clean the Cooktop and contoured areas of the cooktop (all models)- If a spill occurs on the porcelain cooktop, blot up spill with an absorbent cloth. Rinse with a clean, damp cloth and wipe dry. Do not use harsh abrasive cleaners on the cooktop. They can scratch the porcelain. Completely rinse any mild cleaners used from the surface or the porcelain cooktop may become damaged during future heating. DO NOT use spray oven cleaners on the cooktop. 42
-
 1
1 -
2
-
3
-
4
-
5
-
6
-
7
-
8
-
9
-
10
-
11
-
12
-
13
-
14
-
15
-
16
-
17
-
18
-
19
-
20
-
21
-
22
-
23
-
24
-
25
-
26
-
27
-
28
-
29
-
30
-
31
-
32
-
33
-
34
-
35
-
36
-
 37
37 -
 38
38 -
 39
39 -
 40
40 -
 41
41 -
 42
42 -
 43
43 -
 44
44 -
 45
45 -
 46
46 -
 47
47 -
48
 |
 |
