Kenmore 8804 Installation Instructions - Page 8
Window, Instructions
 |
View all Kenmore 8804 manuals
Add to My Manuals
Save this manual to your list of manuals |
Page 8 highlights
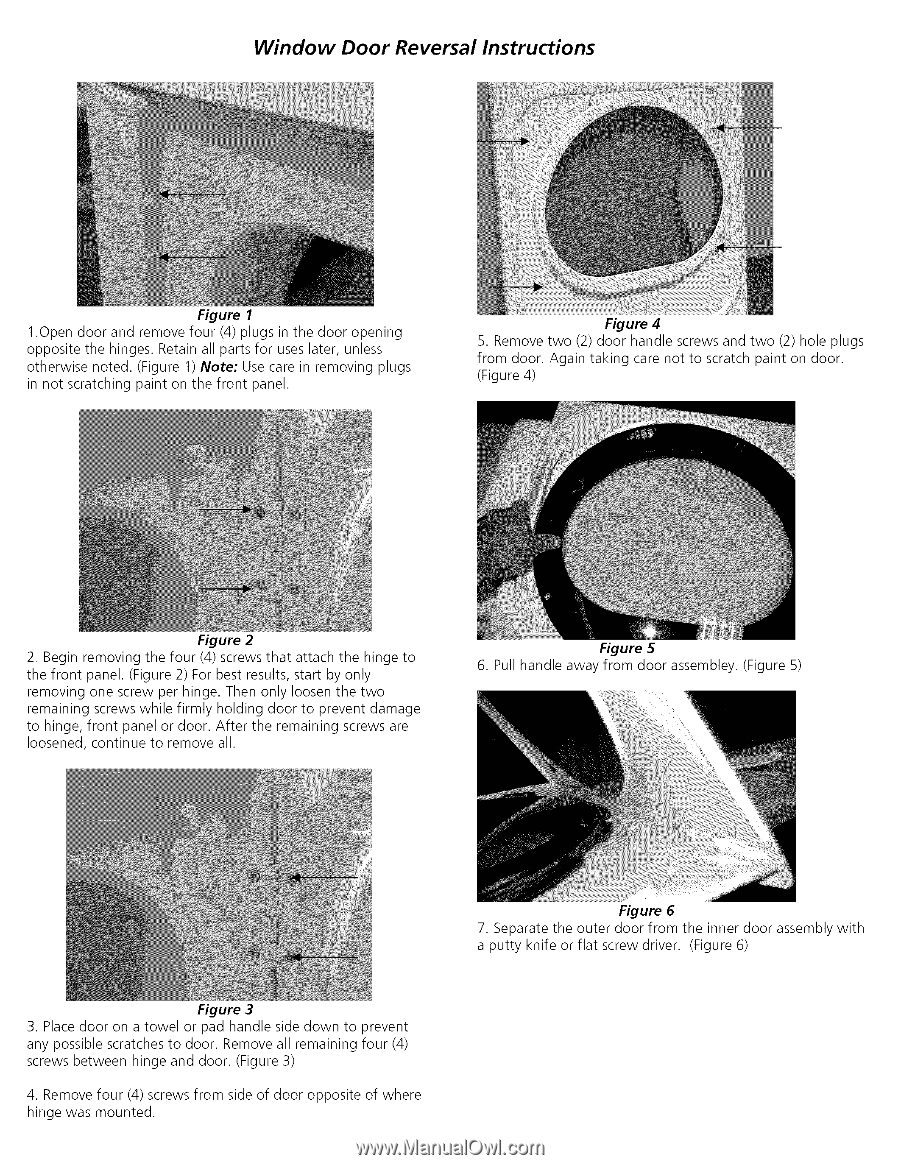
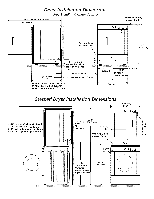
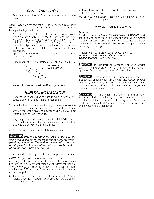
Window Door Reversal Instructions Figure 1 1.0pen door and remove four (4) plugs in the door opening opposite the hinges. Retain all parts for uses later, unless otherwise noted. (Figure 1) Note: Use care in removing plugs in not scratching paint on the front panel. Figure 4 5. Remove two (2) door handle screws and two (2) hole plugs from door. Again taking care not to scratch paint on door. (Figure 4) Figure 2 2. Begin removing the four (4) screws that attach the hinge to the front panel. (Figure 2) For best results, start by only removing one screw per hinge. Then only loosen the two remaining screws while firmly holding door to prevent damage to hinge, front panel or door. After the remaining screws are loosened, continue to remove all. Figure 5 6. Pull handle away from door assembley. (Figure 5) Figure 3 3. Place door on a towel or pad handle side down to prevent any possible scratches to door. Remove all remaining four (4) screws between hinge and door. (Figure 3) 4. Remove four (4) screws from side of door opposite of where hinge was mounted. Figure 6 7. Separate the outer door from the inner door assembly with a putty knife or flat screw driver. (Figure 6)
-
 1
1 -
2
-
 3
3 -
 4
4 -
 5
5 -
 6
6 -
 7
7 -
 8
8 -
 9
9 -
 10
10 -
 11
11 -
 12
12 -
 13
13 -
14
-
15
-
16
-
17
-
18
-
19
-
20
-
21
-
22
-
23
-
24
 |
 |