KitchenAid KFRS271TSS Use and Care Guide - Page 16
Style 2 - Built-In Outdoor Grill Installation
 |
UPC - 883049057569
View all KitchenAid KFRS271TSS manuals
Add to My Manuals
Save this manual to your list of manuals |
Page 16 highlights
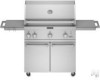
Style 2 - Built-In Outdoor Grill Installation WARNING Excessive Weight Hazard Use two or more people to move and install grill. Failure to do so can result in back or other injury. ■ Unpack grill. Remove all packaging materials and remove grill from carton. ■ Move grill close to desired outdoor location. ■ Open the hood. Make Gas Connection NOTE: If grill has been converted to LP gas, follow instructions in "If Converting to LP Gas" at the end of this section. WARNING Remove Packaging Material Inside the Grill 1. Cut the tiedowns holding the grates together. 2. Remove rotisserie skewer (on some models), warming shelf and grill grates from inside the grill and remove packaging material. 3. Remove foam block and wrap from inside the grill. A Fire Hazard Do not use grill near combustible materials. Do not store combustible materials near grill. Doing so can result in death or fire. Natural Gas Use This installation must conform with local codes and ordinances. In the absence of local codes, installations must conform with either the National Fuel Gas Code ANSI Z223.1 - latest edition, or CAN/CGA-B149.1 Natural Gas and Propane installation code. 1. Place grill into outdoor enclosure, but leave enough room in back to connect to gas supply and electrical plug-in. B WARNING A. Foam block B. Foam wrap 4. Replace the grill grates. 5. Place warming shelf on brackets as shown. B A A A. Warming shelf brackets B. Warming shelf 6. Dispose of/recycle all packaging material. Explosion Hazard Use a new CSA International approved "outdoor" gas supply line. Securely tighten all gas connections. Failure to do so can result in death, explosion, or fire. 2. Make gas connections. A combination of pipe fittings must be used to connect the grill to the existing gas line. ■ If local codes permit, use an outdoor flexible stainless steel tubing gas connector, design-certified by CSA International, to connect the grill to the rigid gas supply line. A ⁵⁄₈" diameter line is recommended. Using a wrench to tighten, connect the gas supply to the grill. Use pipejoint compound on all non-flared male threads. Do not kink or damage the flexible connector when moving the grill. 16
-
 1
1 -
2
-
3
-
4
-
5
-
6
-
7
-
8
-
9
-
10
-
 11
11 -
 12
12 -
 13
13 -
 14
14 -
 15
15 -
 16
16 -
 17
17 -
 18
18 -
 19
19 -
 20
20 -
 21
21 -
22
-
23
-
24
-
25
-
26
-
27
-
28
-
29
-
30
-
31
-
32
-
33
-
34
-
35
-
36
-
37
-
38
-
39
-
40
-
41
-
42
-
43
-
44
-
45
-
46
-
47
-
48
-
49
-
50
-
51
-
52
-
53
-
54
-
55
-
56
-
57
-
58
-
59
-
60
-
61
-
62
-
63
-
64
 |
 |
