Kodak 8847121 User Guide - Page 18
SCSI connections, SCSI interface device ID
 |
View all Kodak 8847121 manuals
Add to My Manuals
Save this manual to your list of manuals |
Page 18 highlights
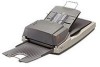
SCSI connections IMPORTANT: Be sure the PC is off while you are doing the steps in the "SCSI connections" section. Connect the SCSI signal cable as shown below. 1. Attach a SCSI cable to the SCSI port. NOTE: There are two SCSI ports on the scanner. This is a SCSI II pass-through connection. Plug the SCSI cable into either port using a 50-pin, high-density connector to connect to the scanner. SCSI interface device ID 2. Attach the other end of the SCSI cable to your PC SCSI port. Kodak does not recommend several devices on a SCSI chain with our scanner. However, if there is more than one SCSI device on the chain, you may need to adjust the SCSI ID selector on the scanner. This selector assigns a specific device ID to the scanner. If the assignment conflicts with an existing SCSI device, select a new ID. NOTE: The factory SCSI ID setting for the scanner is 6. SCSI ID 0 is usually assigned to an internal hard disk drive and 7, 8, and 9 are used for diagnostic purposes. The scanner will not operate properly if the SCSI ID is set to 7, 8, or 9. • Using a suitable tool, turn the SCSI ID selector switch until the arrow points to the desired ID number. 14 A-61527 May 2006
-
 1
1 -
2
-
3
-
4
-
5
-
6
-
7
-
8
-
9
-
10
-
11
-
12
-
 13
13 -
 14
14 -
 15
15 -
 16
16 -
 17
17 -
 18
18 -
 19
19 -
 20
20 -
 21
21 -
 22
22 -
 23
23 -
24
-
25
-
26
-
27
-
28
-
29
-
30
-
31
-
32
-
33
-
34
-
35
-
36
-
37
-
38
-
39
-
40
-
41
-
42
-
43
-
44
-
45
-
46
-
47
-
48
-
49
-
50
-
51
-
52
-
53
-
54
-
55
-
56
-
57
-
58
-
59
-
60
-
61
-
62
-
63
-
64
-
65
-
66
-
67
-
68
-
69
-
70
-
71
-
72
-
73
-
74
-
75
-
76
-
77
-
78
-
79
-
80
-
81
-
82
-
83
-
84
-
85
-
86
-
87
-
88
-
89
-
90
-
91
-
92
-
93
 |
 |
