Kodak 8847121 User Guide - Page 20
Set up the input and output trays, Unlocking the scanner
 |
View all Kodak 8847121 manuals
Add to My Manuals
Save this manual to your list of manuals |
Page 20 highlights
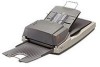
3. Plug the output power cord from the power supply into the power port on the scanner. Set up the input and output trays Unlocking the scanner 4. Plug the input power cord into the wall outlet. Detailed procedures and illustrations for installing and adjusting the input and output trays can be found in Chapter 3, Using the Scanner. Following is a brief outline of these procedures to get you started. 1. Lift the input tray to about a 45° angle. 2. Pull the input tray wire leg down. 3. Place the wire leg on the top of the clips on the flatbed cover and press down to snap the wire leg into the clips. 4. Install the output tray by inserting the three tabs on the output tray into the three slots on the automatic document feeder. The scanner has a shipping switch that locks the scanner's flatbed camera to avoid causing damage during transportation. • Unlock the shipping switch before you power up the scanner. • Lock the shipping switch before moving the scanner to a new location. See the section entitled, "Locking the scanner" in Chapter 5 for procedures. To unlock the scanner: 1. Place the scanner in an upright position on its front. 2. Unlock the scanner by moving the shipping switch (located on the bottom of the scanner) down into the unlocked position. Shipping switch 3. Place the scanner back in its normal position. 16 A-61527 May 2006
-
 1
1 -
2
-
3
-
4
-
5
-
6
-
7
-
8
-
9
-
10
-
11
-
12
-
13
-
14
-
 15
15 -
 16
16 -
 17
17 -
 18
18 -
 19
19 -
 20
20 -
 21
21 -
 22
22 -
 23
23 -
 24
24 -
 25
25 -
26
-
27
-
28
-
29
-
30
-
31
-
32
-
33
-
34
-
35
-
36
-
37
-
38
-
39
-
40
-
41
-
42
-
43
-
44
-
45
-
46
-
47
-
48
-
49
-
50
-
51
-
52
-
53
-
54
-
55
-
56
-
57
-
58
-
59
-
60
-
61
-
62
-
63
-
64
-
65
-
66
-
67
-
68
-
69
-
70
-
71
-
72
-
73
-
74
-
75
-
76
-
77
-
78
-
79
-
80
-
81
-
82
-
83
-
84
-
85
-
86
-
87
-
88
-
89
-
90
-
91
-
92
-
93
 |
 |
