Konica Minolta bizhub 215 bizhub 215 Fax Operations User Guide - Page 40
Manual redialing - installation manual
 |
View all Konica Minolta bizhub 215 manuals
Add to My Manuals
Save this manual to your list of manuals |
Page 40 highlights
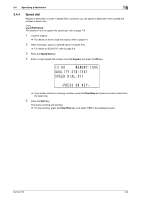
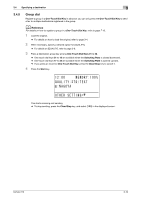
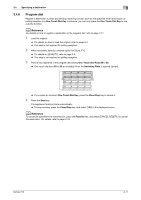
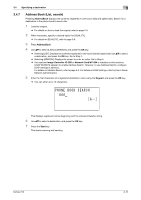
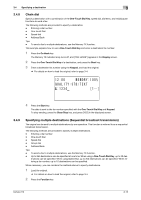
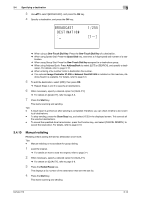
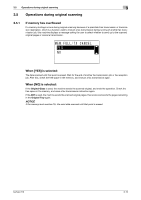
3.4 Specifying a destination 3 3 Use +, to select [BROADCAST], and press the OK key. 4 Specify a destination, and press the OK key. % When using a One-Touch Dial Key: Press the One-Touch Dial Key of a destination. % When using Speed Dial: Press the Speed Dial key, and enter a 3-digit speed dial number of a des- tination. % When using Group Dial: Press the One-Touch Dial Key assigned to a destination group. % When using Address Book: Press AddressBook to select [LIST] or [SEARCH], and specify a desti- nation. For details, refer to page 3-12. % When entering a fax number: Enter a destination fax number. % If an optional Image Controller IC-209 or Network Card NC-504 is installed on this machine, Ad- dress Search is available. For details, refer to page 5-3. 5 To add the destination, select [ADD], then press OK. % Repeat Steps 4 and 5 to specify all destinations. 6 When necessary, specify a desired option for [QUALITY]. % For details on [QUALITY], refer to page 3-6. 7 Press the Start key. This starts scanning and sending. Tips - A result report is printed out after sending is completed; therefore, you can check whether a fax is sent to all destinations. - To stop sending, press the Clear/Stop key, and select [YES] in the displayed screen. This cancels all the selected destinations. - To cancel the specified-time transmission, press the Function key, and select [CANCEL RESERV.] to cancel the reservation. For details, refer to page 3-18. 3.4.10 Manual redialing Redialing means dialing the last fax destination once more. Tips - Manual redialing is not available for group dialing. 1 Load the original. % For details on how to load the original, refer to page 3-4. 2 When necessary, specify a desired option for [QUALITY]. % For details on [QUALITY], refer to page 3-6. 3 Press the Redial/Pause key. This displays a fax number of the destination that sent the last fax. 4 Press the Start key. This starts scanning and sending. bizhub 215 3-14
-
 1
1 -
2
-
3
-
4
-
5
-
6
-
7
-
8
-
9
-
10
-
11
-
12
-
13
-
14
-
15
-
16
-
17
-
18
-
19
-
20
-
21
-
22
-
23
-
24
-
25
-
26
-
27
-
28
-
29
-
30
-
31
-
32
-
33
-
34
-
 35
35 -
 36
36 -
 37
37 -
 38
38 -
 39
39 -
 40
40 -
 41
41 -
 42
42 -
 43
43 -
 44
44 -
 45
45 -
46
-
47
-
48
-
49
-
50
-
51
-
52
-
53
-
54
-
55
-
56
-
57
-
58
-
59
-
60
-
61
-
62
-
63
-
64
-
65
-
66
-
67
-
68
-
69
-
70
-
71
-
72
-
73
-
74
-
75
-
76
-
77
-
78
-
79
-
80
-
81
-
82
-
83
-
84
-
85
-
86
-
87
-
88
-
89
-
90
-
91
-
92
-
93
-
94
-
95
-
96
-
97
-
98
-
99
-
100
-
101
-
102
-
103
-
104
-
105
-
106
-
107
-
108
-
109
-
110
-
111
-
112
-
113
-
114
-
115
-
116
-
117
-
118
-
119
-
120
-
121
-
122
-
123
-
124
-
125
-
126
-
127
-
128
-
129
-
130
-
131
-
132
-
133
-
134
-
135
-
136
-
137
-
138
-
139
-
140
-
141
-
142
-
143
-
144
-
145
-
146
-
147
-
148
-
149
-
150
-
151
-
152
-
153
-
154
-
155
-
156
-
157
-
158
-
159
-
160
-
161
-
162
-
163
-
164
-
165
-
166
 |
 |
